Adding Users to Occupier
Let us give you a step by step walk through click below to Launch a tour in Occupier!
Onboard your team members to Occupier so you can easily share and stay updated on transactions and leases.
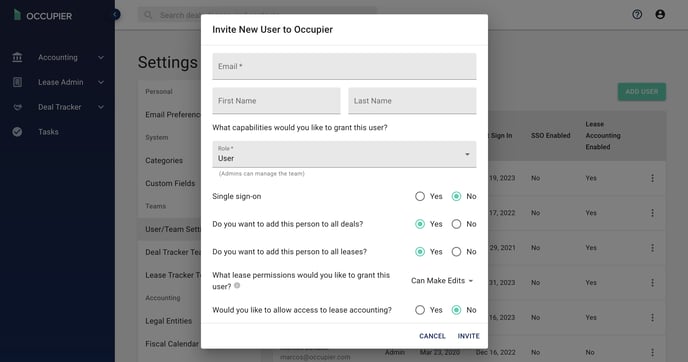
To add a person to Occupier (i.e., create a new user account), the minimum requirements are:
-
Email Address. This is the unique identifier for a user in Occupier. A user can be a member of one or more Occupier company accounts (For example, a Broker who is doing work for two different tenants (i.e., John at CBRE New York) could be added as a user to both companies using the same email address (i.e., john@example.com).
-
First & Last Name. This is the user's first and last name.
-
User Role. The user role defines if a user can manage team members. Occupier has two user roles, Admin and Standard. Admin users can manage team members (ie. add other users or remove them)
-
Permissions These define what a user can do within an existing Lease.
User Types/ Access
| Admins | Have the ability to make any edits within Occupier. They also have the ability to add or remove other users. |
| User with Edit Rights | Has the ability to make edits within Occupier, same as an Admin. However, they cannot add or remove other users. |
| User with Read-Only Rights | Have no edits rights within Occupier. They cannot make any changes to the leases, mark tasks as complete or add/remove other users. They can only review the data within Occupier, but cannot interact with it at all. |
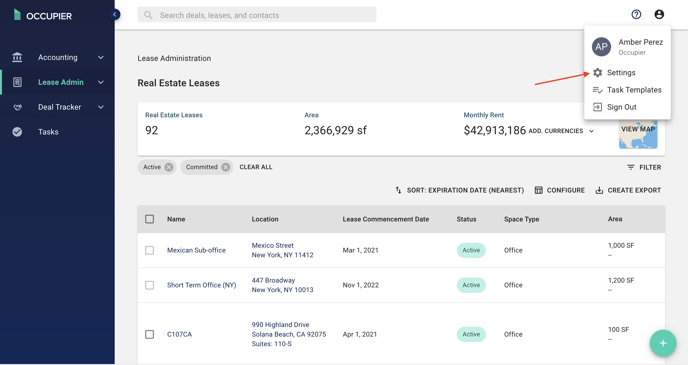
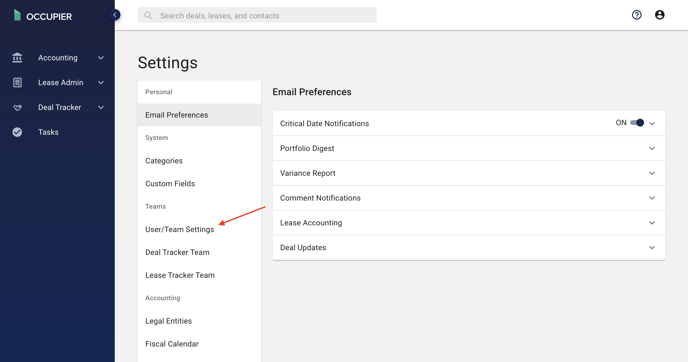
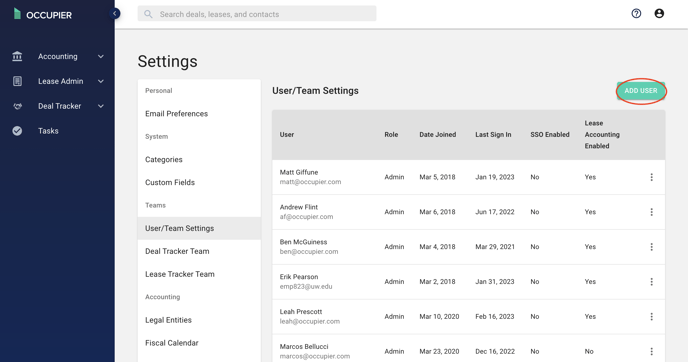
Steps to Adding Users:


Step 6: Once a user is invited they will receive and email prompting them to create an Occupier account, and then they will have access as defined in the sign up form.
If you select "No" to "Do you want to add this person to all deals?" or "Do you want to add this person to all leases?", then you can add that person to individual deals/leases. Here are some helpful articles that walk you through how to do so -
Tutorial Video