Adding & Removing Users from a Individual Lease
How do I Add or Remove Users (Team Members) from a Lease?
This article will walk you through how to add a user to an individual lease in Occupier. This comes in handy if you want to invite someone to your account and you only want them to have access to a particular subset of the leases, not all of them.
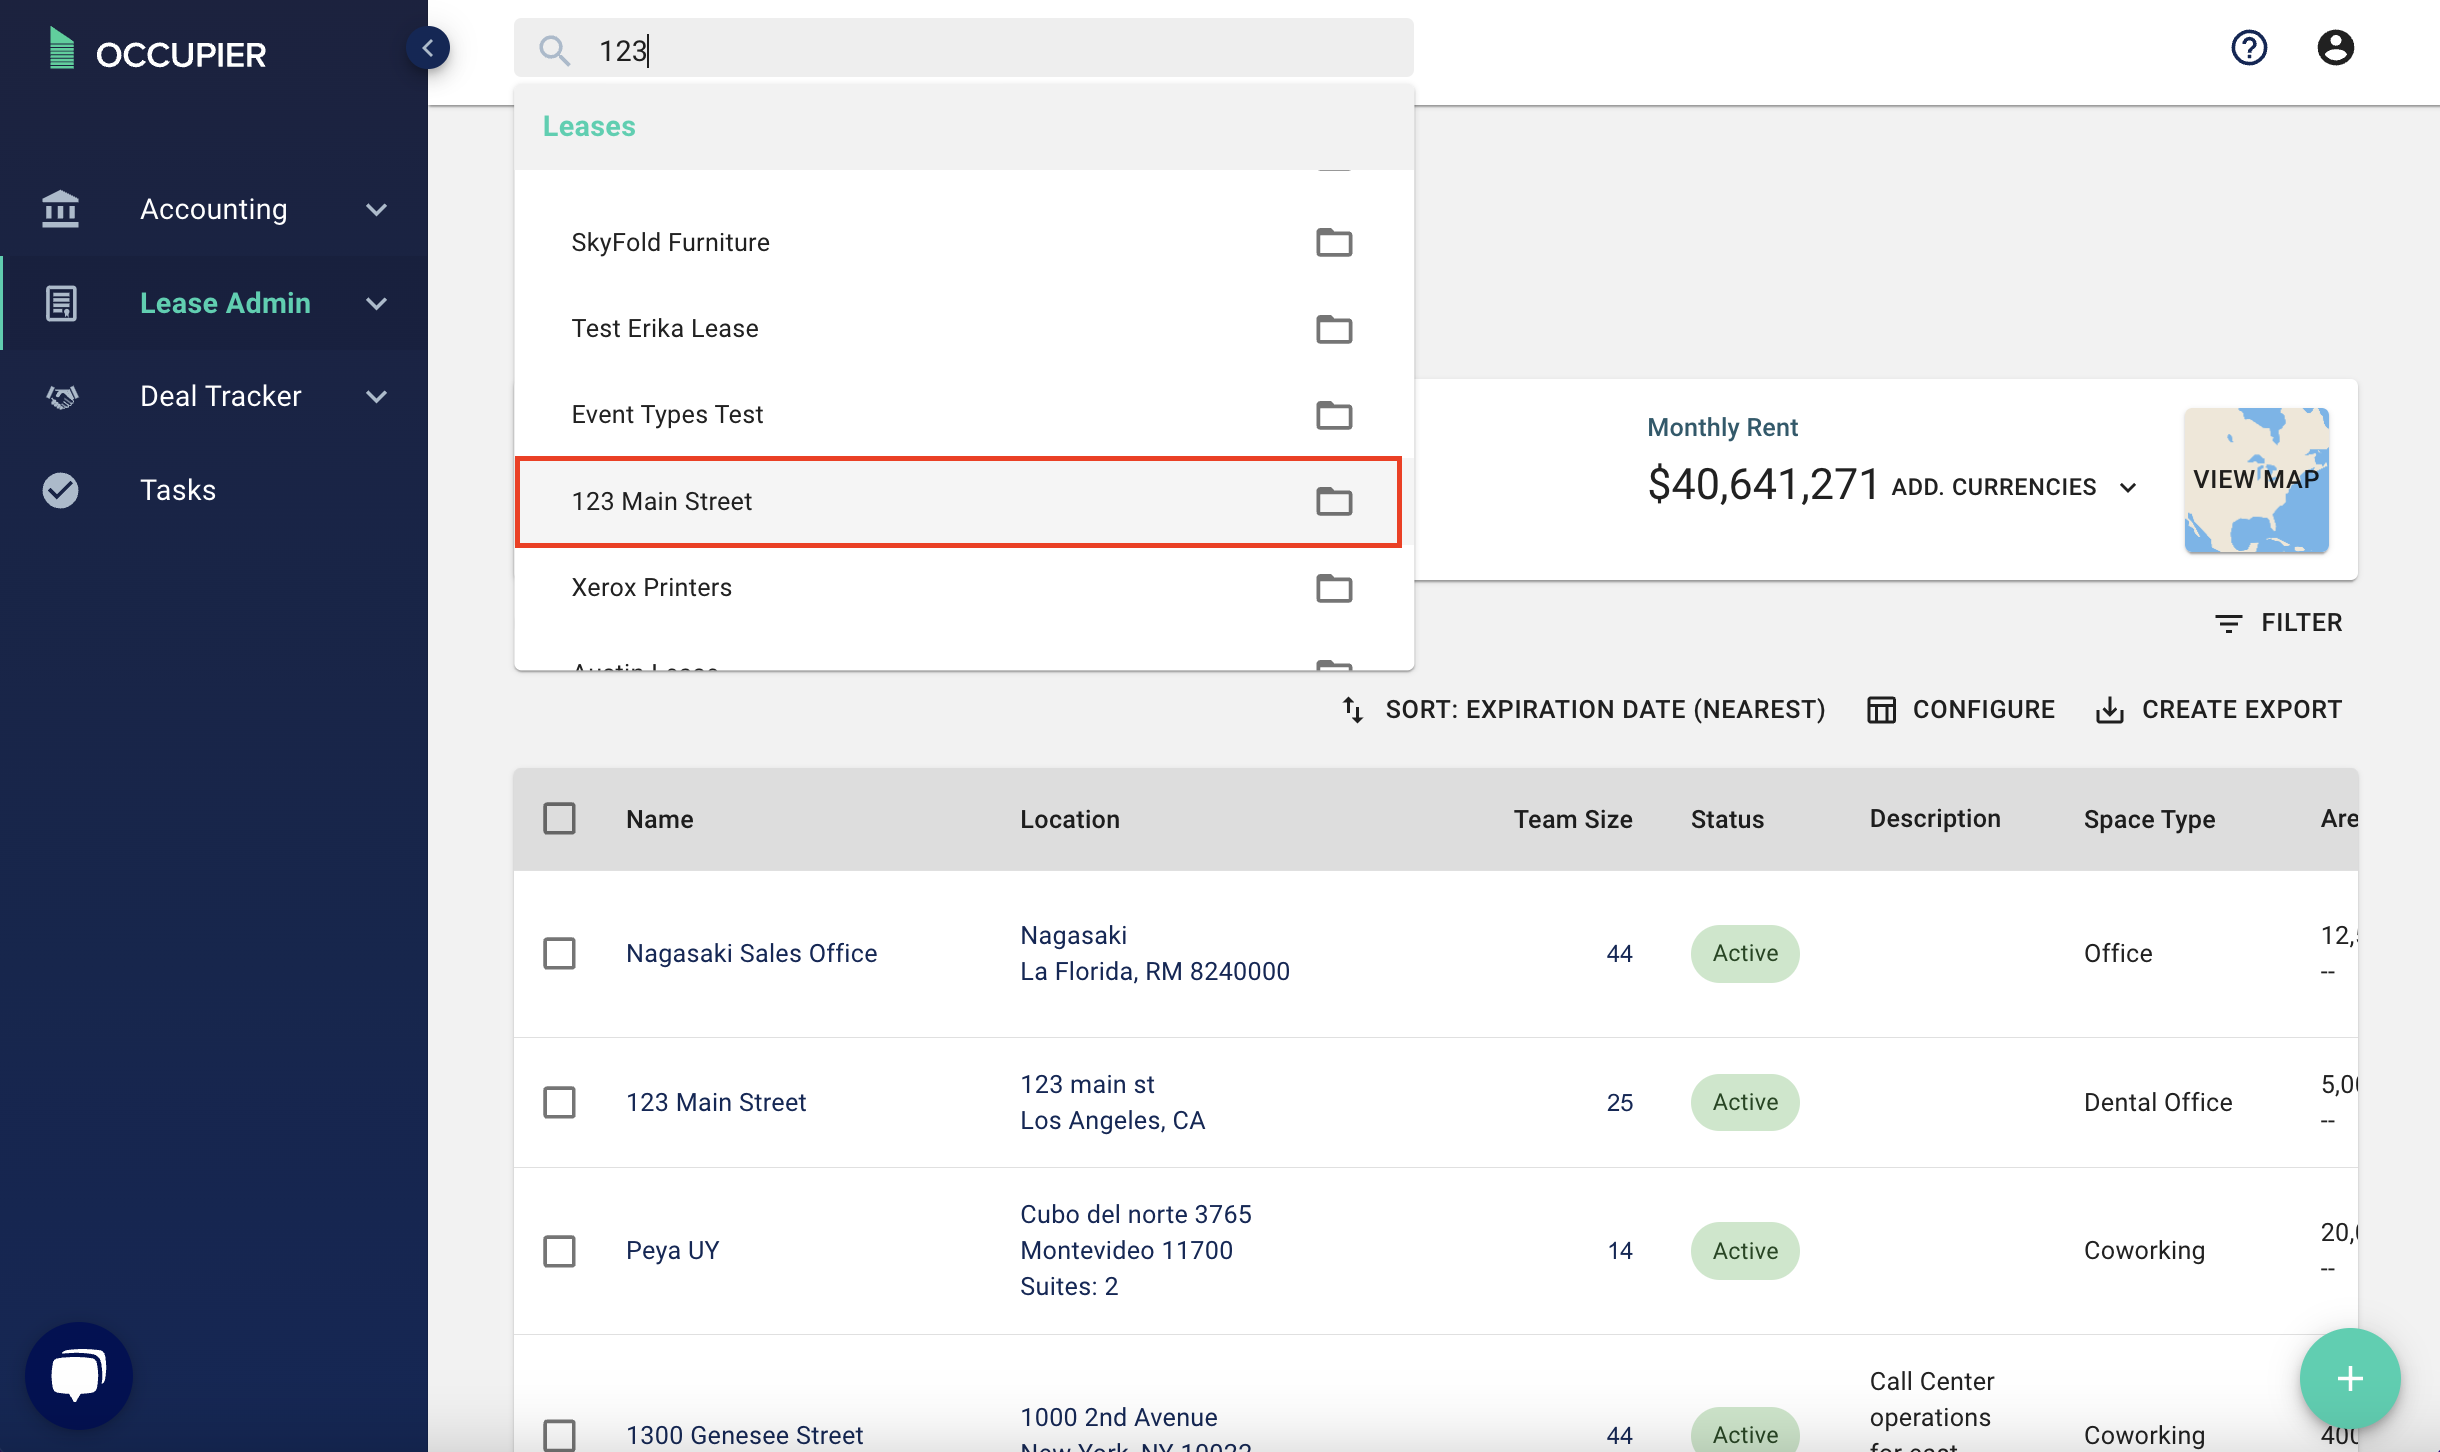
To add a user to an individual lease, navigate to that lease via the search bar at the top of the page.
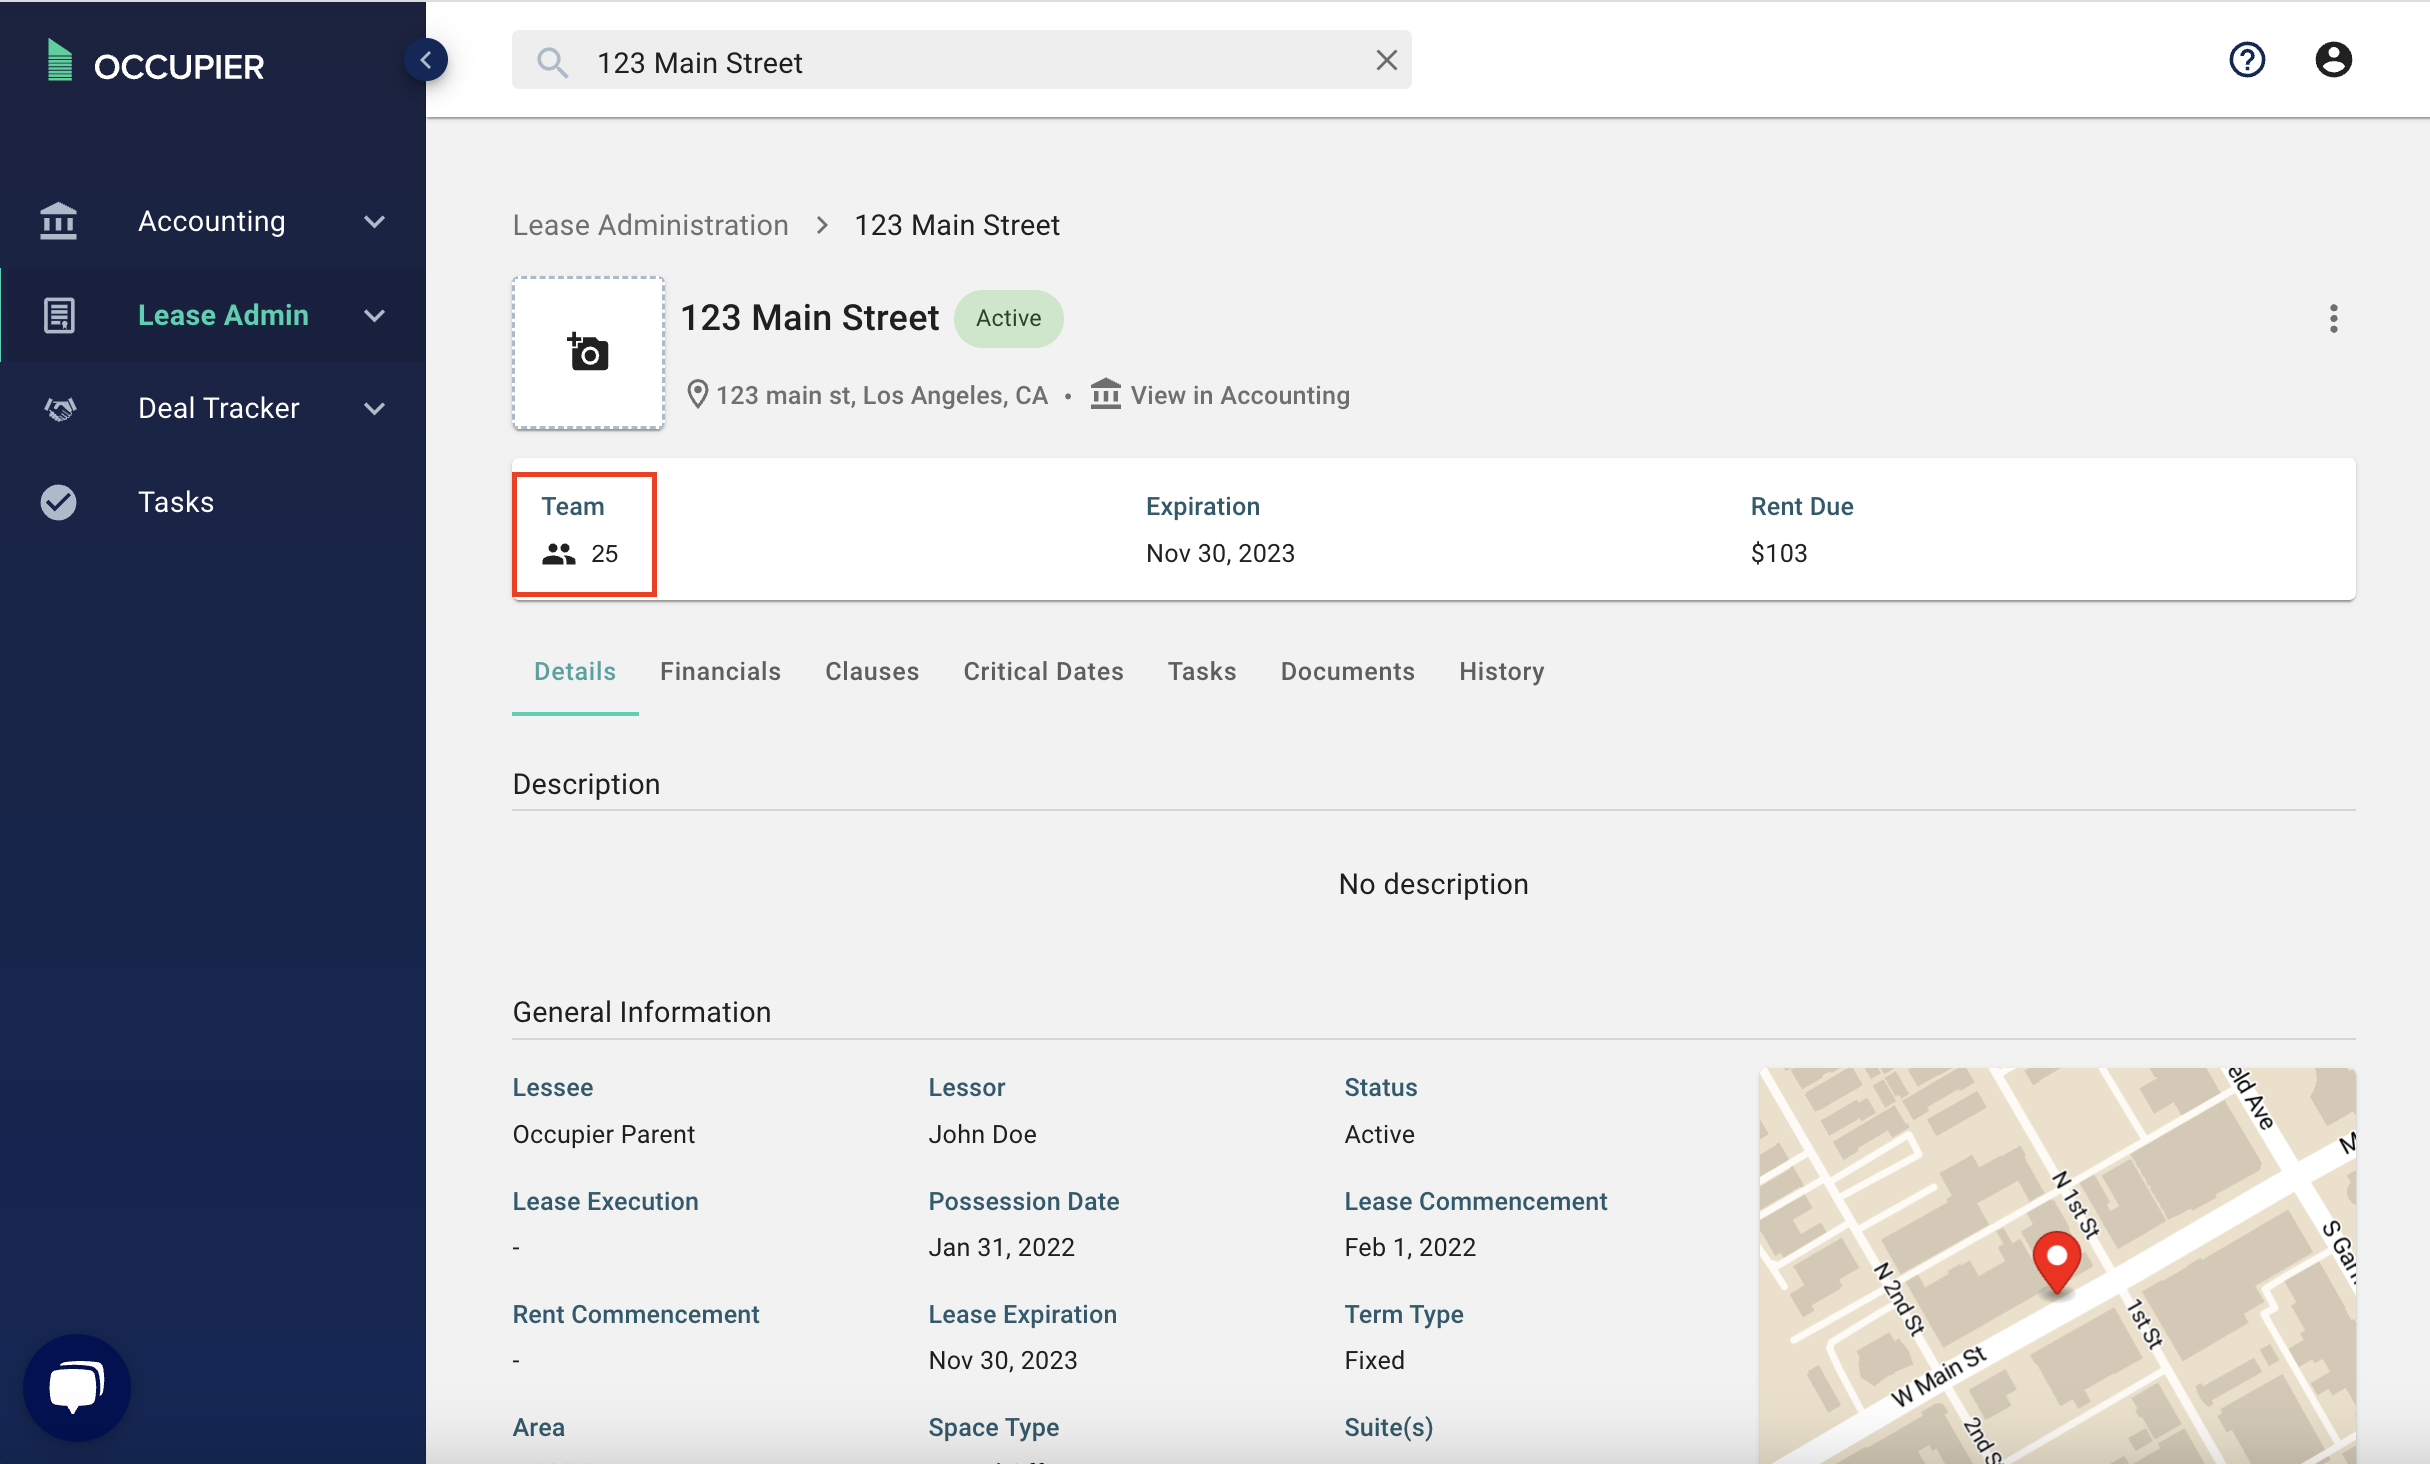
Once in that Lease, click on “Team”.
Once the Team overview pops up, search for the user, select the appropriate access rights (edit vs read only), then click “Invite” and then "Submit". Note - this is also where you can remove someone from a lease by clicking the trashcan icon next to their name.
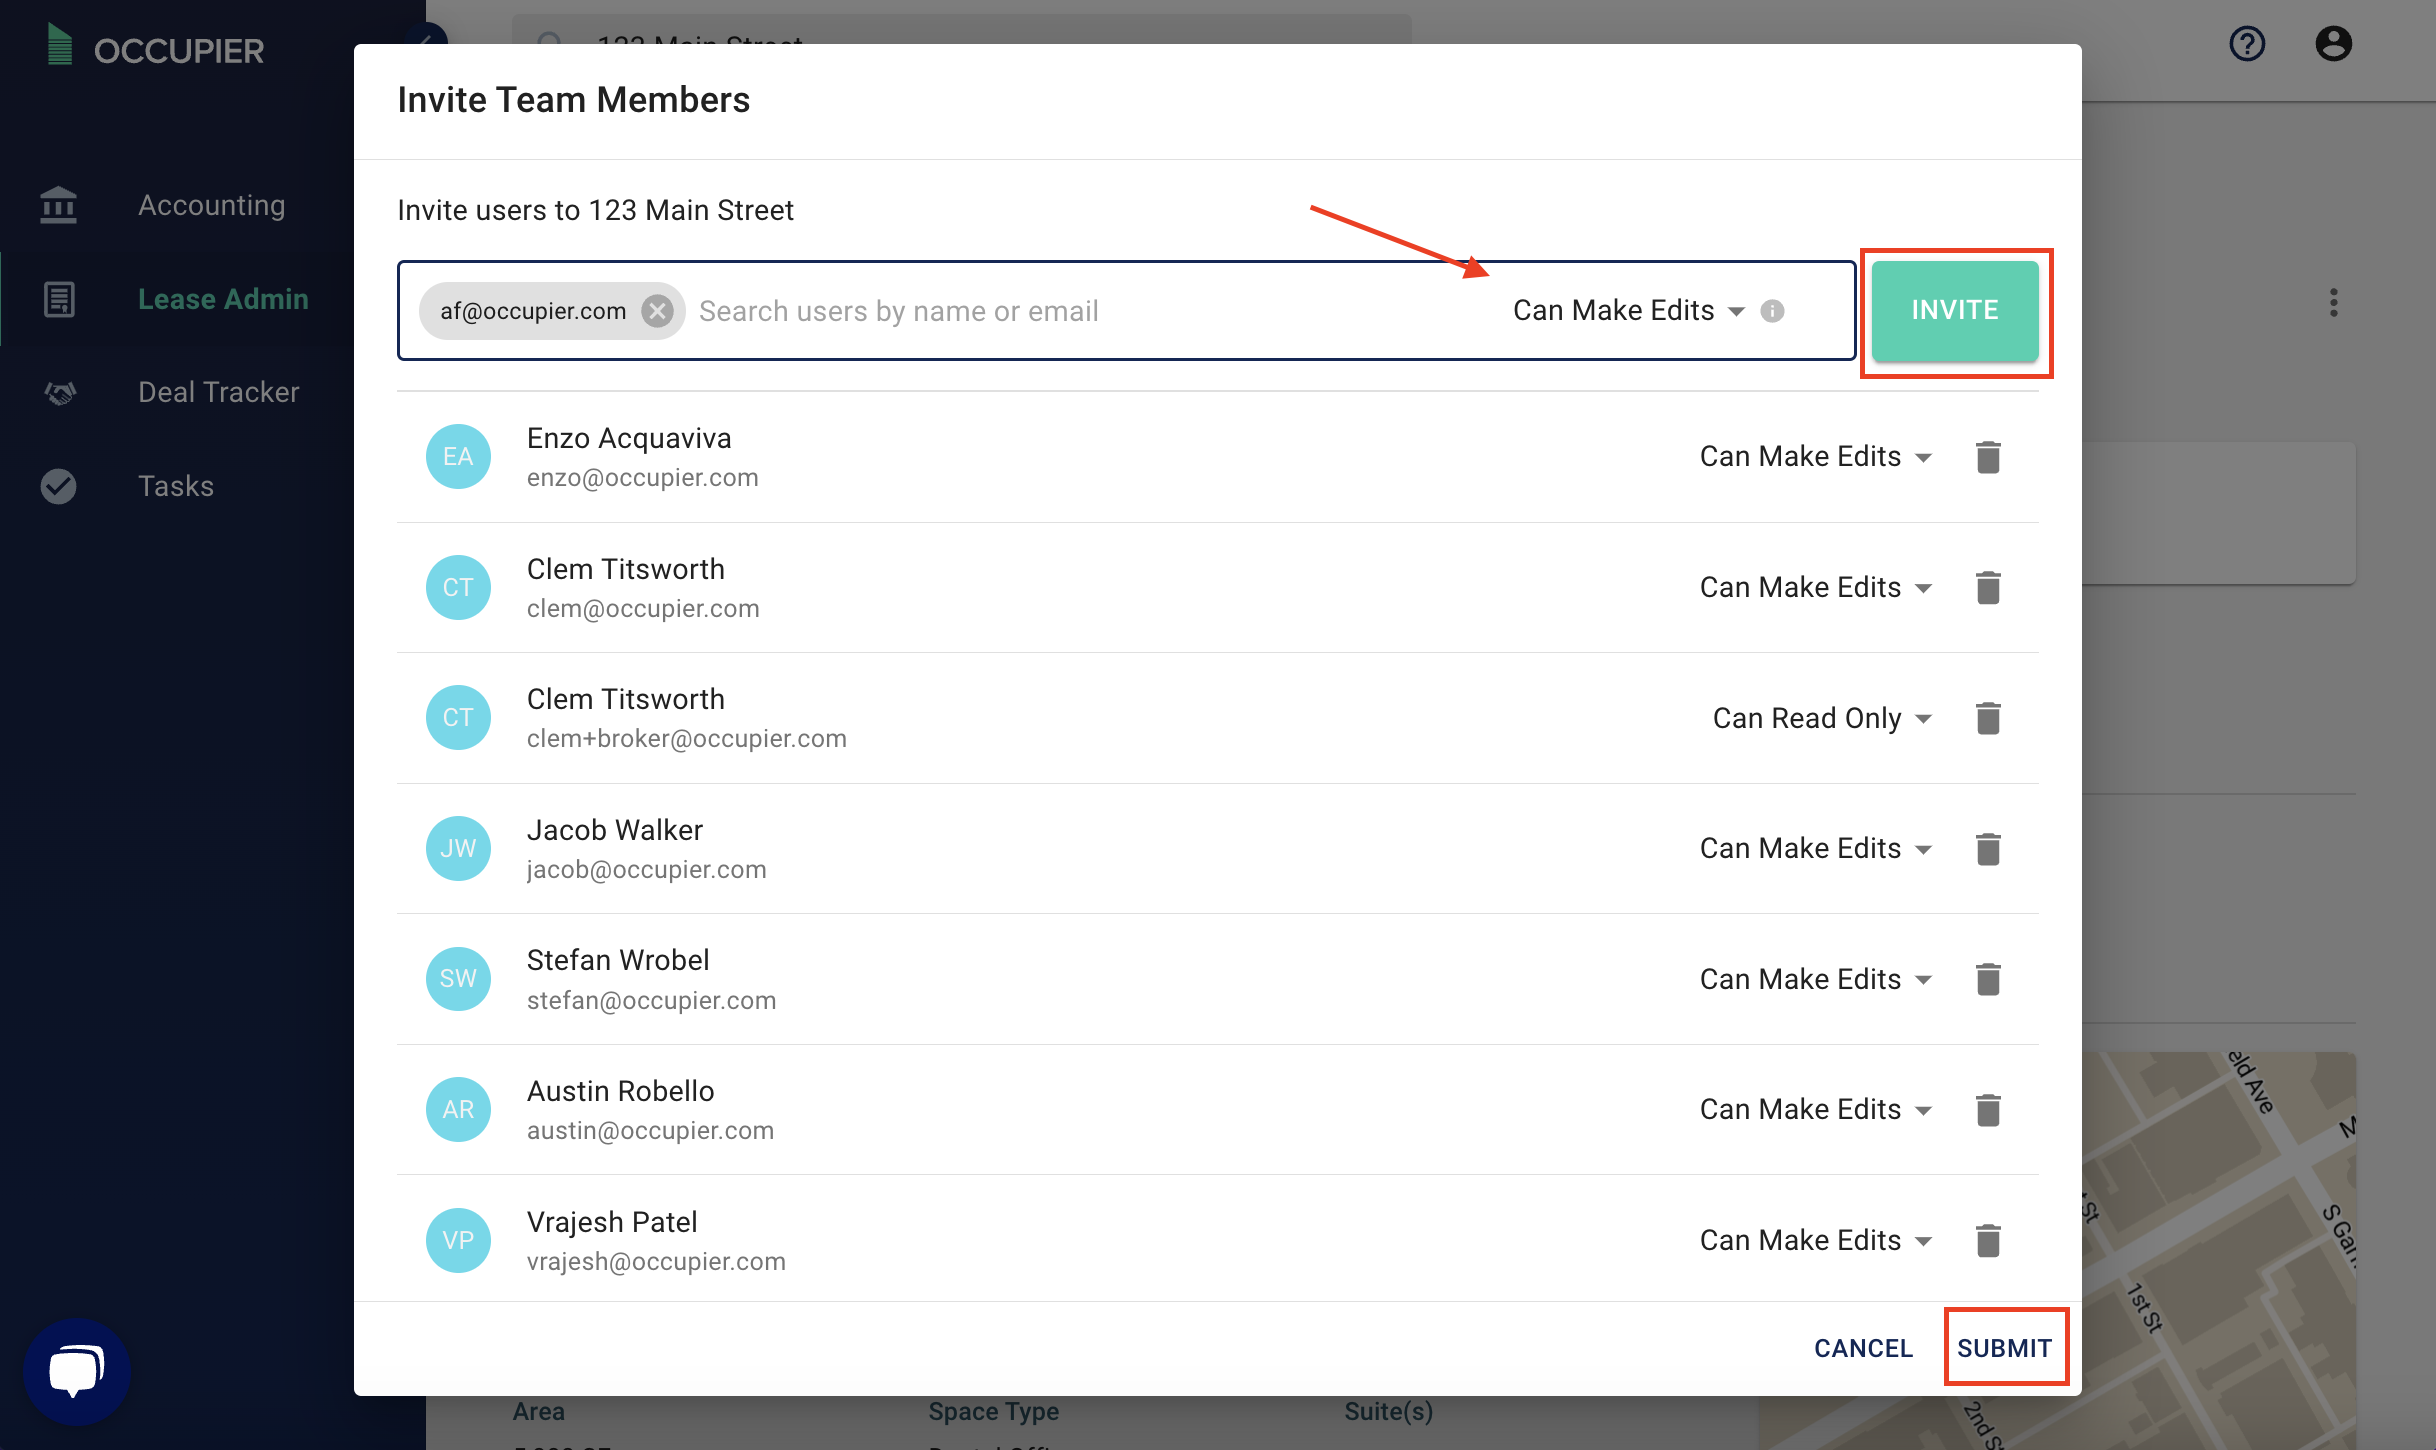
Once you have done that, the user will receive an Occupier invitation and can login and view the leases you invited them to.
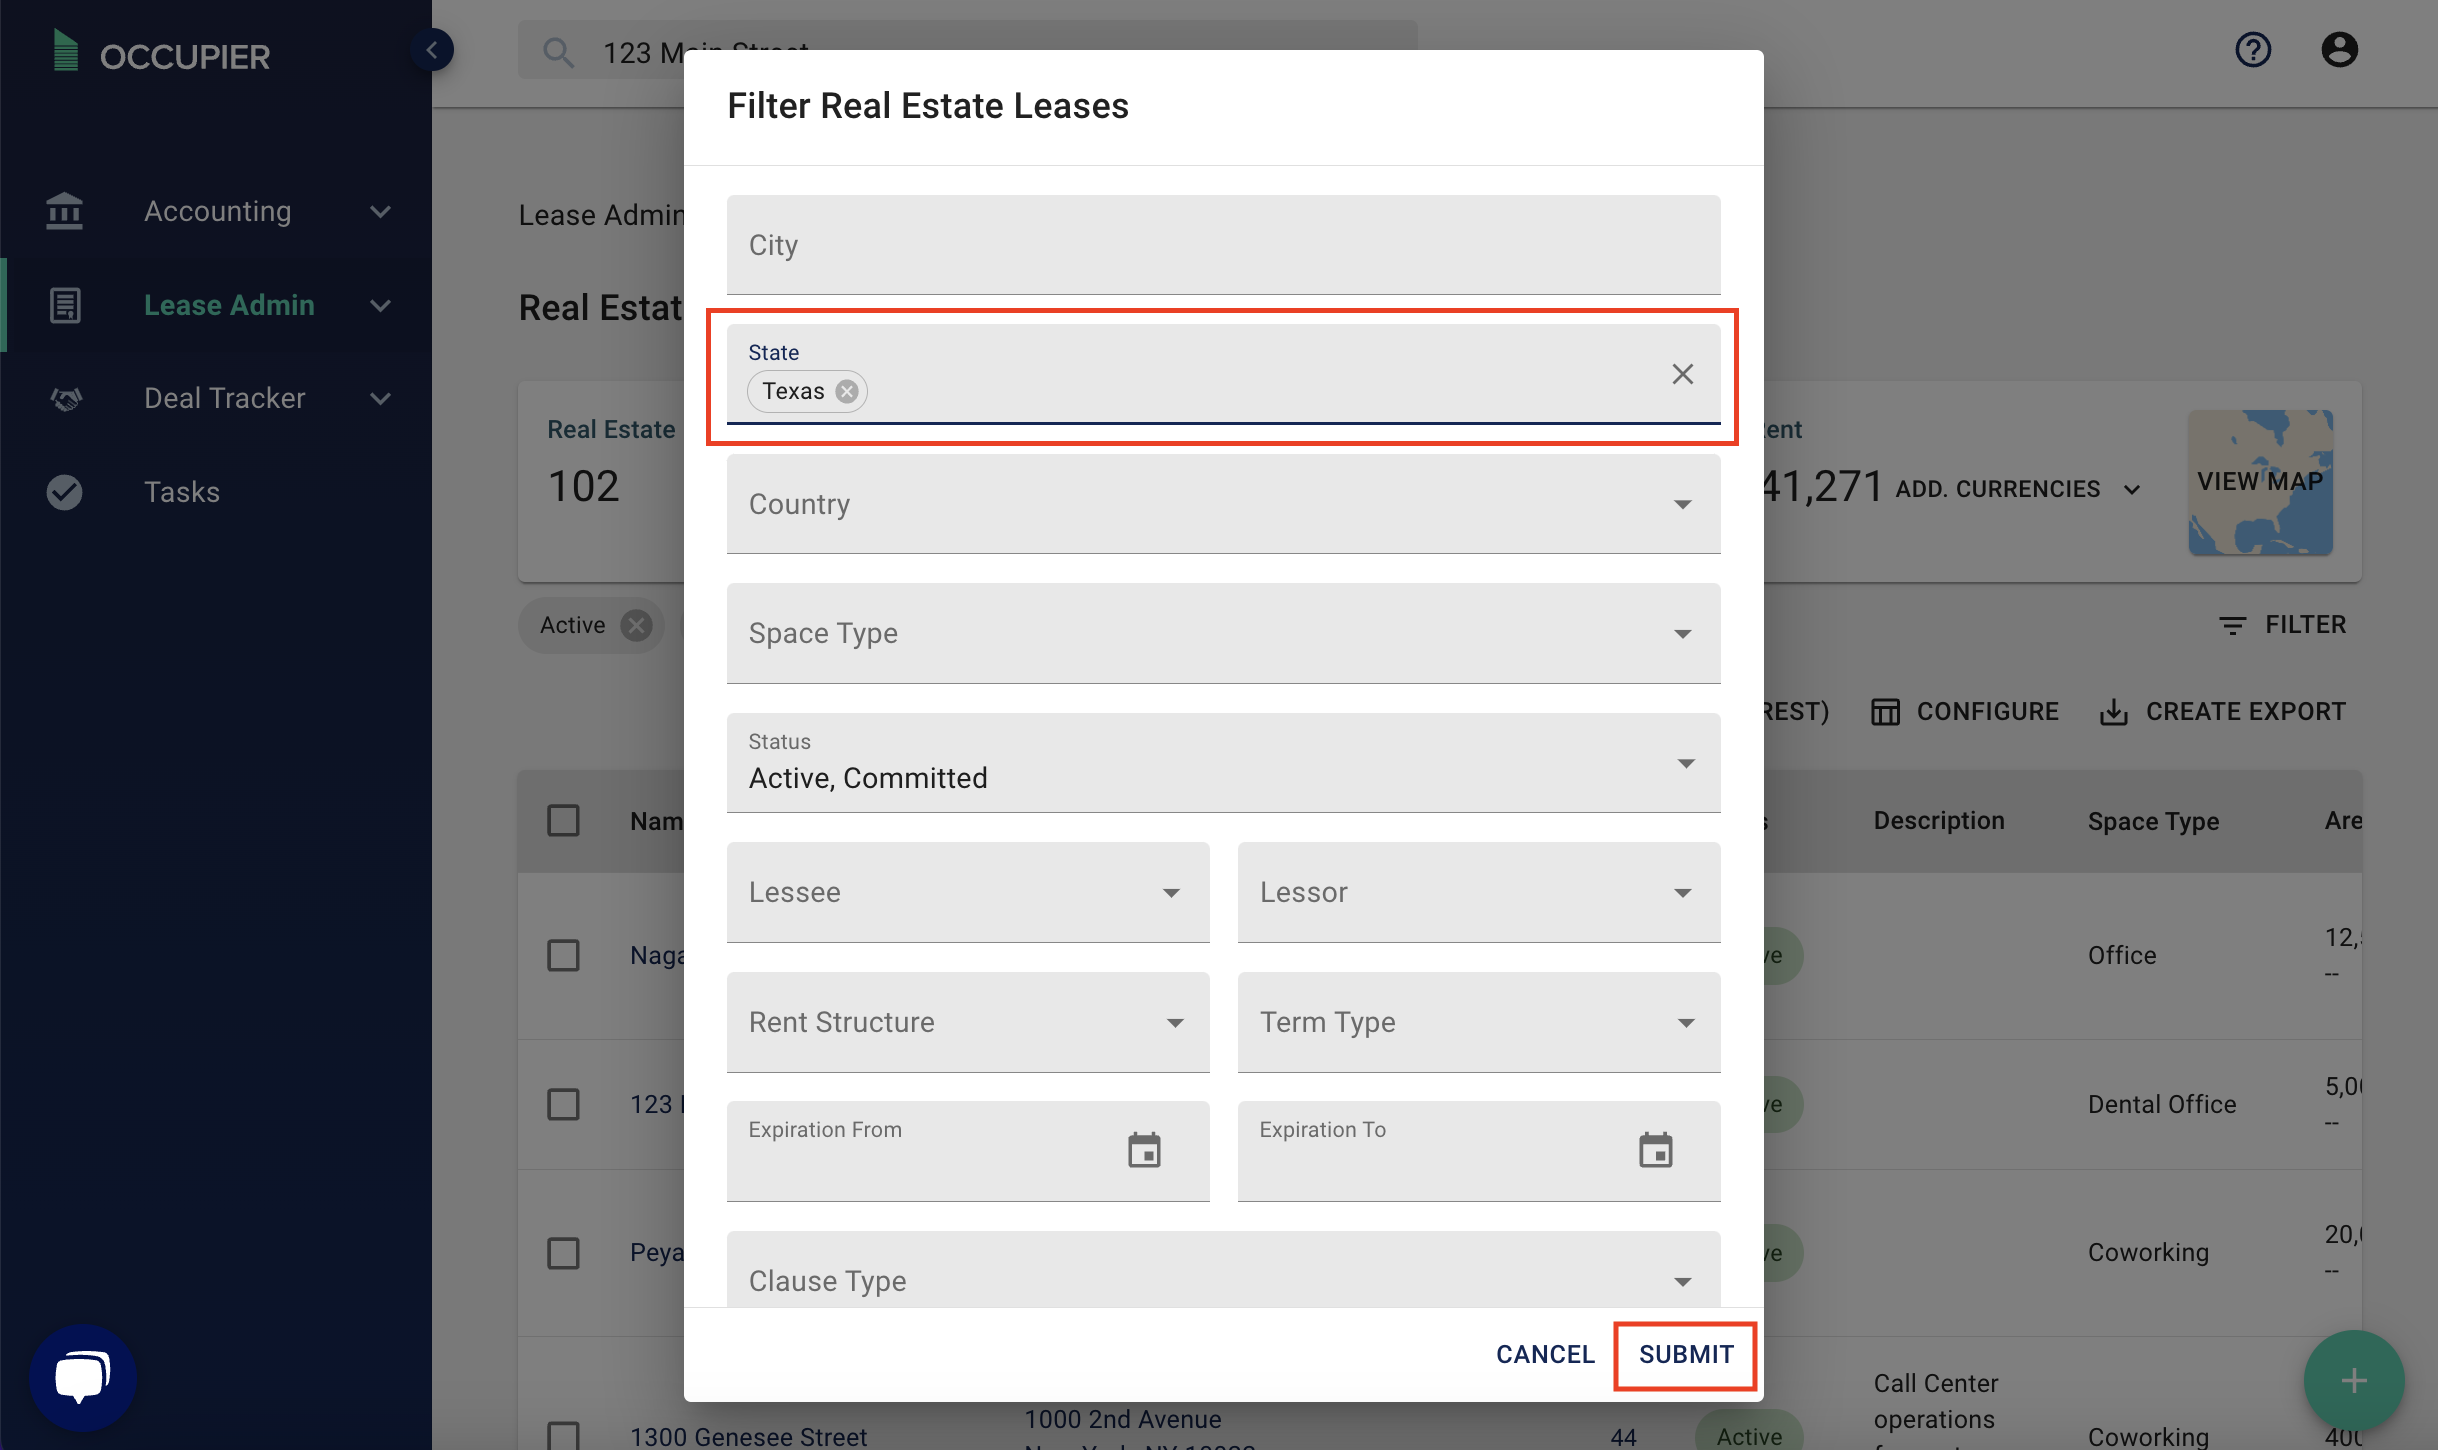
You can also add a user to multiple leases at once from the homepage using your filters. For example, if you want to invite someone to all of your Texas leases, first go to your Lease Admin homepage and click on "Filter"
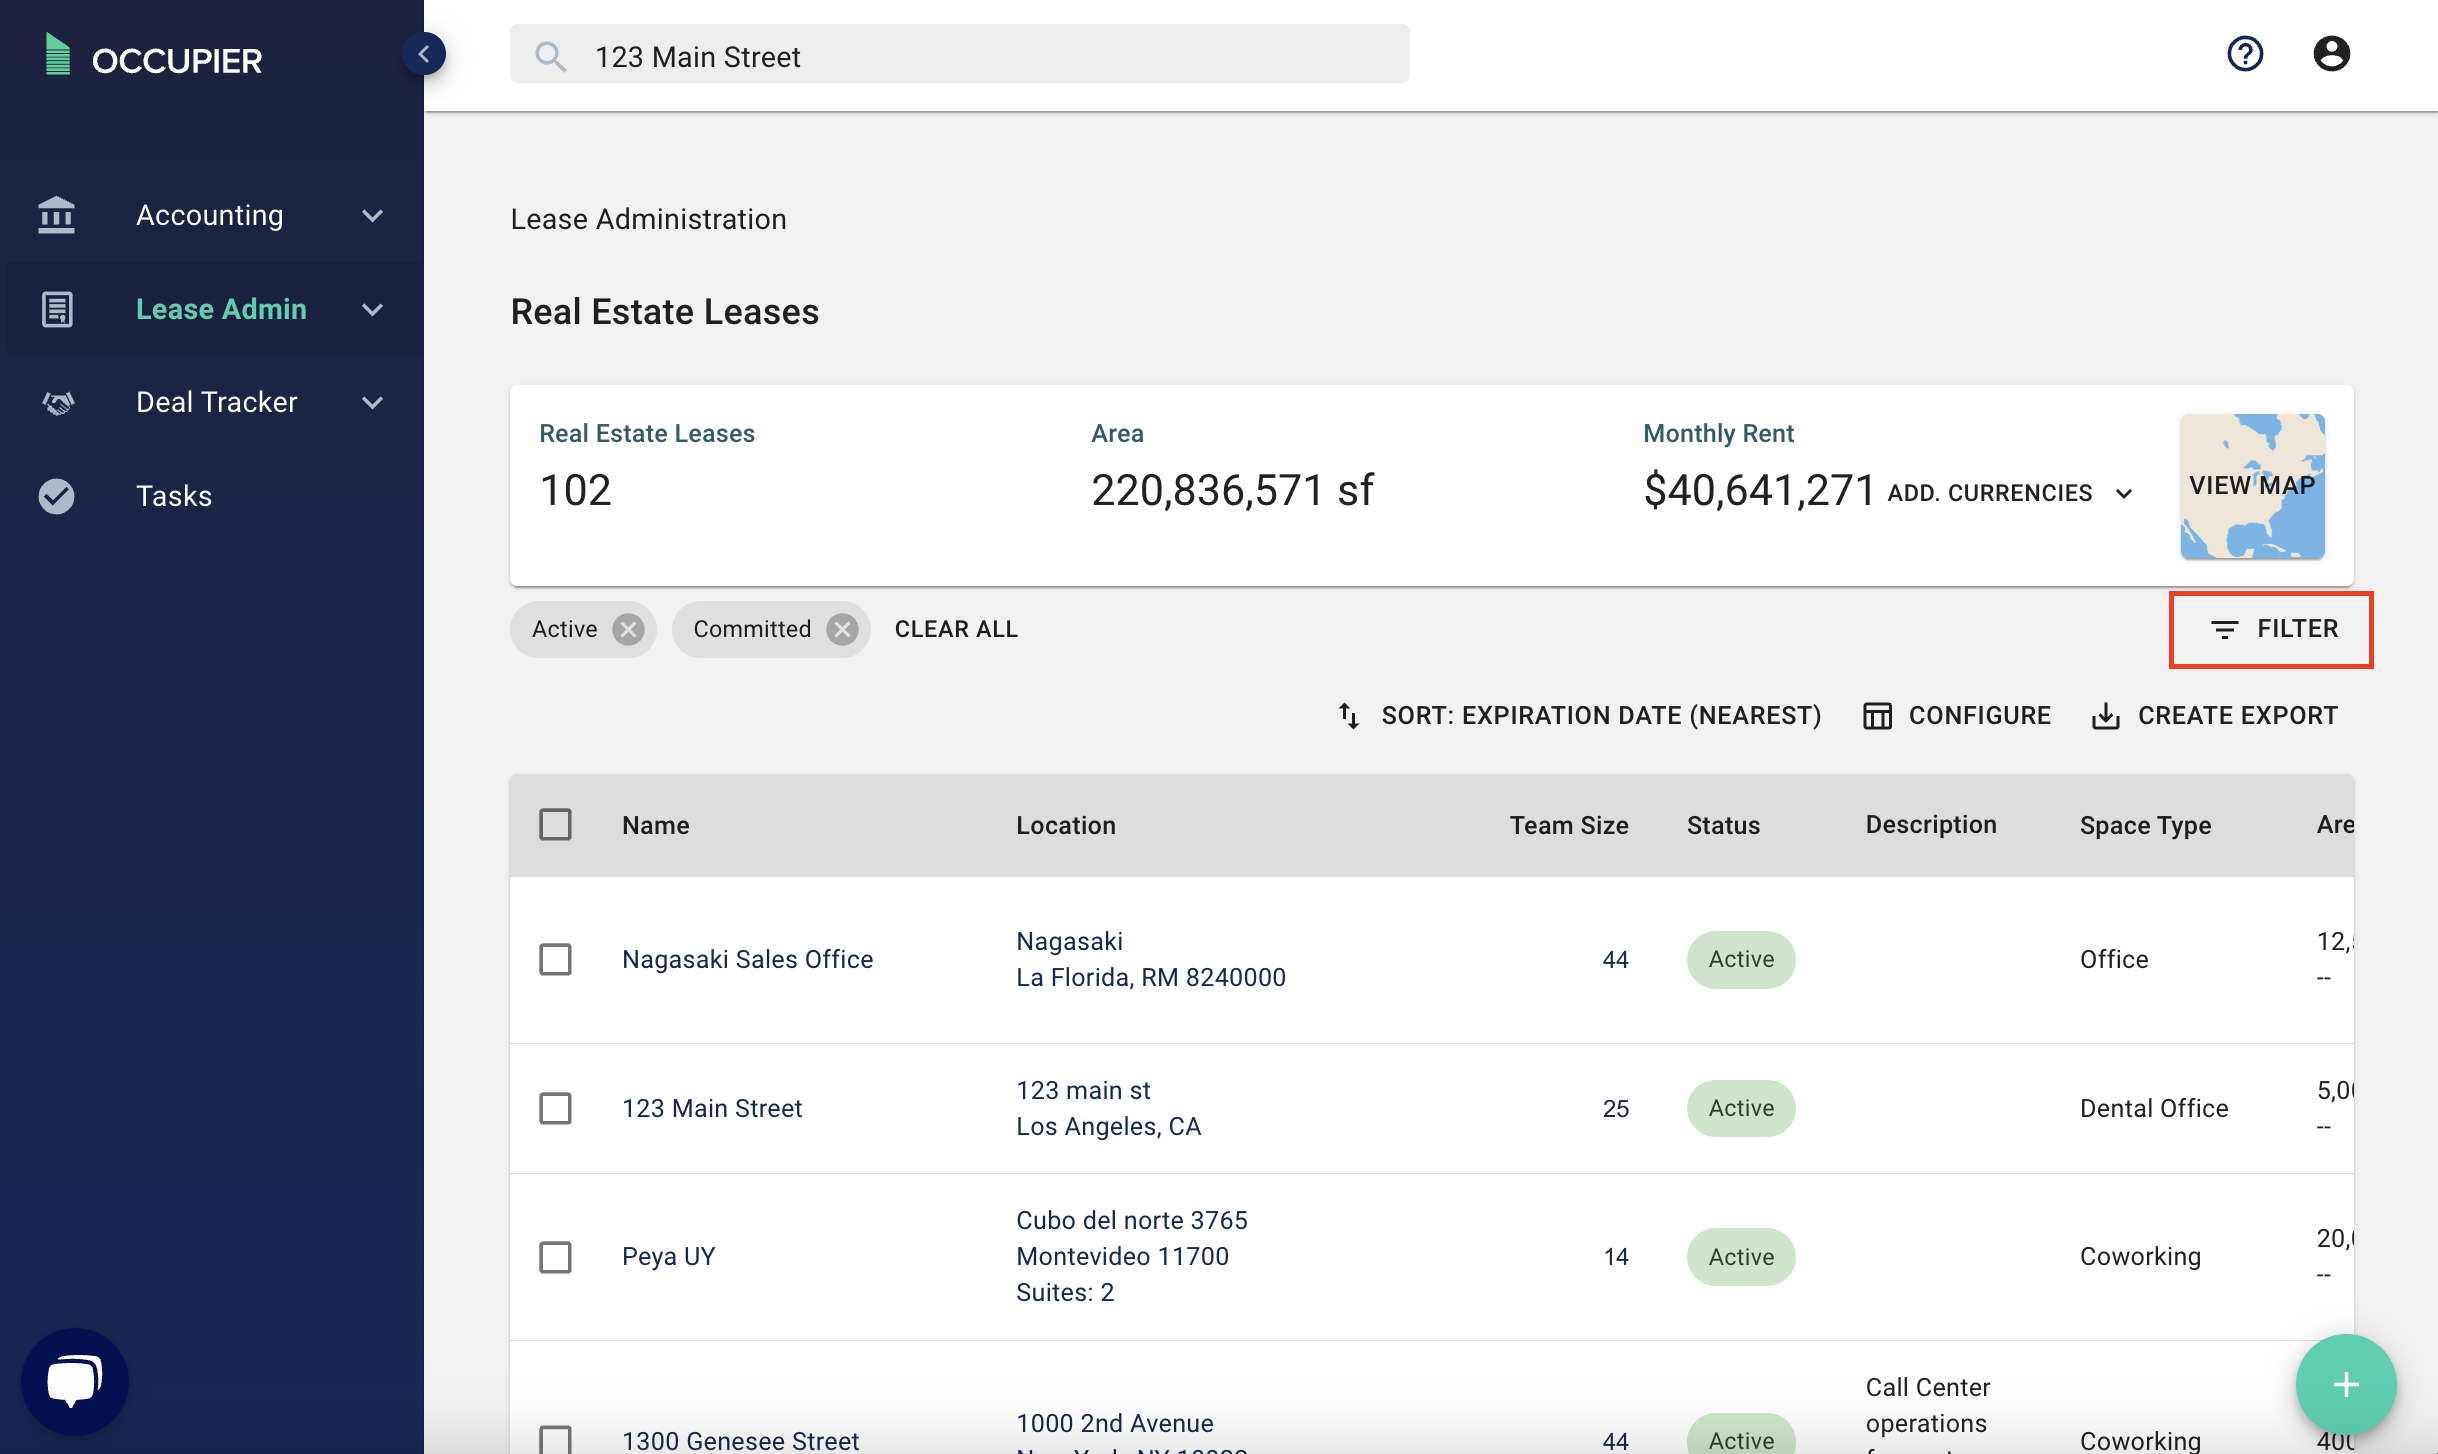
Next, apply the filter for Texas and submit.
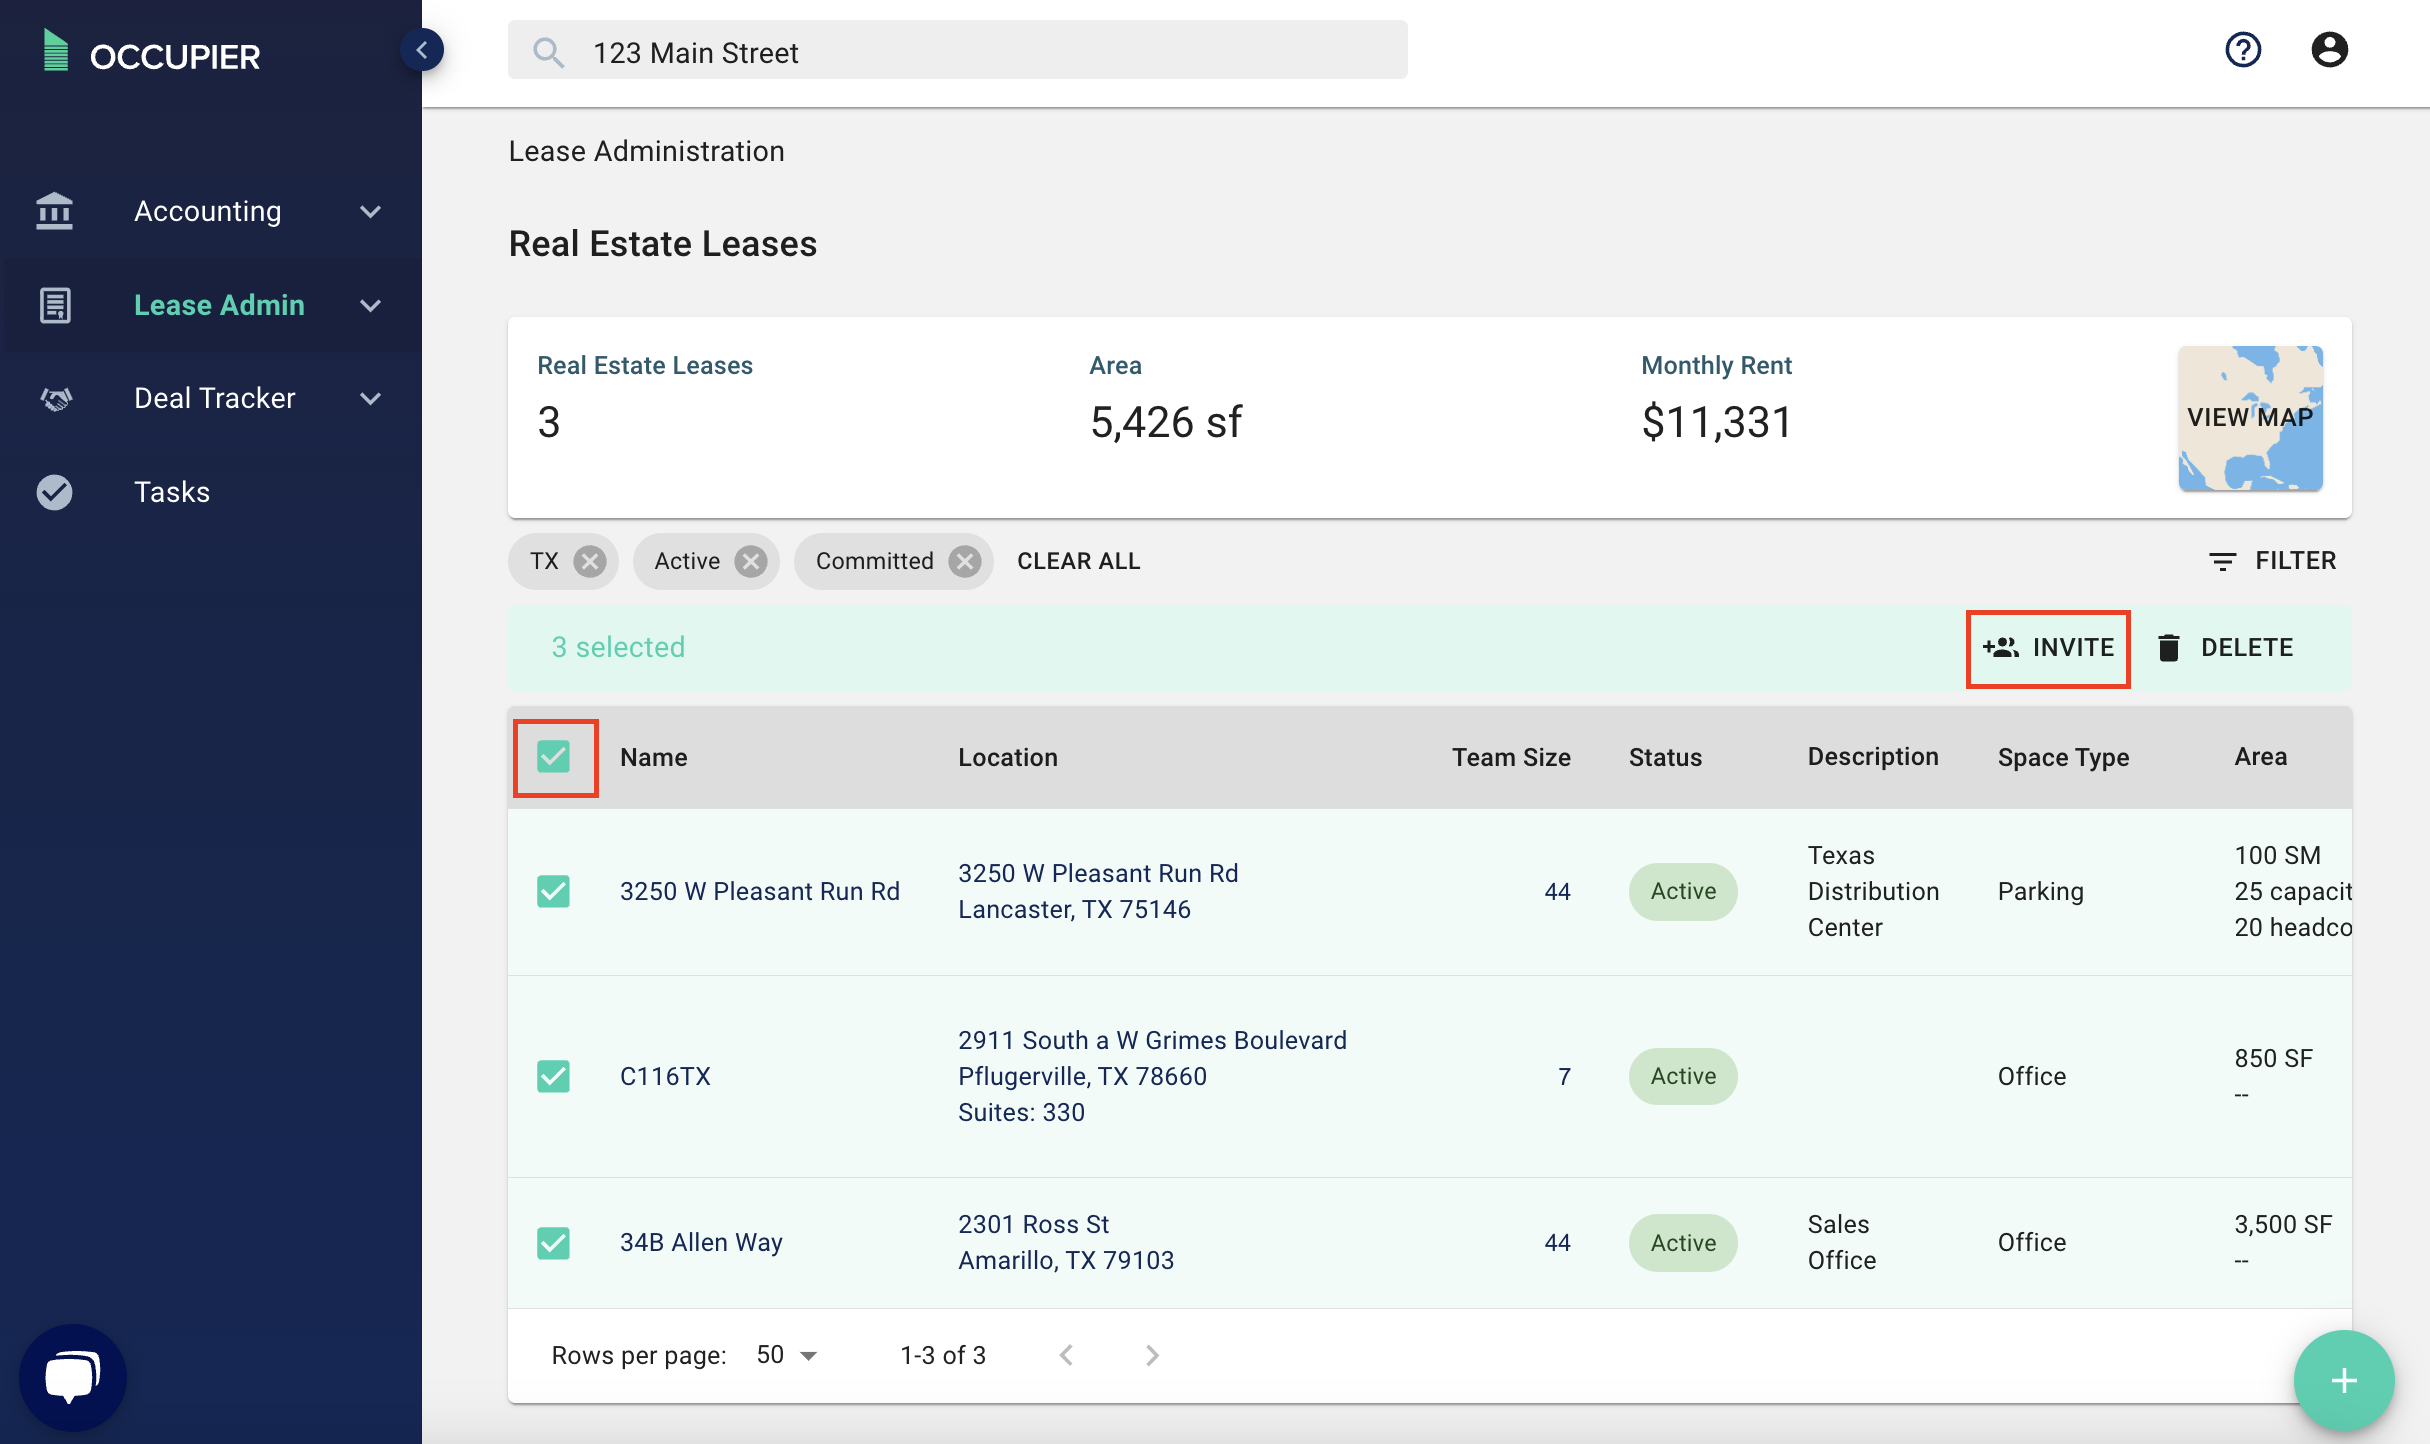
From here you can click on the checkbox at the top of the table and then click "invite"
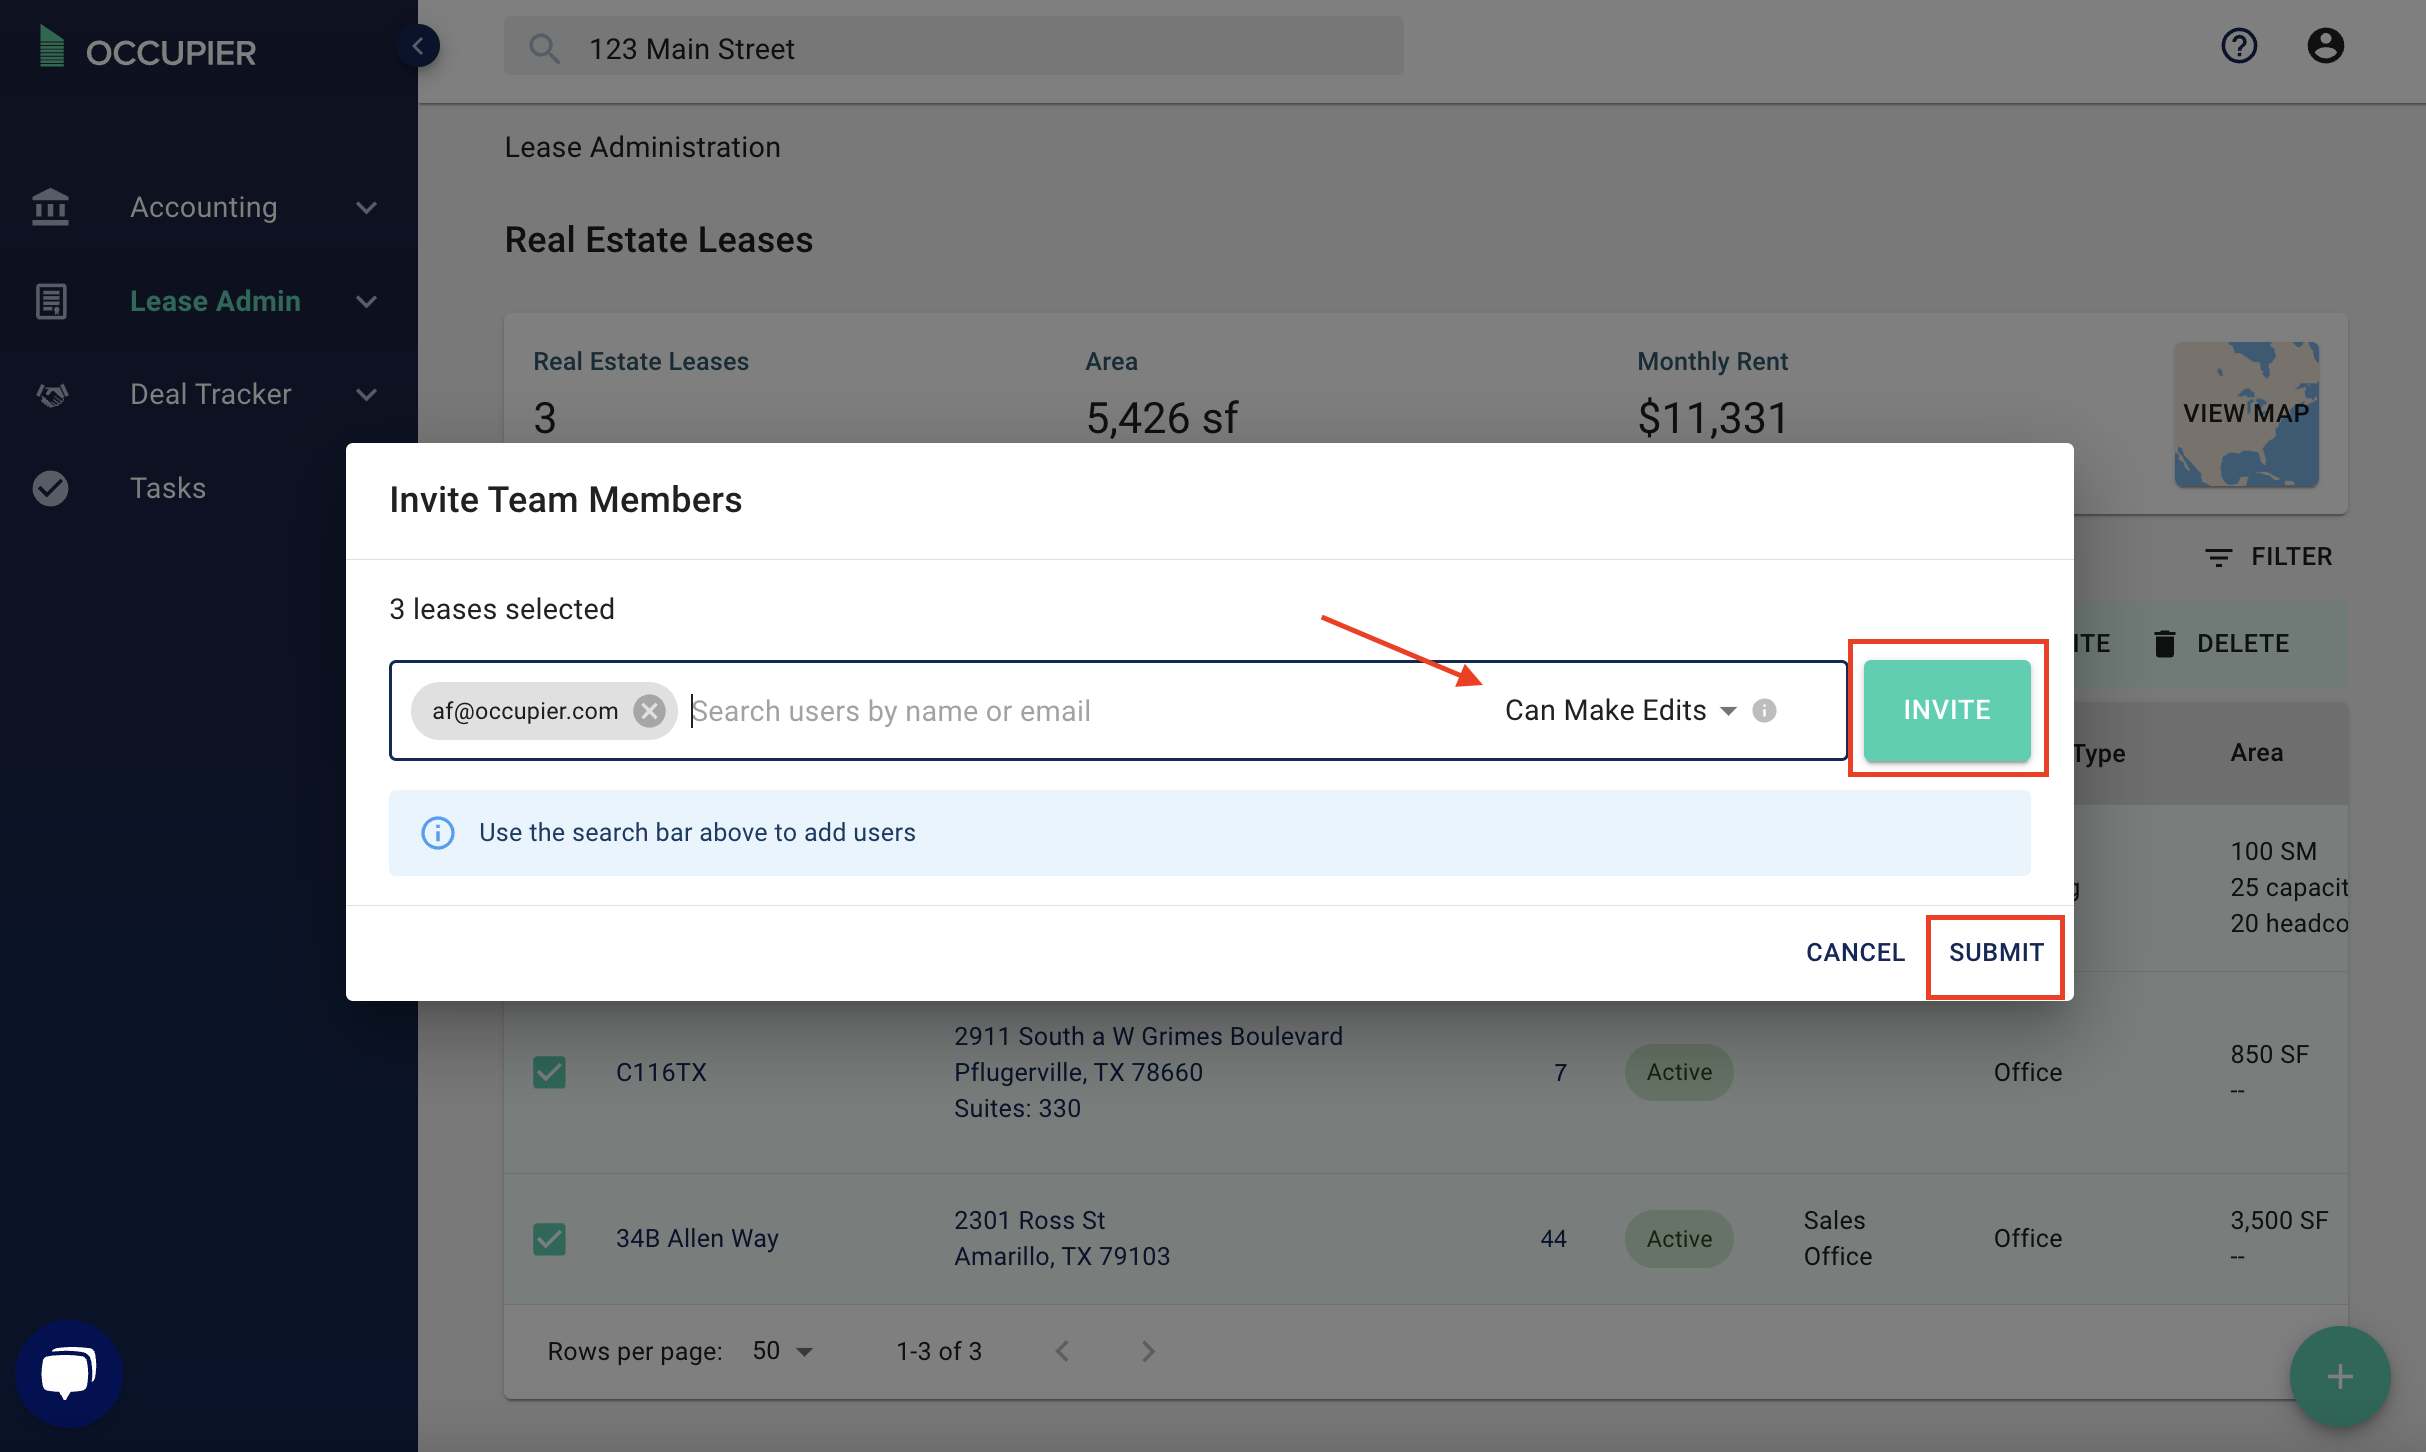
Then search for the user, select the appropriate access rights (edit vs read only), then click “Invite” and then "Submit".
User Types
| Admins | Have the ability to make any edits within Occupier. They also have the ability to add or remove other users. |
| User with Edit Rights | Has the ability to make edits within Occupier, same as an Admin. However, they cannot add or remove other users. |
| User with Read-Only Rights | Have no edits rights within Occupier. They cannot make any changes to the leases, mark tasks as complete or add/remove other users. They can only review the data within Occupier, but cannot interact with it at all. |