How to review your Legal Entity set up using Lease Administration
Prior to beginning the Occupier Lease Accounting journey, it is essential you confirm your organization's legal entity structure is accurately reflected within Occupier's Lease Administration module. This is a necessary step to ensure accurate accounting and a seamless transition to ASC 842/IFRS 16.
At this point in the journey most (if not all) of your lease data is uploaded into Lease Administration. The last step required before layering on Lease Accounting is to confirm that all of the Lease Administration data is complete and accurate.
In the steps below, we will outline how to review the Legal Entities set up within Lease Administration.
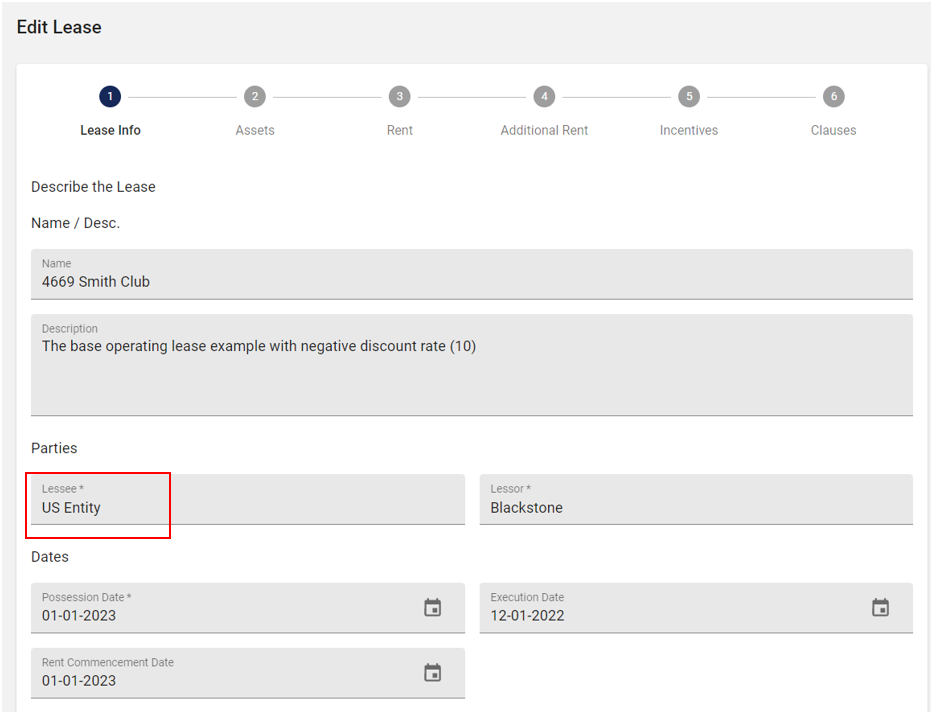
When reviewing your Legal Entities within Occupier Lease Administration, an important distinction to make is that each "Lessee" set up within Lease Administration will correlate to a Legal Entity in the Lease Accounting module (for a definition of Legal Entity- please refer to the FAQs below). Below is a screenshot on where this lives on an individual lease within Lease Administration.
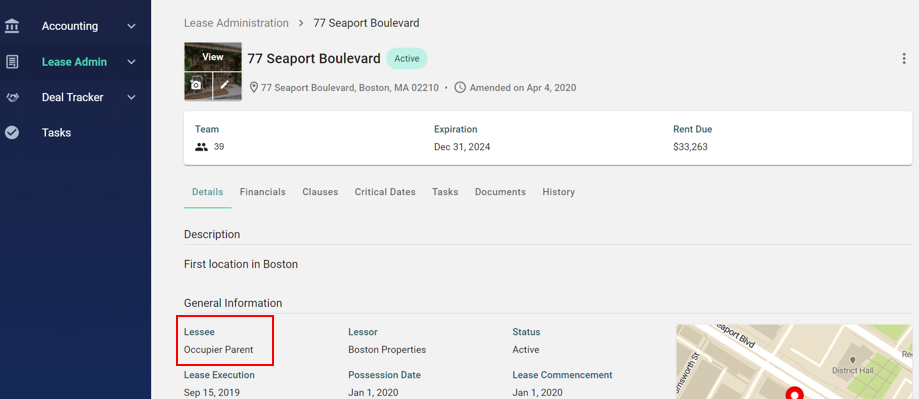
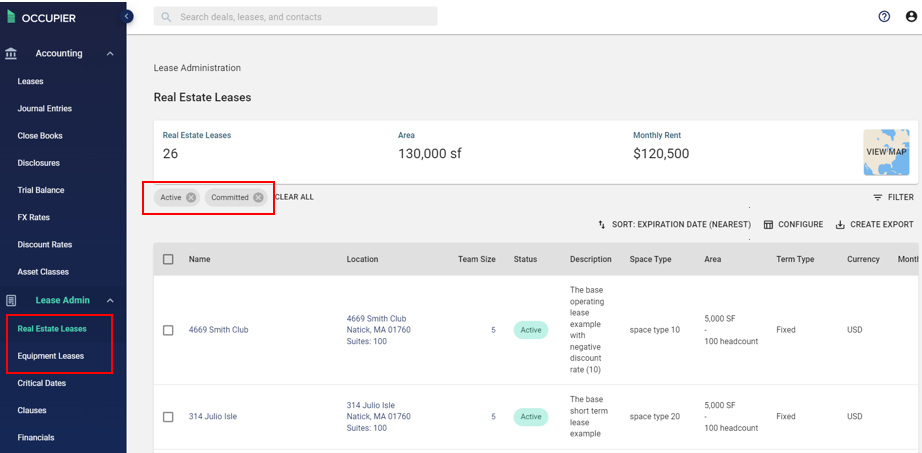
Therefore, before moving on to Lease Accounting, it is important to confirm that the Lessee assigned to each lease is in fact the correct Legal Entity. To perform a consolidated review of the Lessee's (Legal Entities) assigned to each lease you can navigate to "Real Estate Leases" and/or "Equipment Leases" within Lease Administration and complete the following steps:
Step 1- Ensure you have a complete population of leases by clicking the "X" or "Clear All."
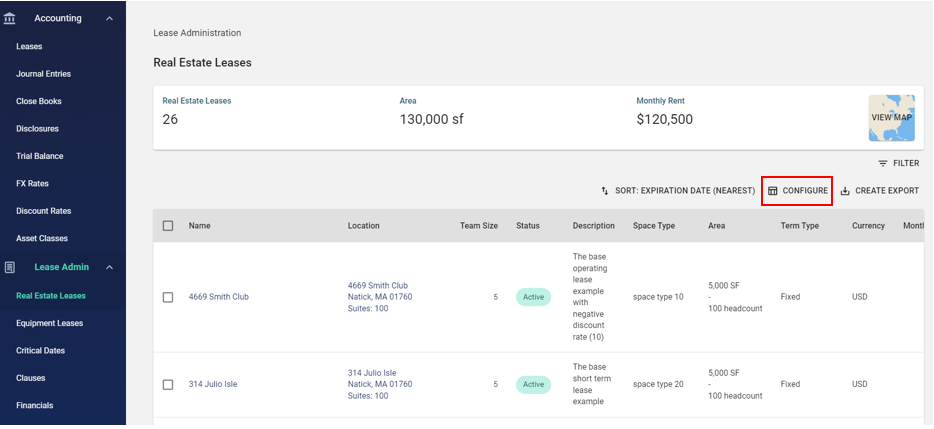
Step 2- Select the "Configure" button on the right-hand side.
Step 3- Ensure that "Lessee" is selected in the configurations.
*Note- you can even drag "Lessee" to the top of the configurations to display that field first in the Real Estate/Equipment Lease tables.
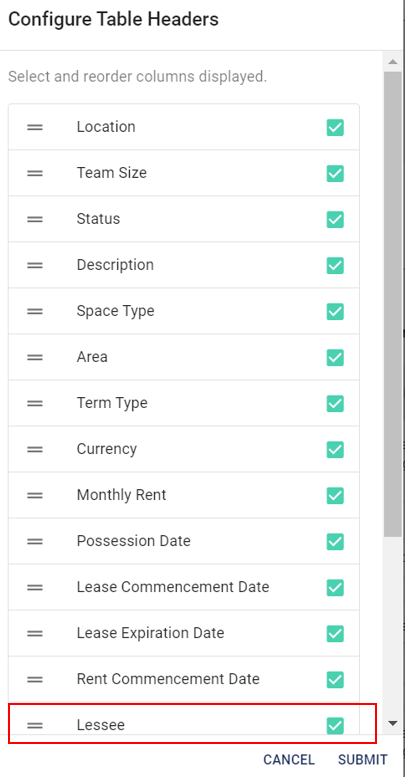
By selecting this field, you will ensure that this is included in the export. If you want to de-select other fields to not view that information you can do that as well.
Step 4- Create export of lease data into Excel or review lease data in Occupier.
You now have the option of either reviewing the Lessee/Legal Entities in an Excel export or within the Occupier platform. To view the data in Excel, simply select the "Create Export" button on the top right-hand corner (pictured below).
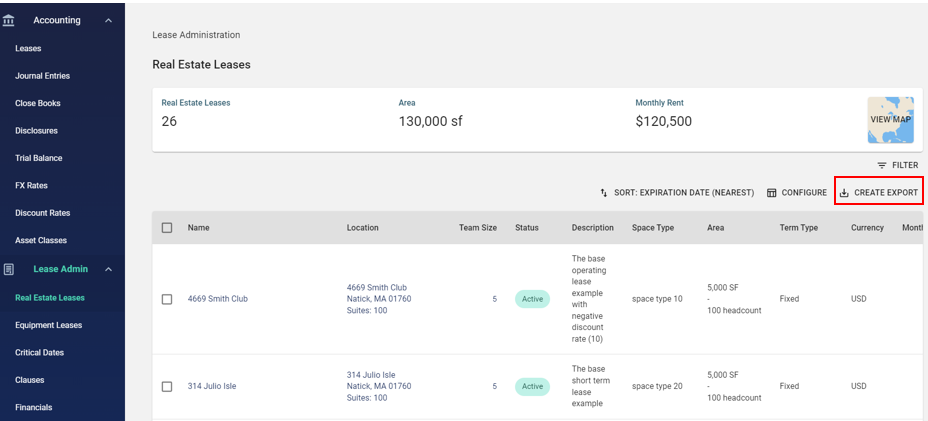
Step 5- Review the Excel export/Occupier
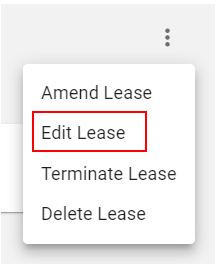
Review the Excel export/Occupier to ensure all "Lessees" are correctly tagged to each lease. If you need to make any updates, you can edit at the individual lease level, by selecting the ellipses in the top right-hand corner (pictured below):

Then select "Edit Lease."
Then update the "Lessee" field based on the correct Legal Entity associated with this lease.
Note- only pre-entered Lessees/Legal Entities will populate in the "Lessee" field as selectable options. If you wish to add a new Legal Entity you can do so through selecting "+ New Legal Entity" in the Lease Administration "Edit Lease" screen (see screenshot below).
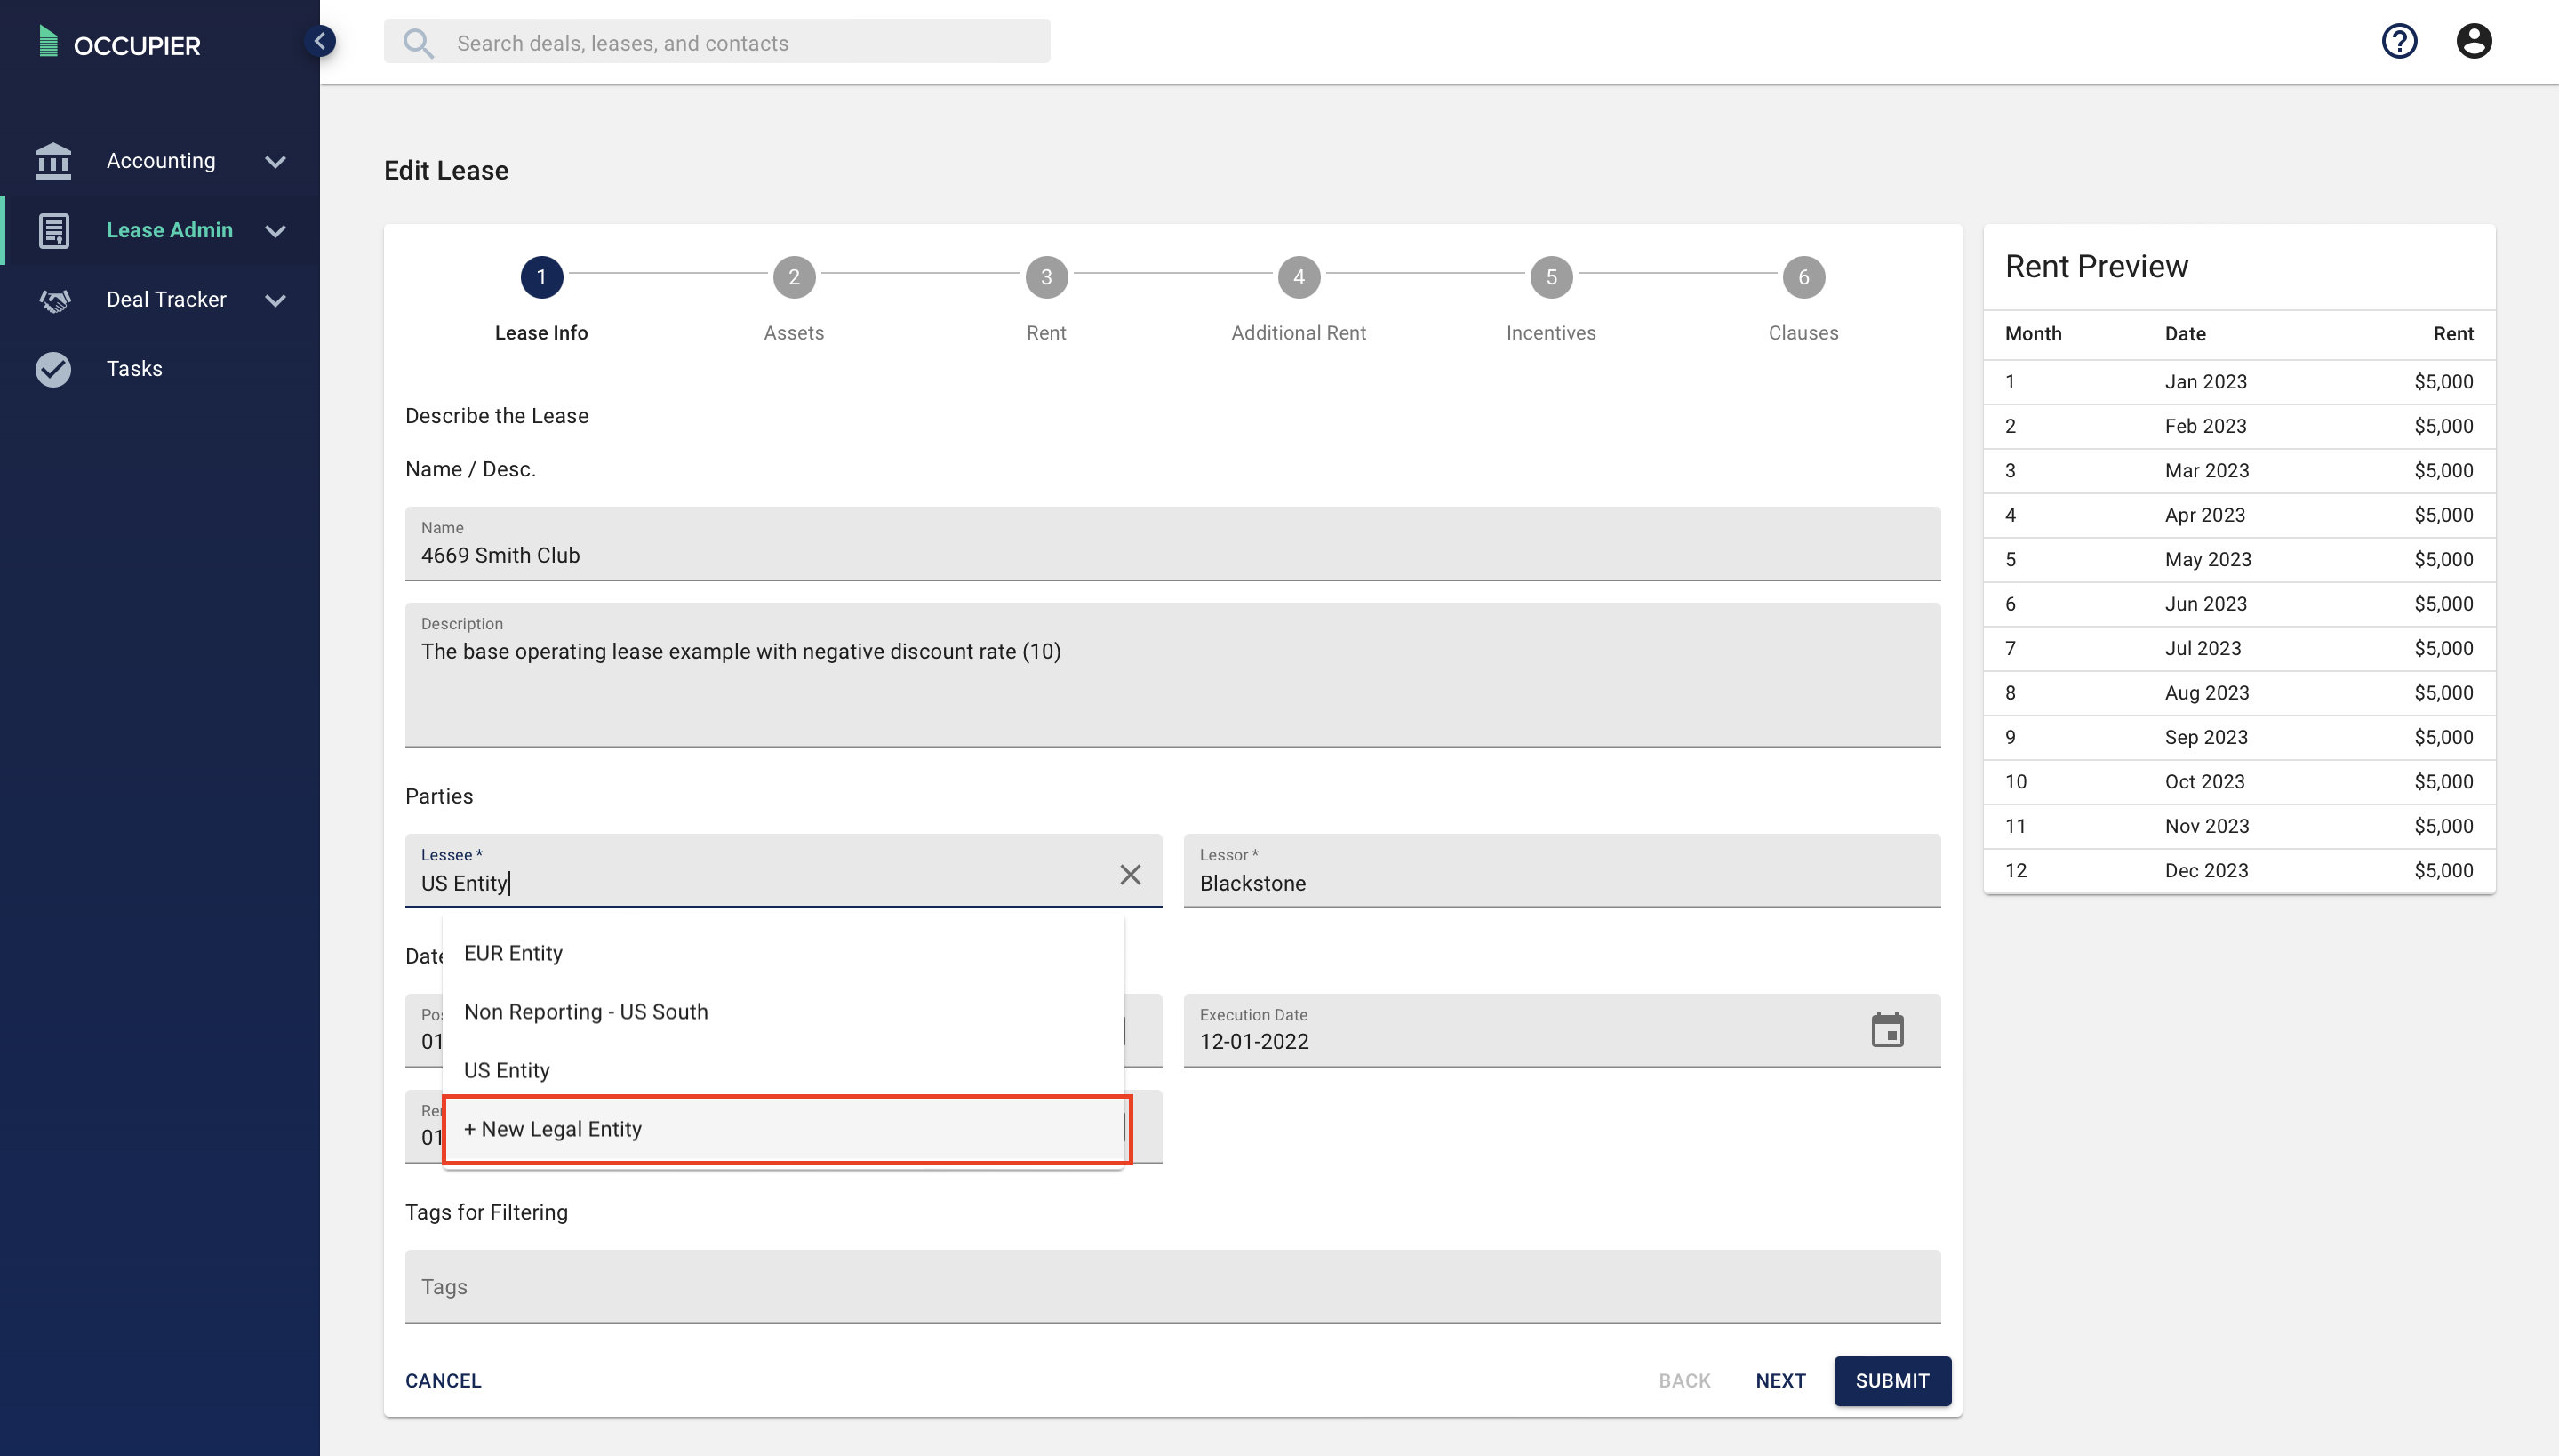
Once you select "+ New Legal Entity" you will be asked a series of questions about the new Legal Entity you wish to add (see below).
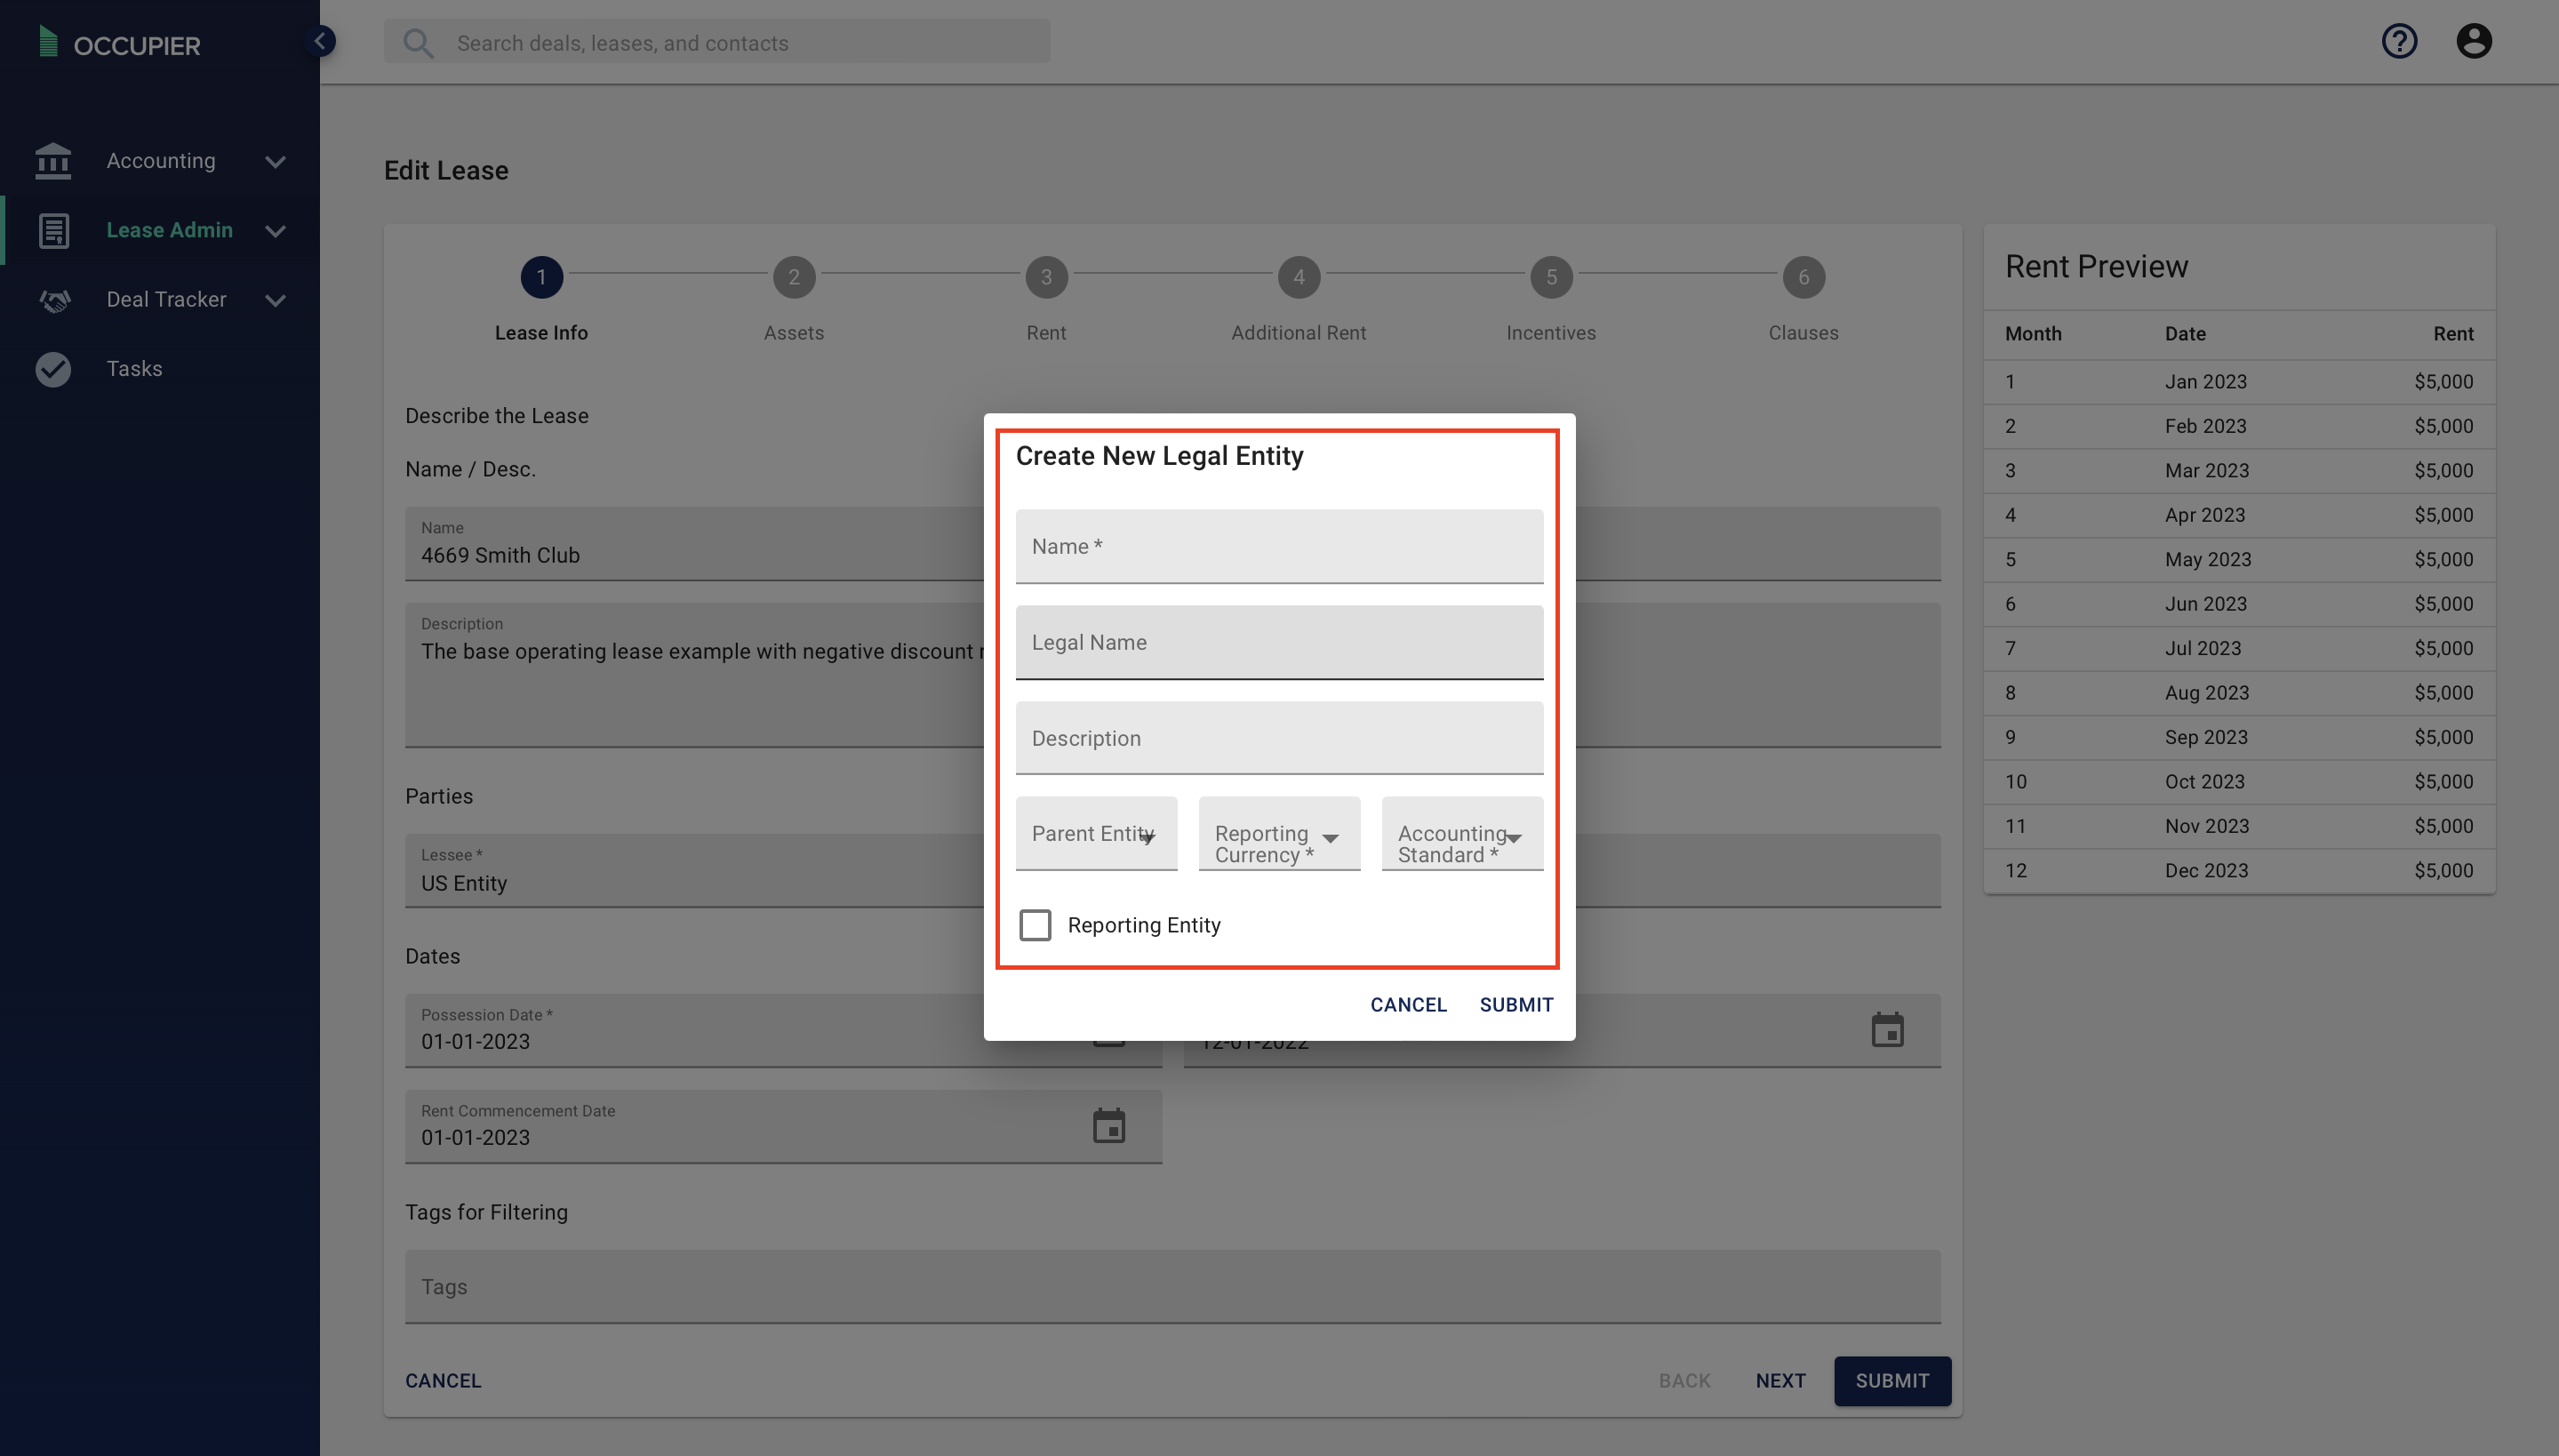
Below outlines what each of these fields mean in the "+ New Legal Entity" screen.
Name- This is the name of the Legal Entity.
Legal Name- This is the legal name of the Legal Entity (can be the same as Name).
Description- Provide a brief description of this Legal Entity.
Parent Entity- Designate who the ultimate parent of this Legal Entity is (if any).
Reporting Currency- Designate the reporting currency of this new Legal Entity.
Accounting Standard- Designate which accounting standard this new Legal Entity will comply by (IFRS 16 or ASC 842).
Reporting Entity- This check box will designate whether or not this Legal Entity is a "Reporting Entity." The term "Reporting Entity" is further defined below.