How do I create custom fields and add custom categories?
Why did we build this?
Custom Data Fields and Categories were built so that our customers could leverage every data point necessary to their real estate process and to make data-driven decisions. While the basics may be standard across commercial real estate, each one of our customers has a unique portfolio and may have a unique approach. These customizations allow Occupier to fully fit our customers' data-tracking needs.
What does it do?
Custom Data Fields allow users to add their own details to be tracked on individual Deals and Leases. These items can be things like additional requirement items or unique location identifiers.
Categories allow for customization of Space Types, Clause Types, Expense Types, Event Types, Equipment Types, and Incentive Types. It’s important that the naming of these items be flexible, so that the data in Occupier matches the way your company talks about real estate. For example, if a lease document has a clause called “Right to Terminate,” it’s important that the details of this clause are represented under “Right to Terminate” in Occupier.
How to use it
Custom Data Fields…
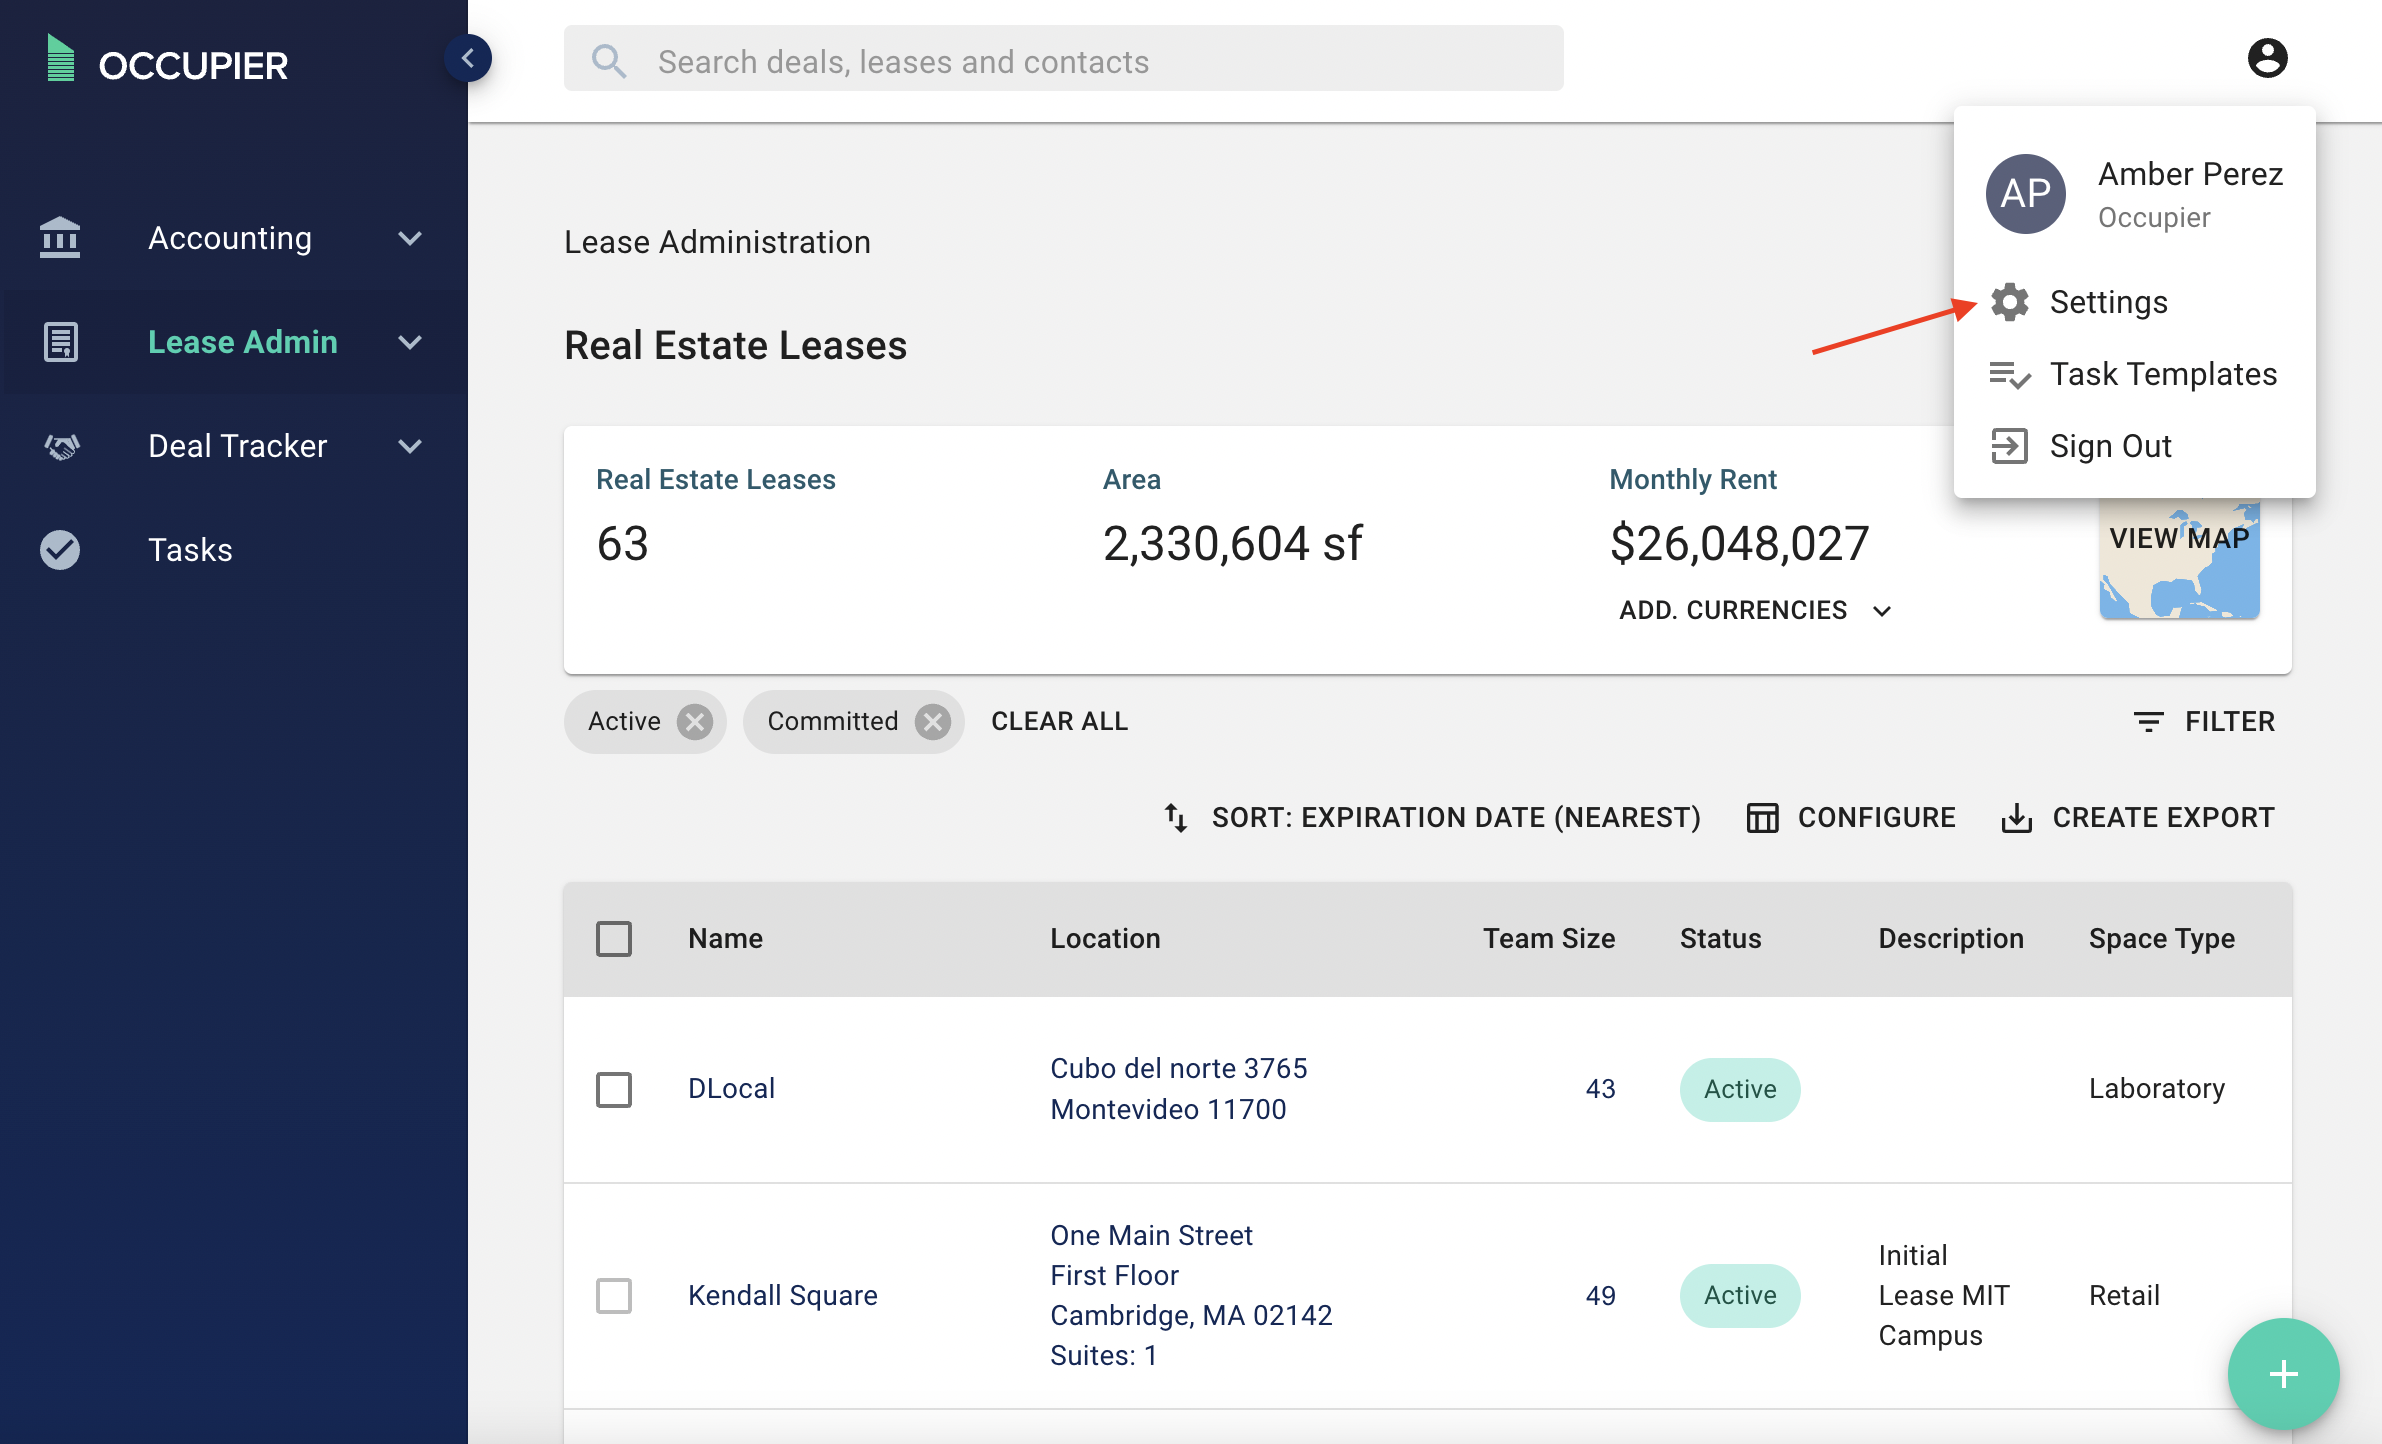
Step 1: Navigate to “Settings” under the icon of a person in the top right corner
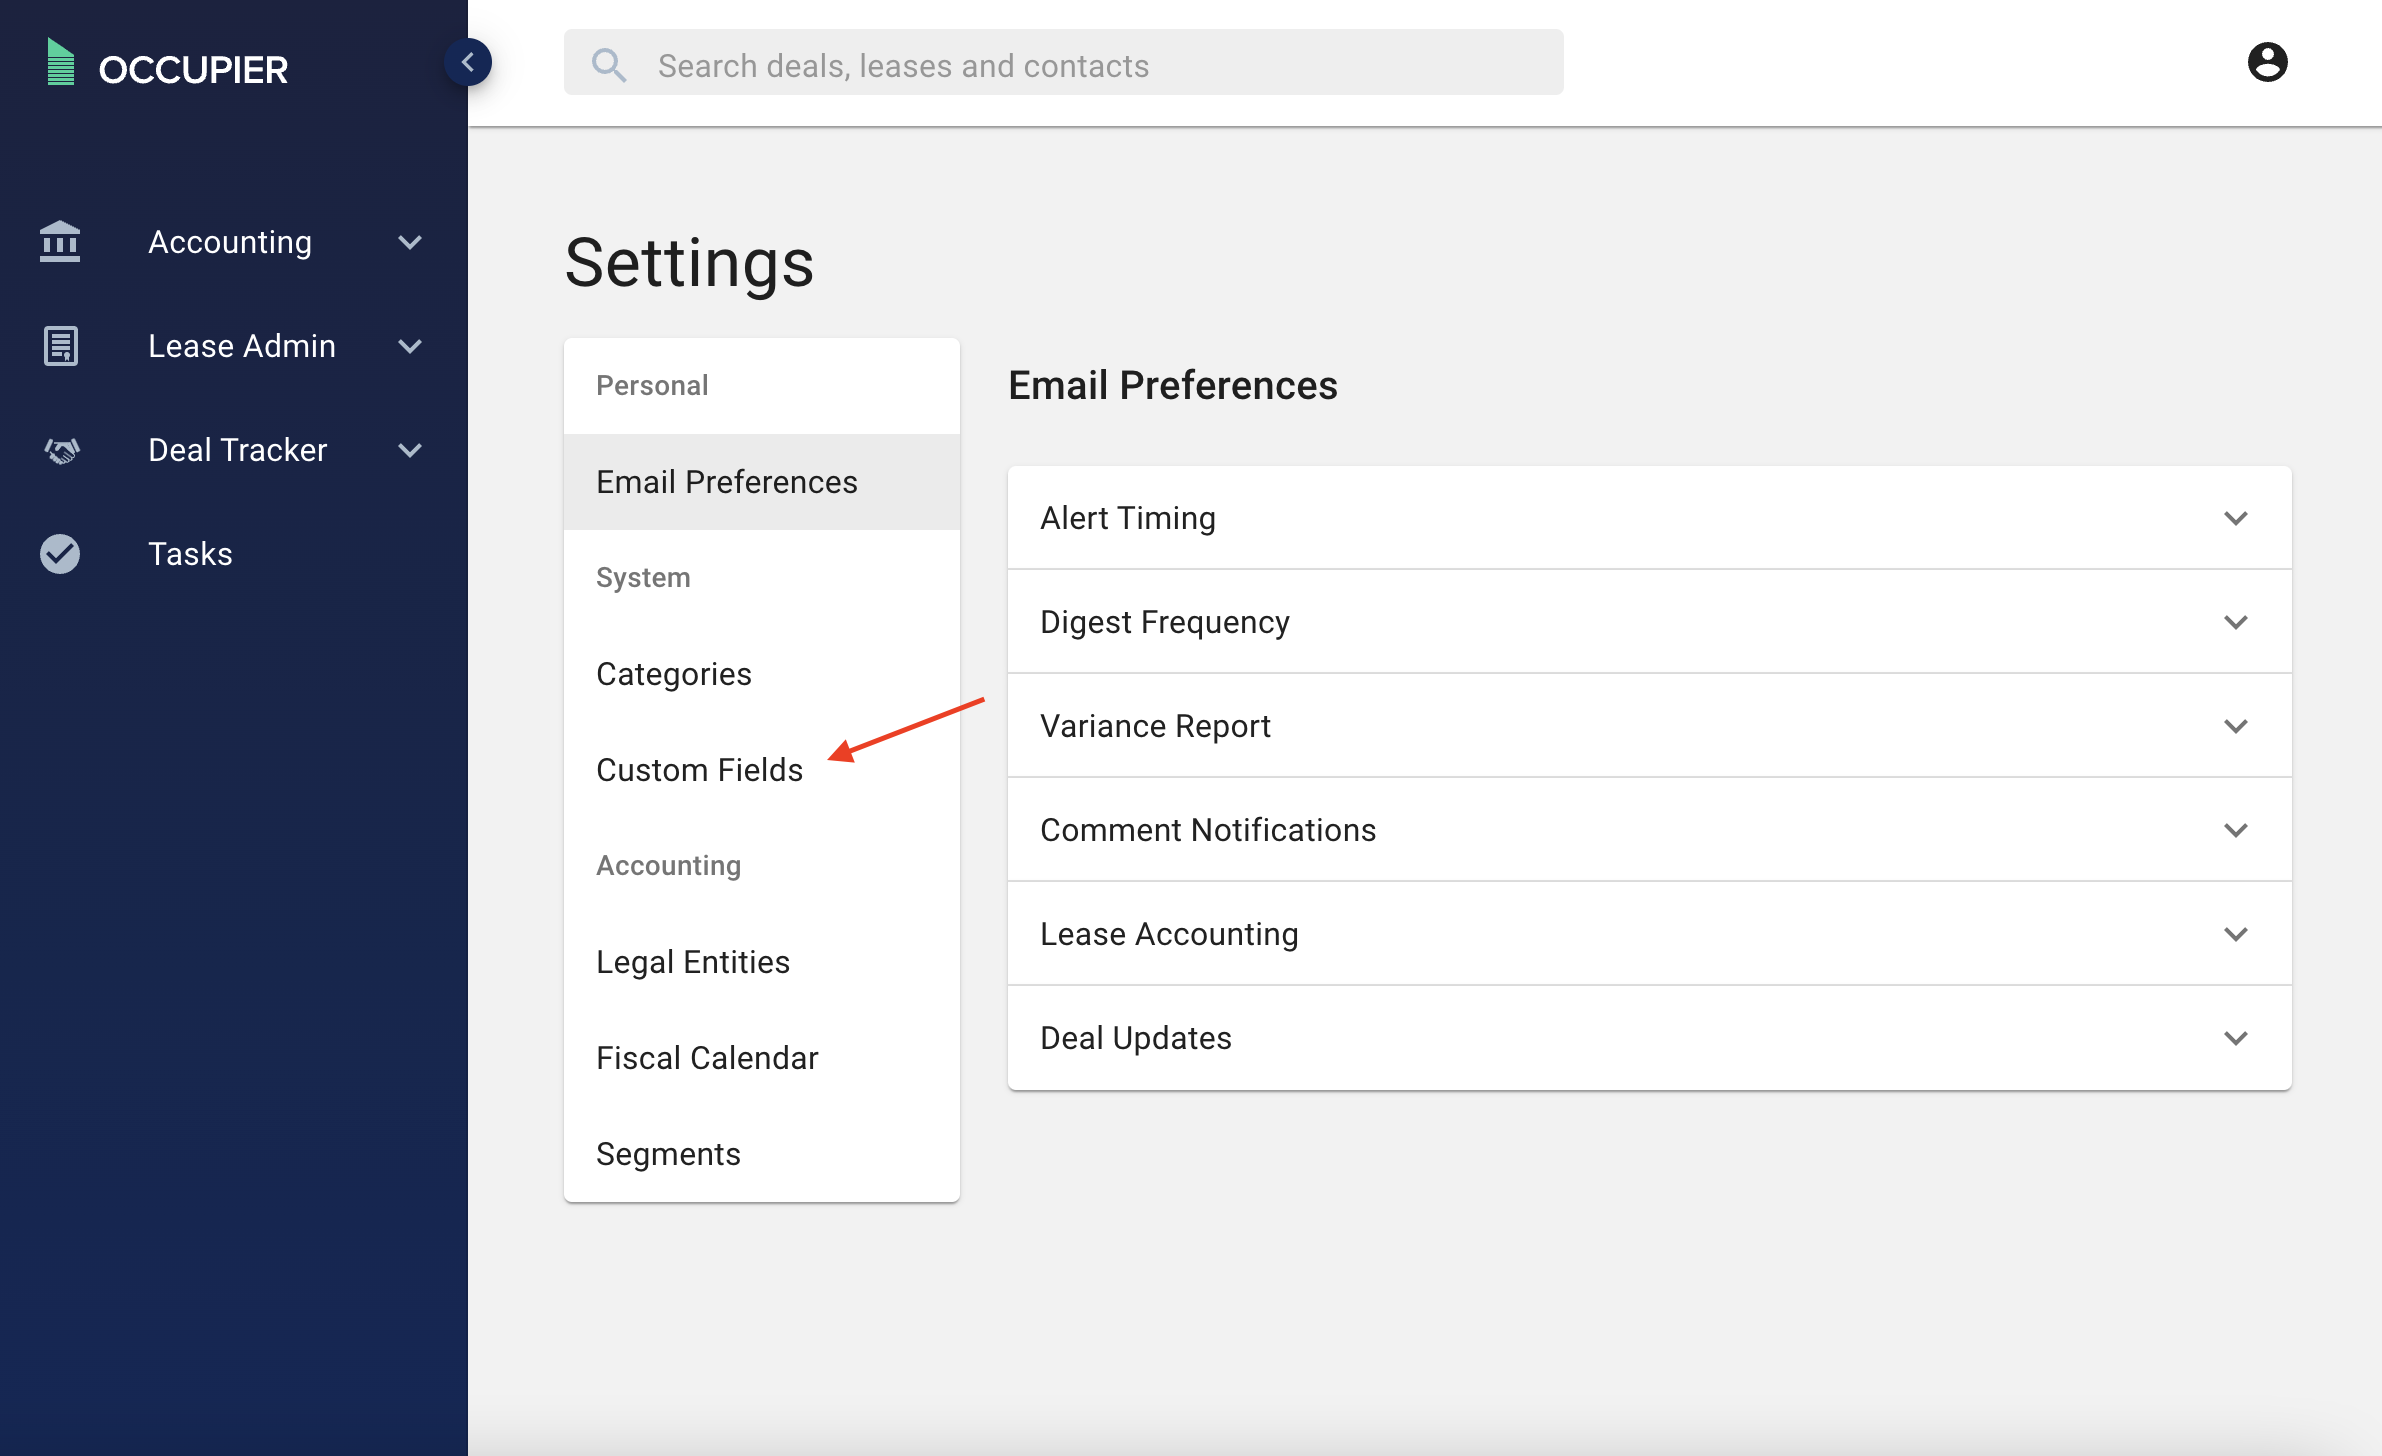
Step 2: Select “Custom Fields”
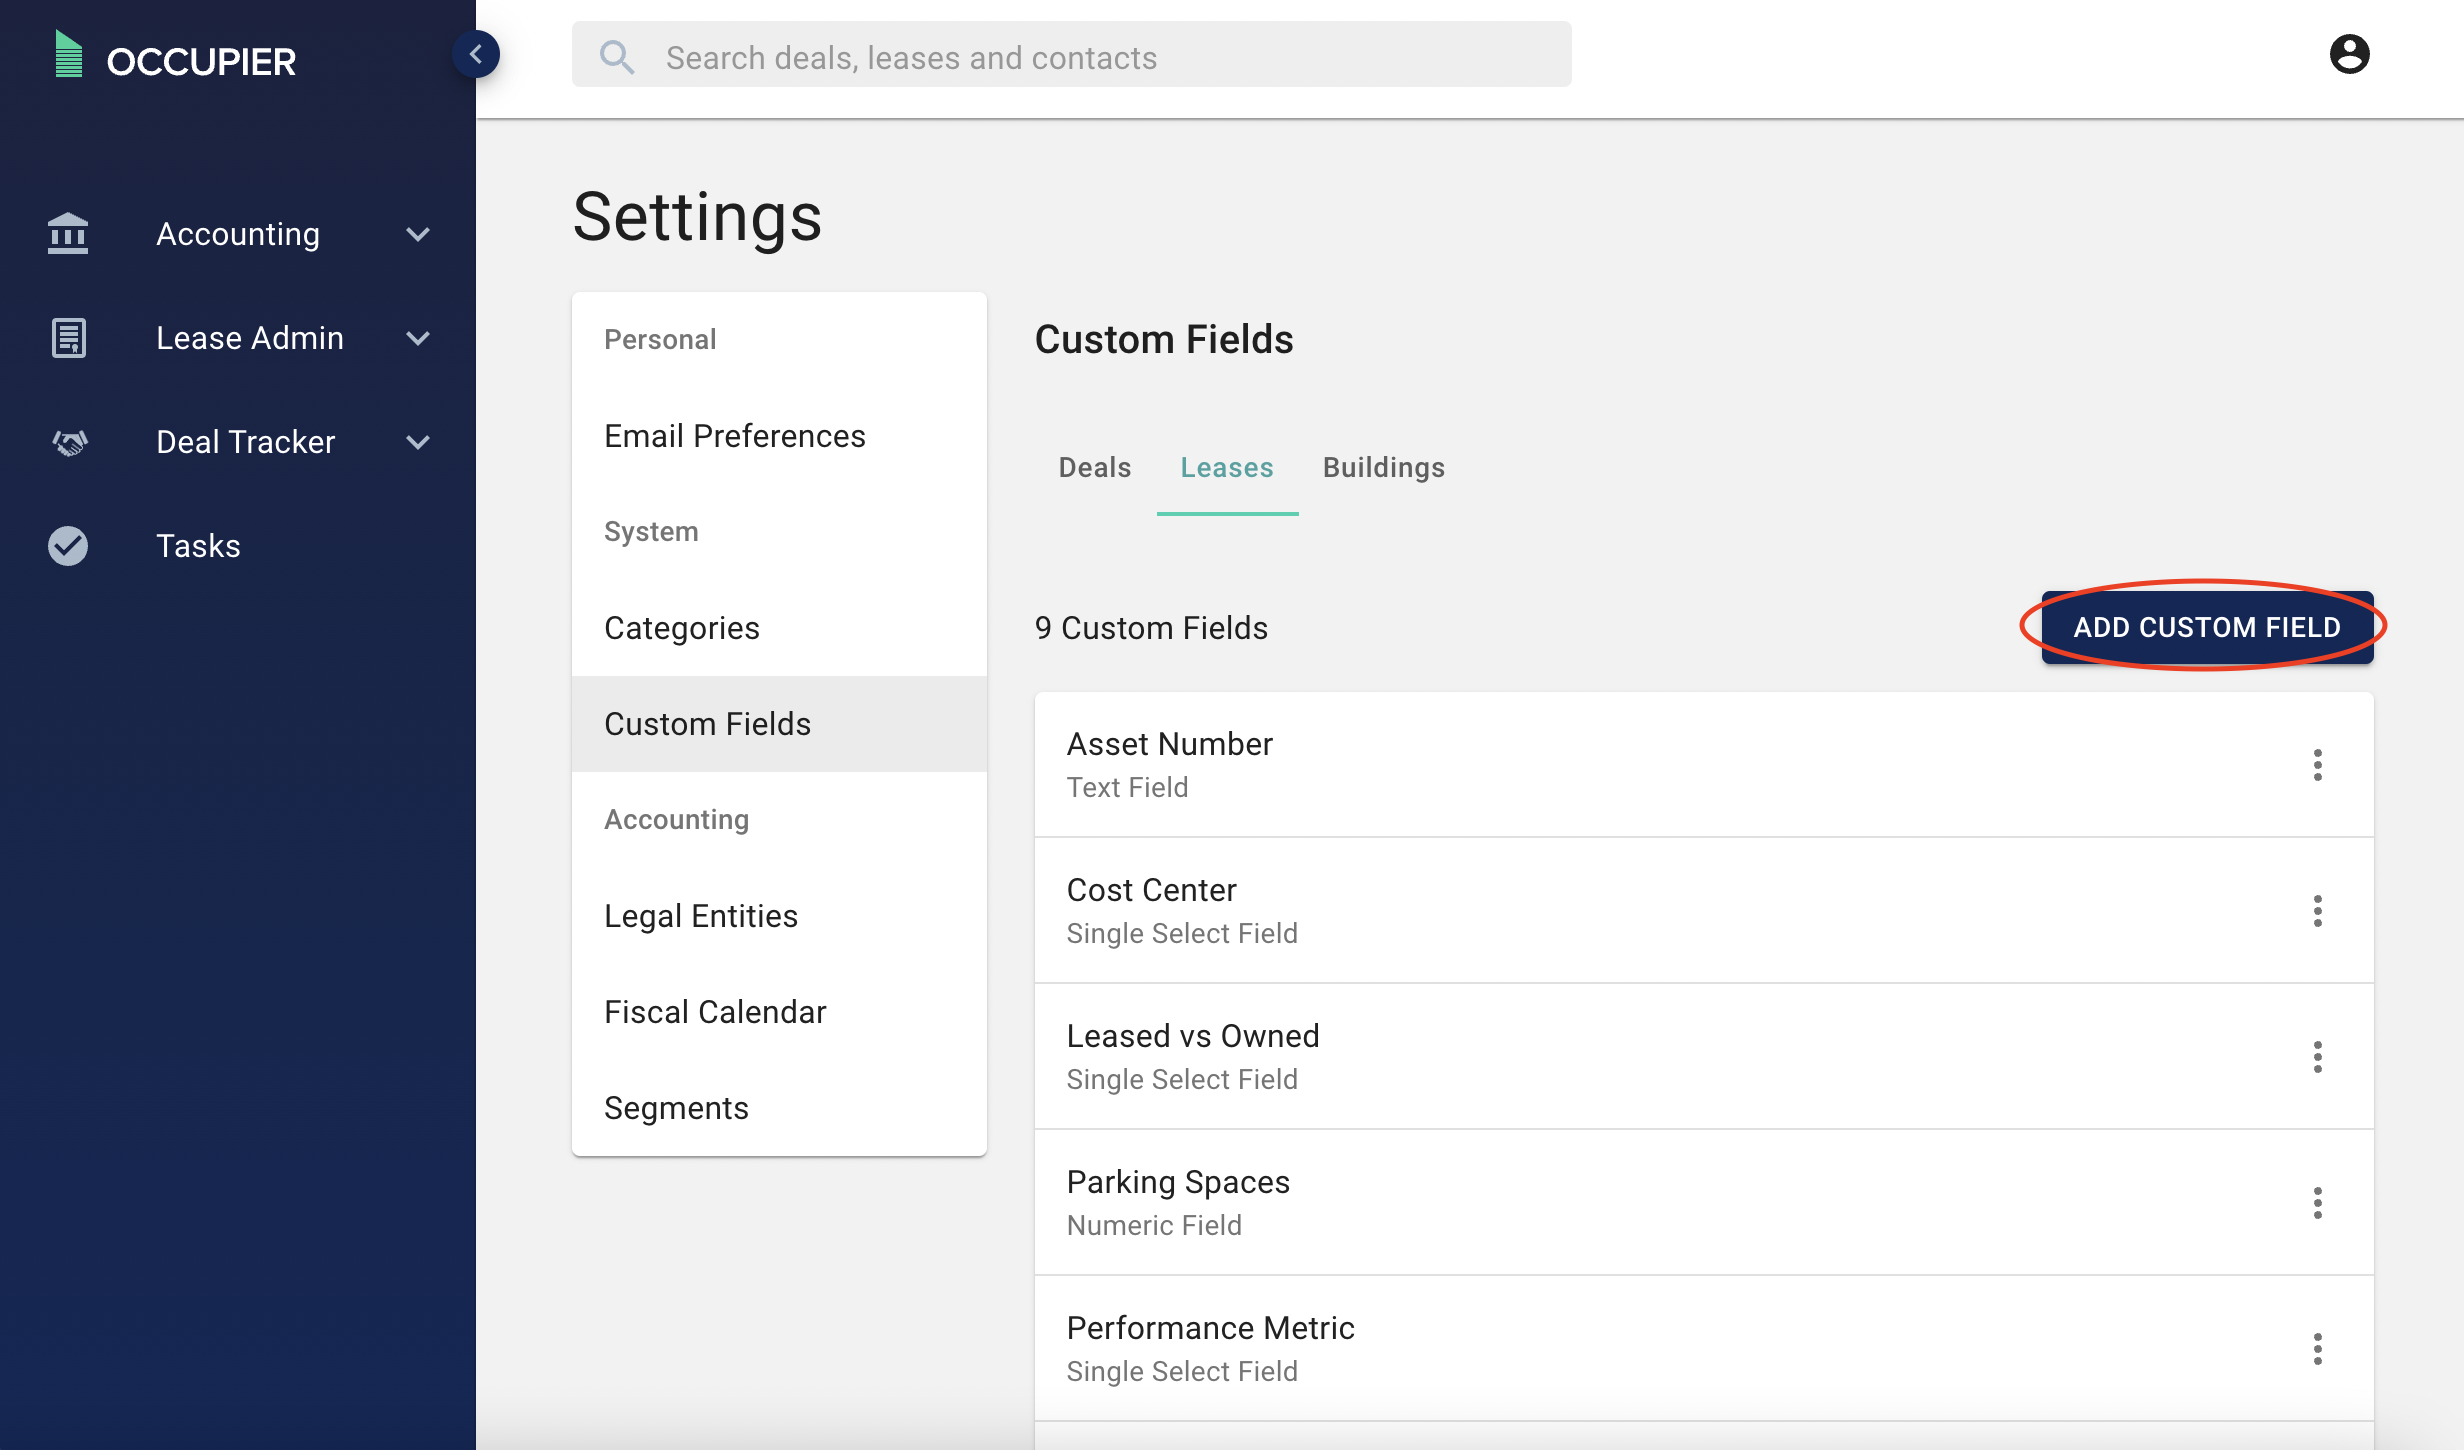
Step 3: Select where you would like to create the field Deals (only available in Deal Tracker Module), Leases, Vendors or Payables. This will determine whether your Custom Field applies to lease records or a deal rooms

Step 3 (if in a Broker account): Select which Client this Custom Field will apply to using the “Choose Client” selector
Step 4: Select “Add Custom Field”
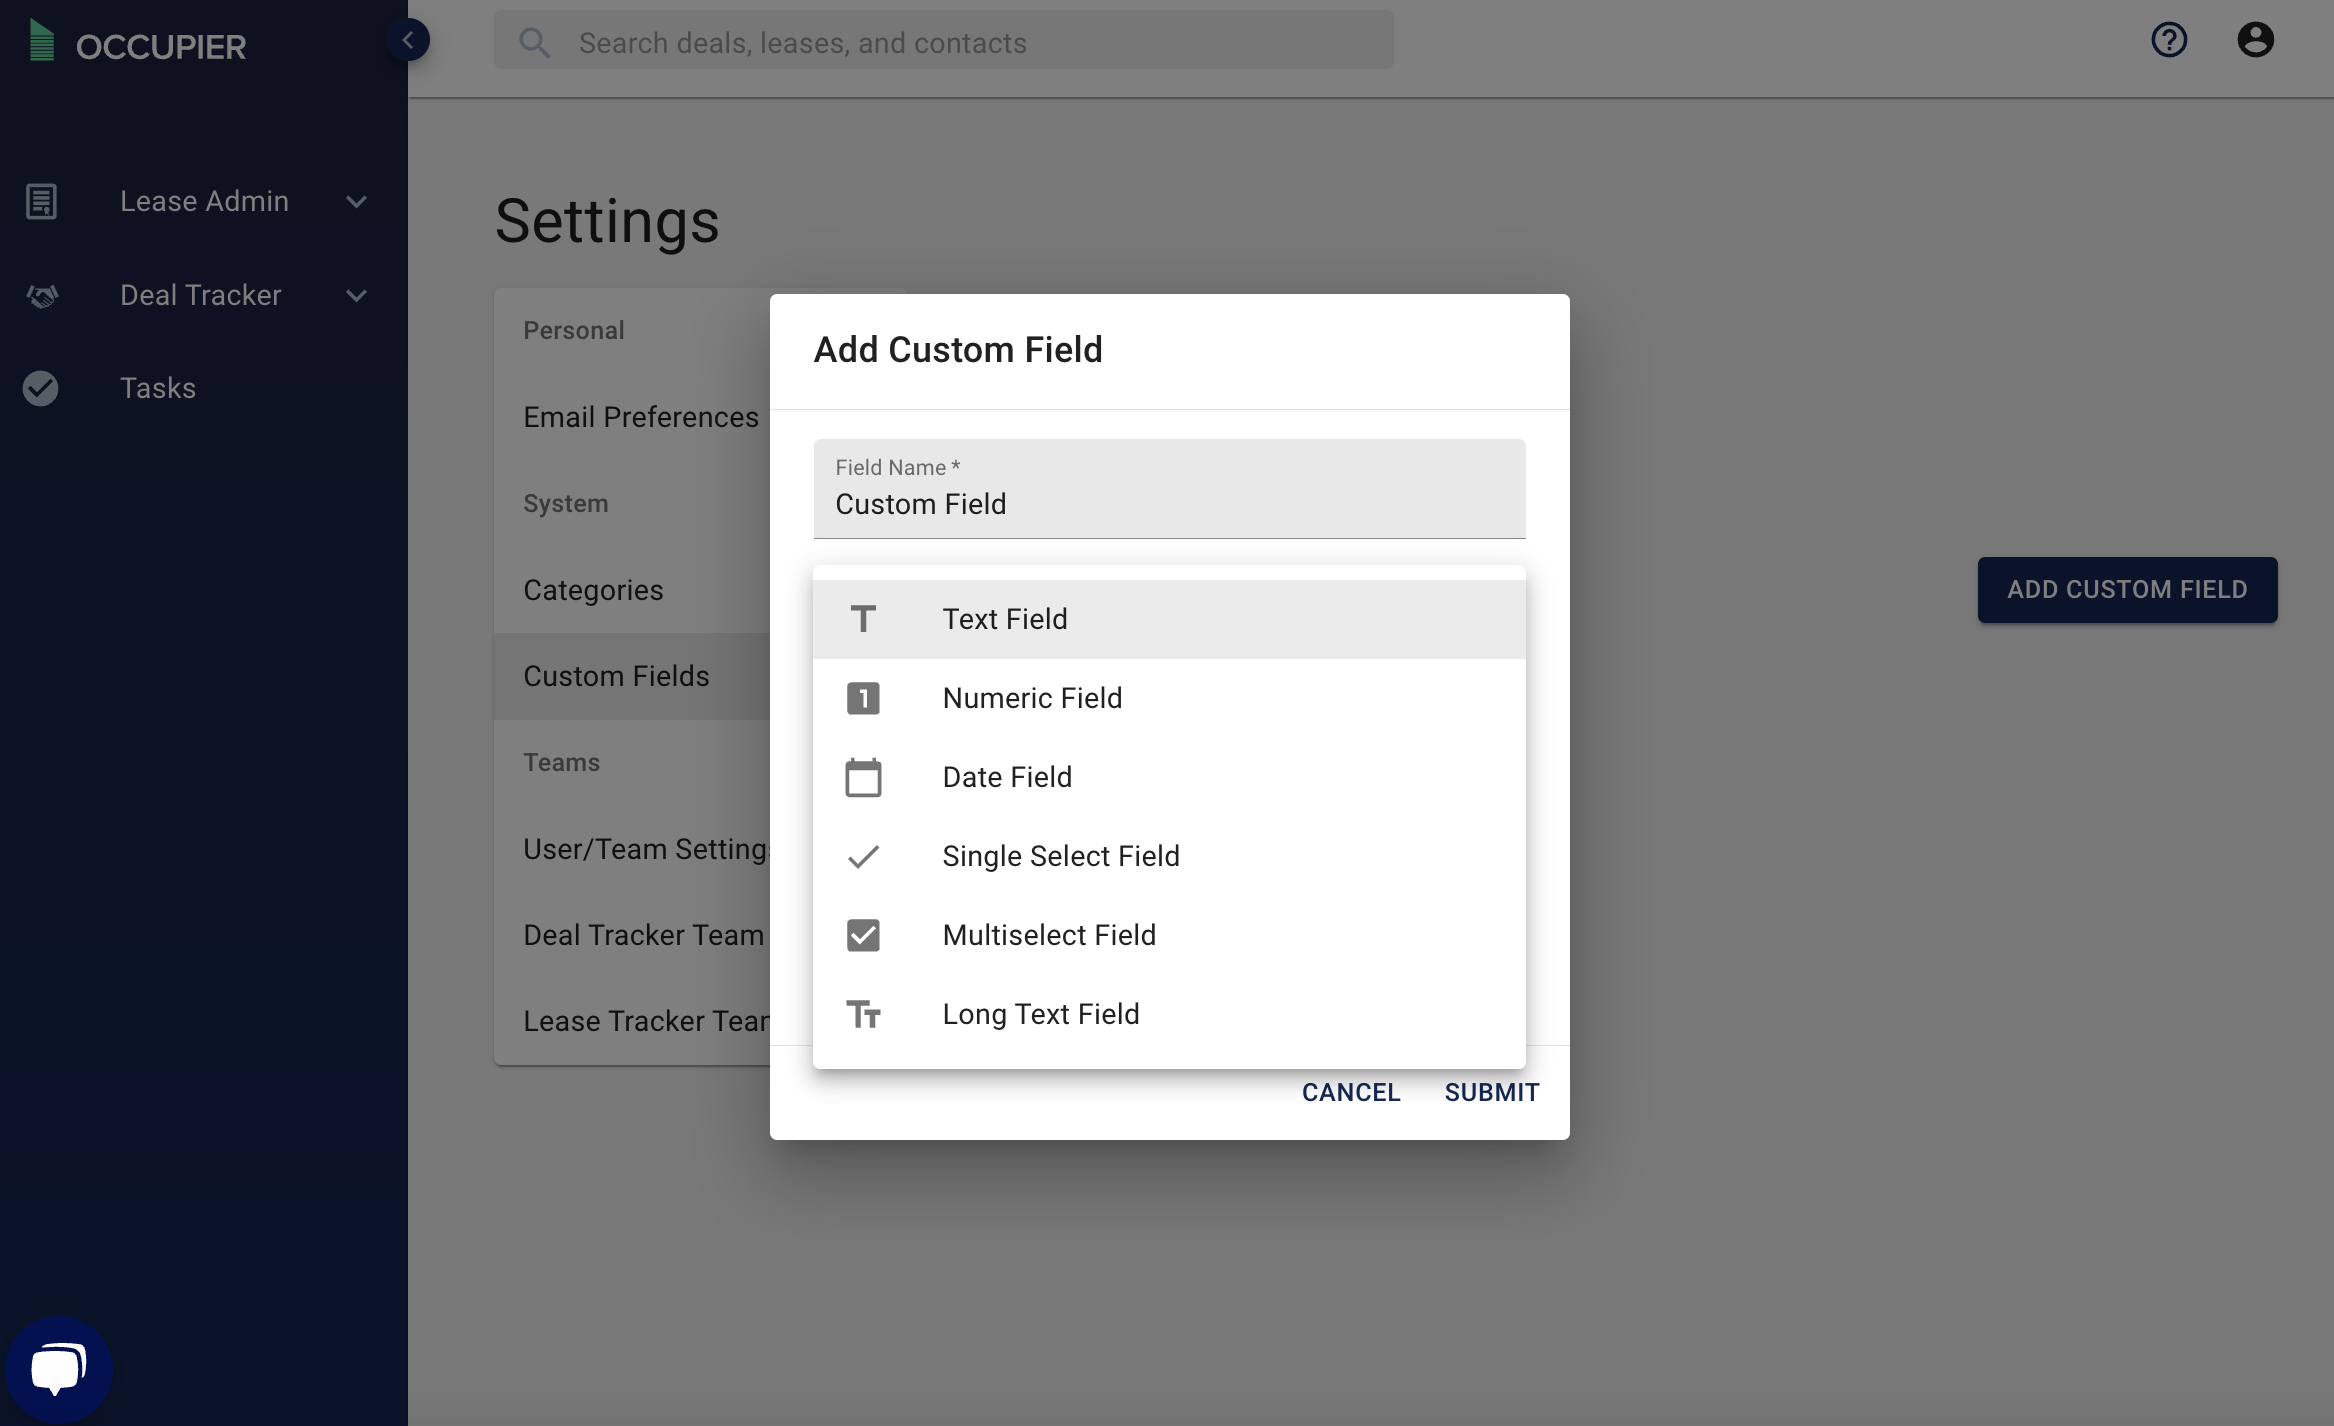
Step 5: Name your Custom Field under “Field Name”

Step 6: Select the type of Custom Field you would like to create under “Field Type” (please note that text fields are not filterable, so if you would like to filter based on this custom field, it is suggested you use numeric, date, single select or multiselect)
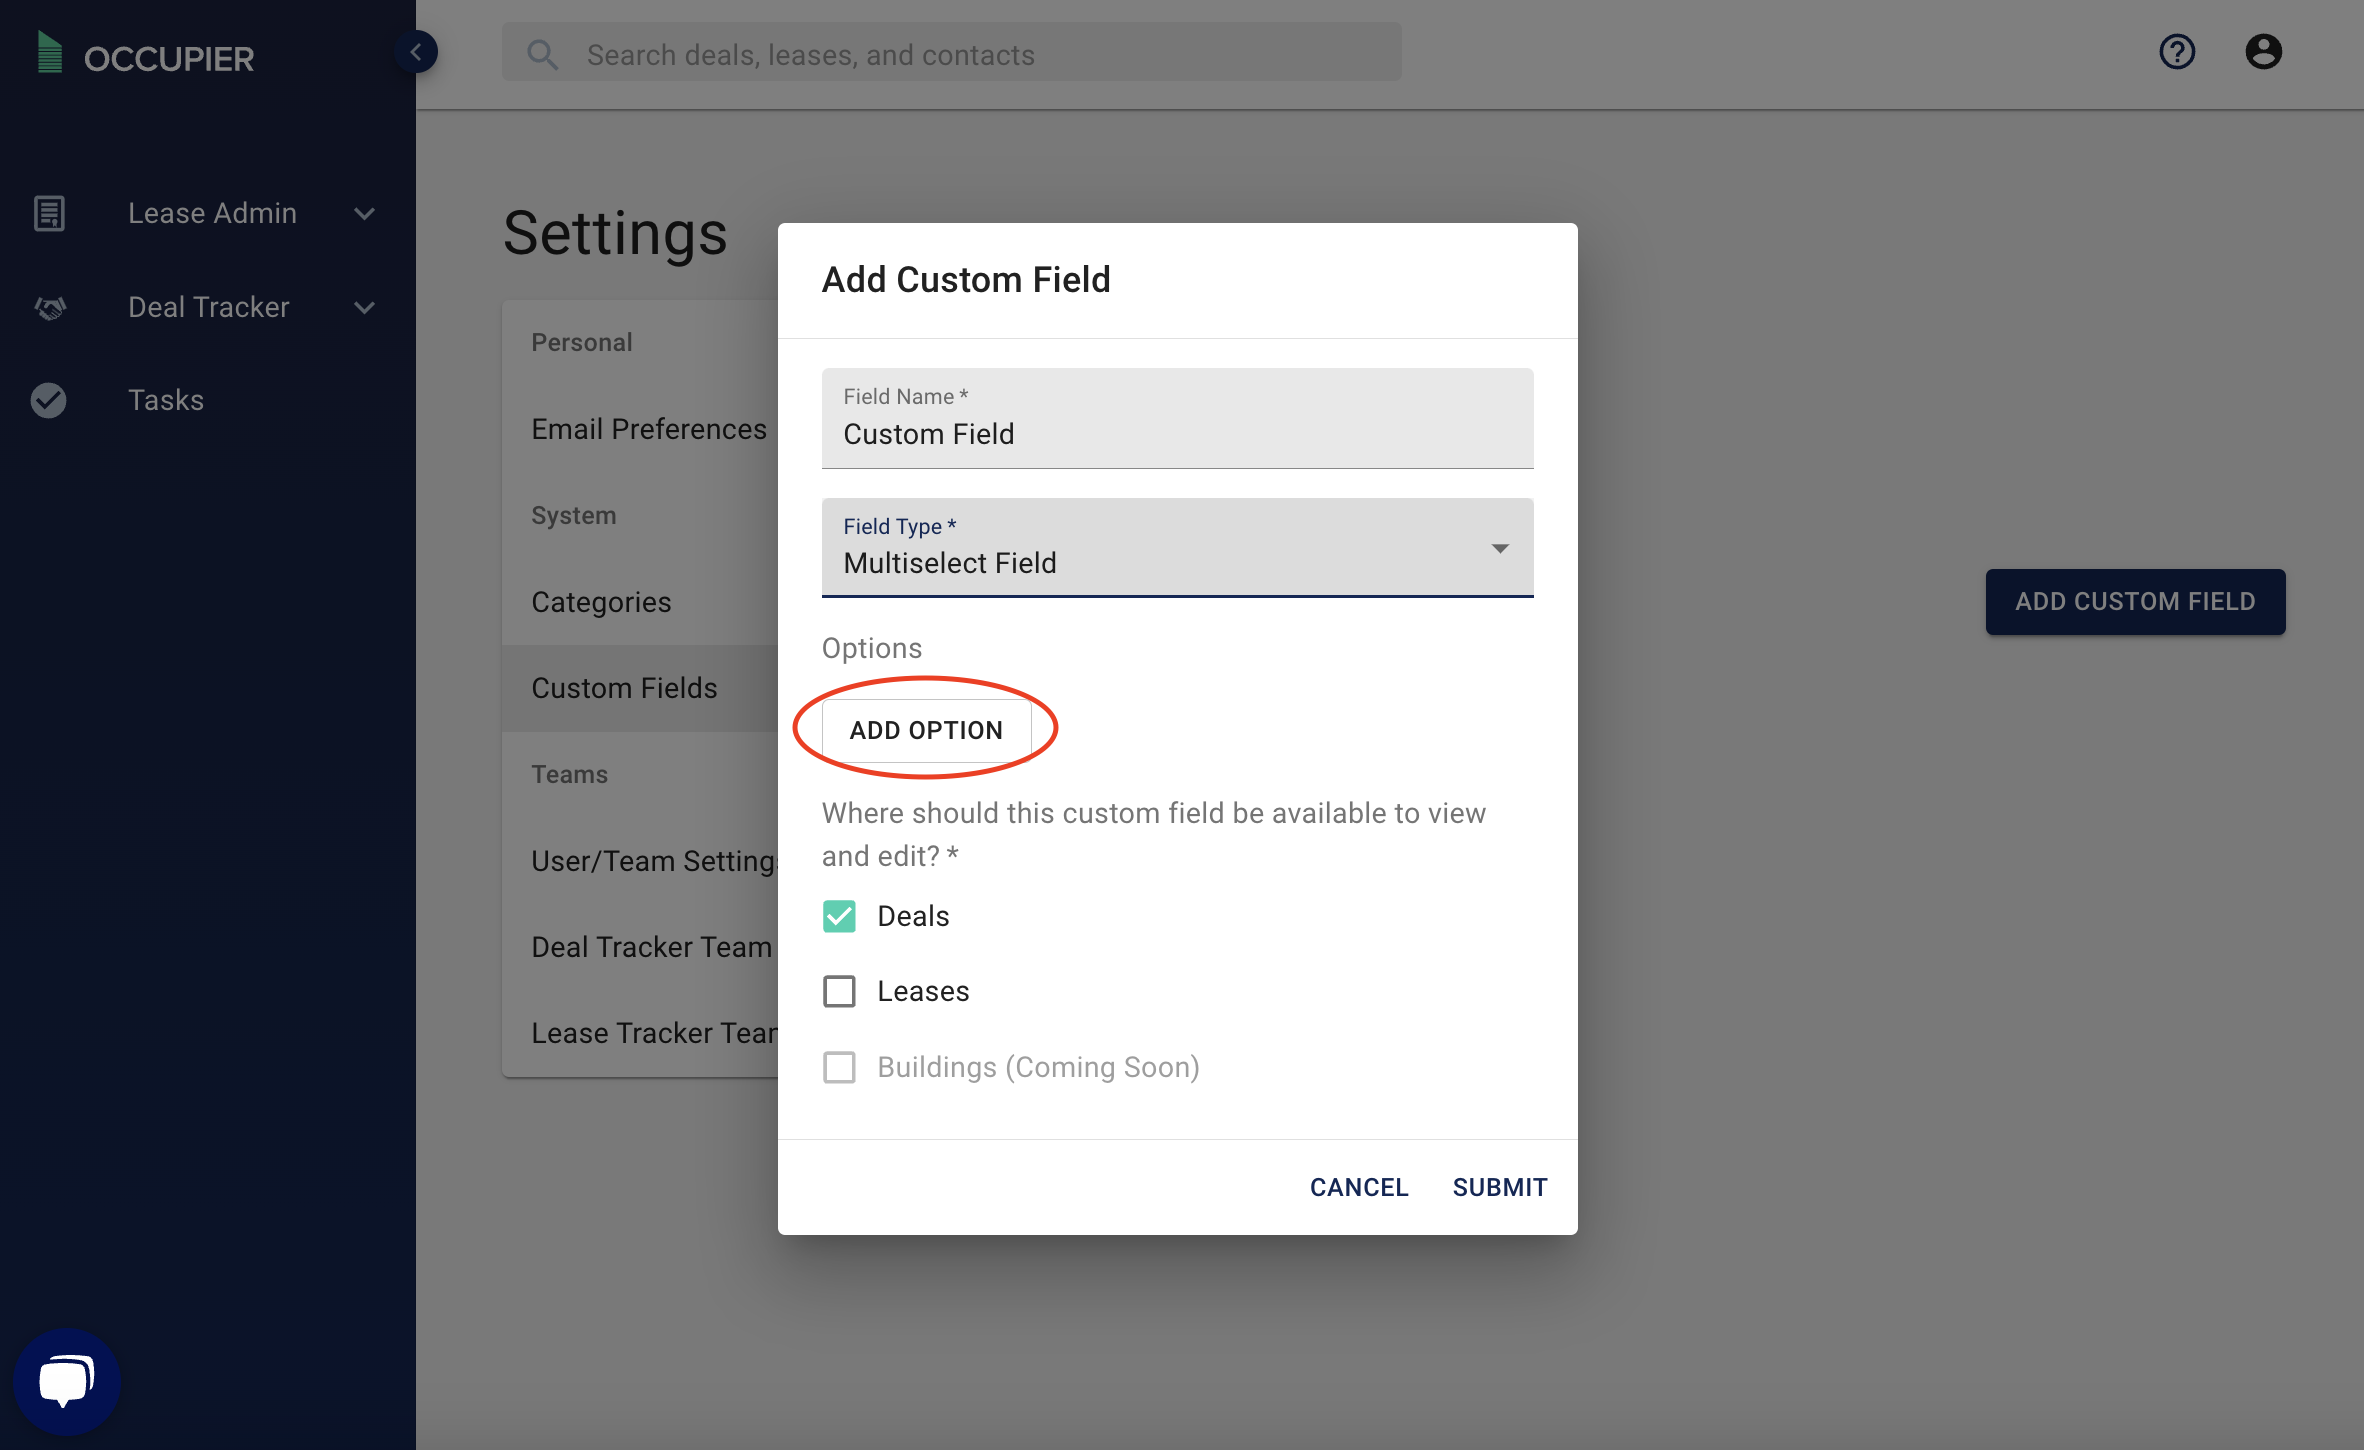
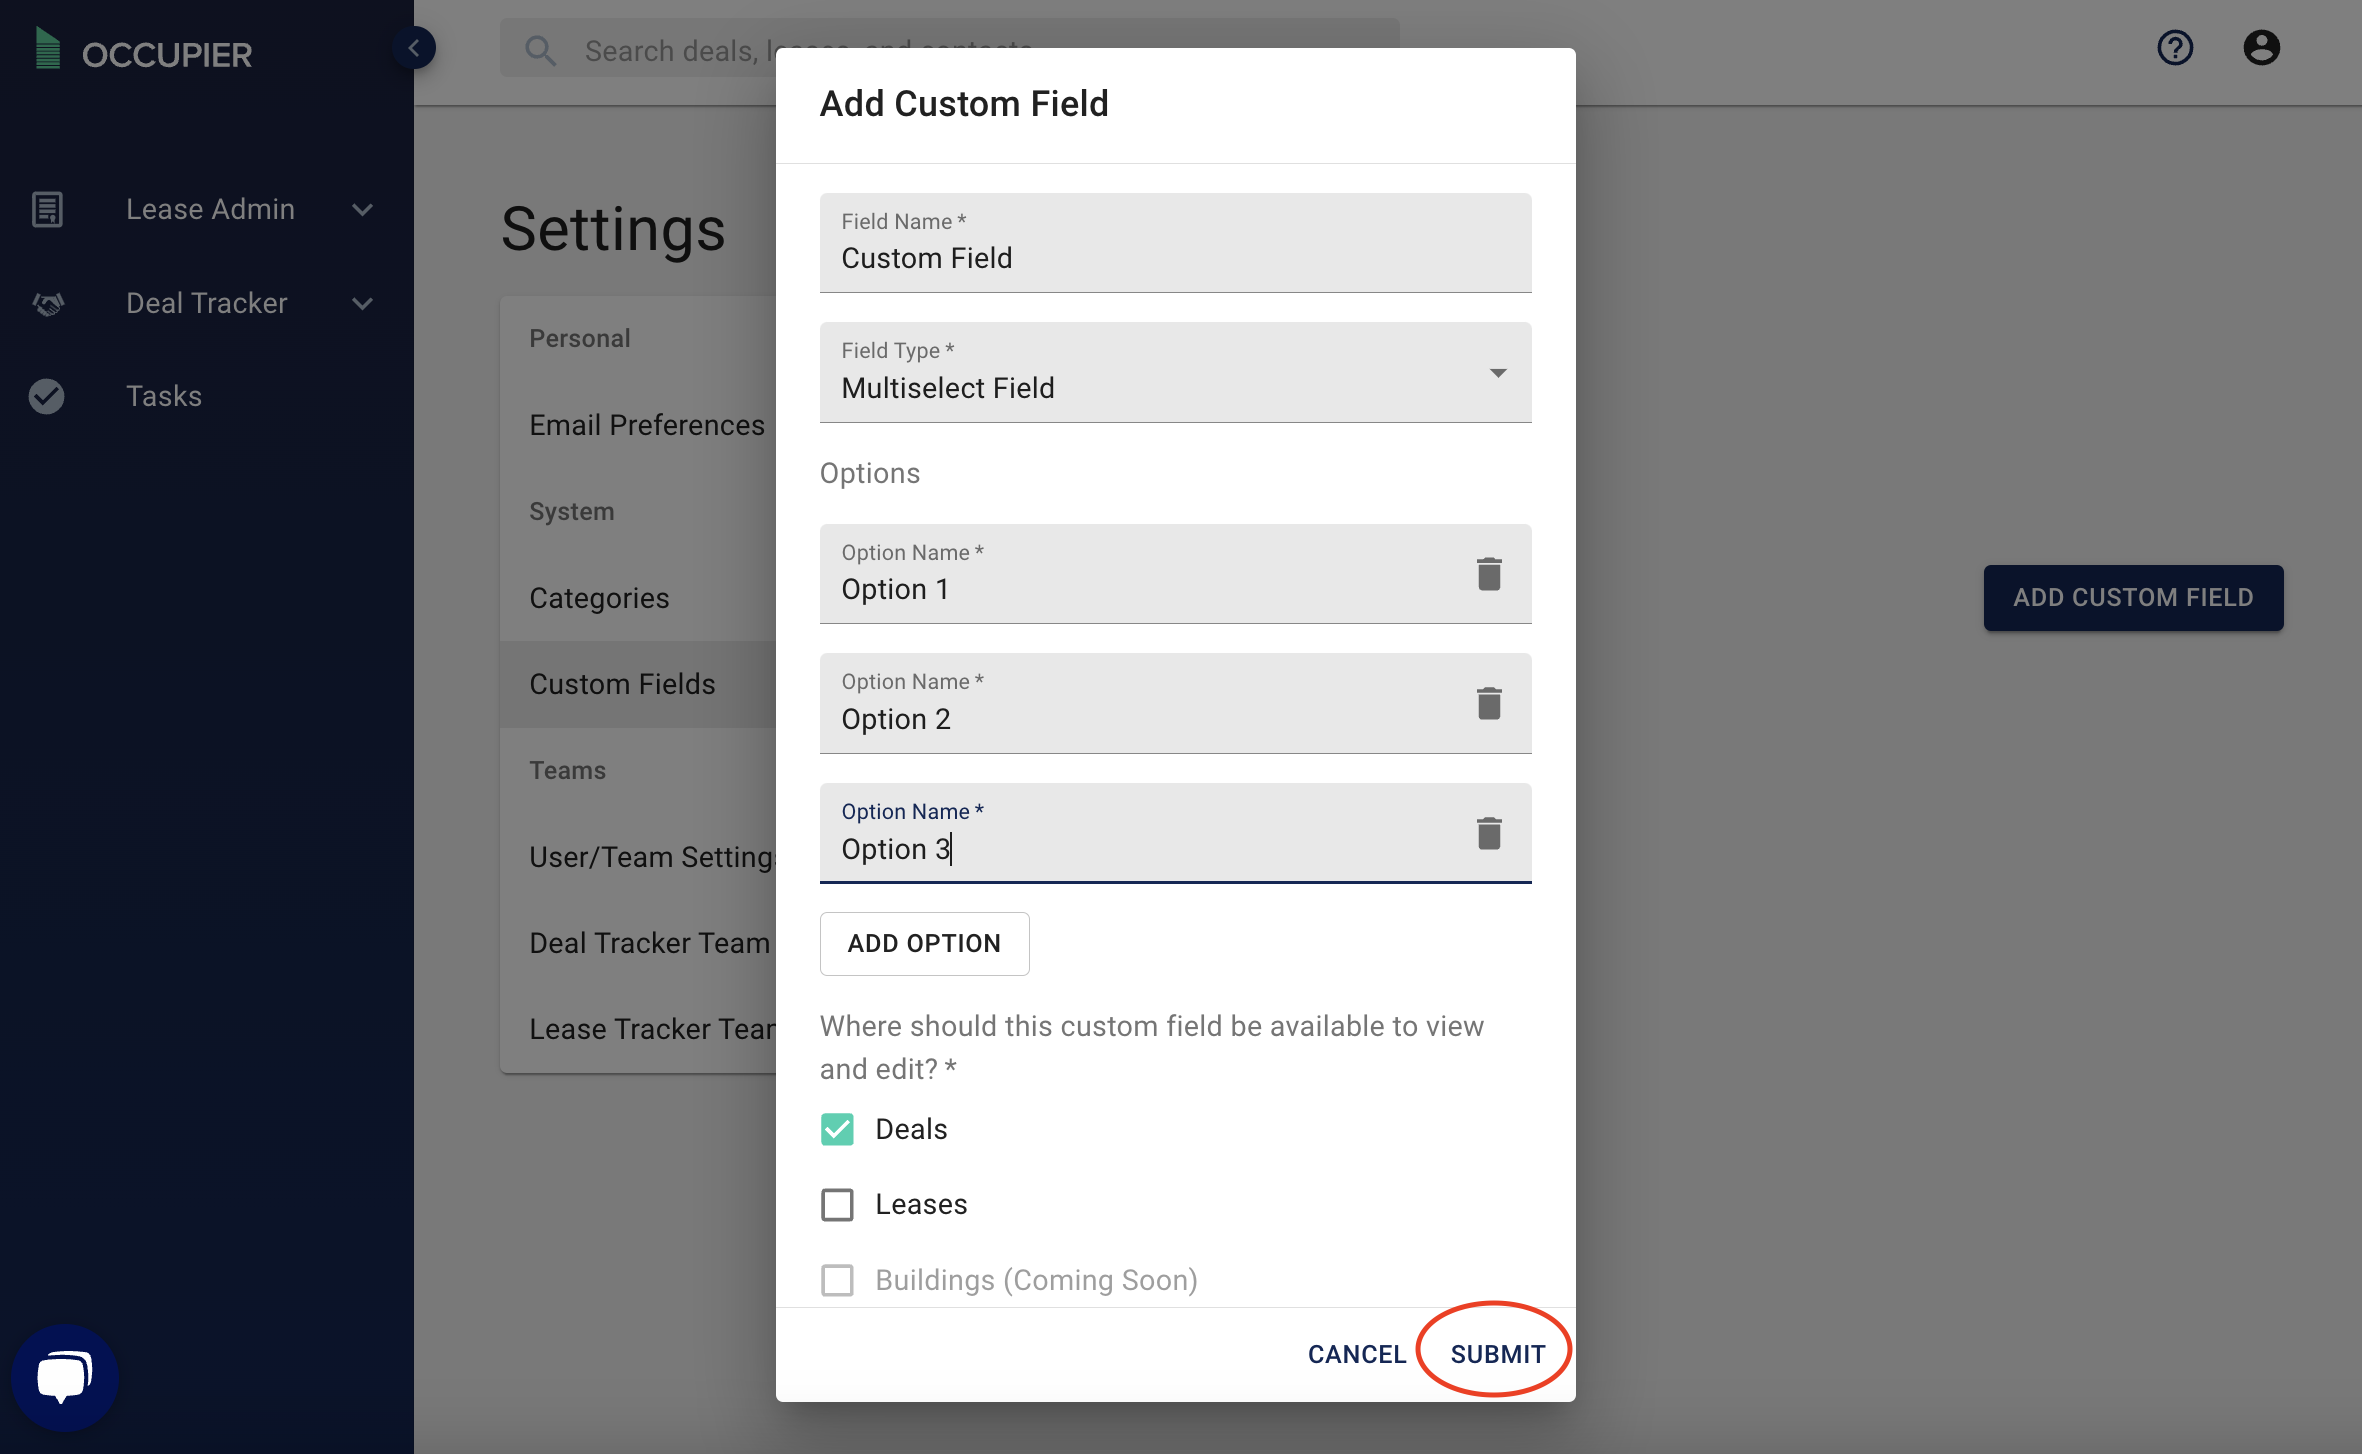
Step 7 (if necessary): If this is a “Single Select” or “Multiselect” field, add and name the options to be selected to populate this Custom Field.
Step 8: Click “Submit”
To add Categories…
Step 1: Navigate to “Settings” under the icon of a person in the top right corner

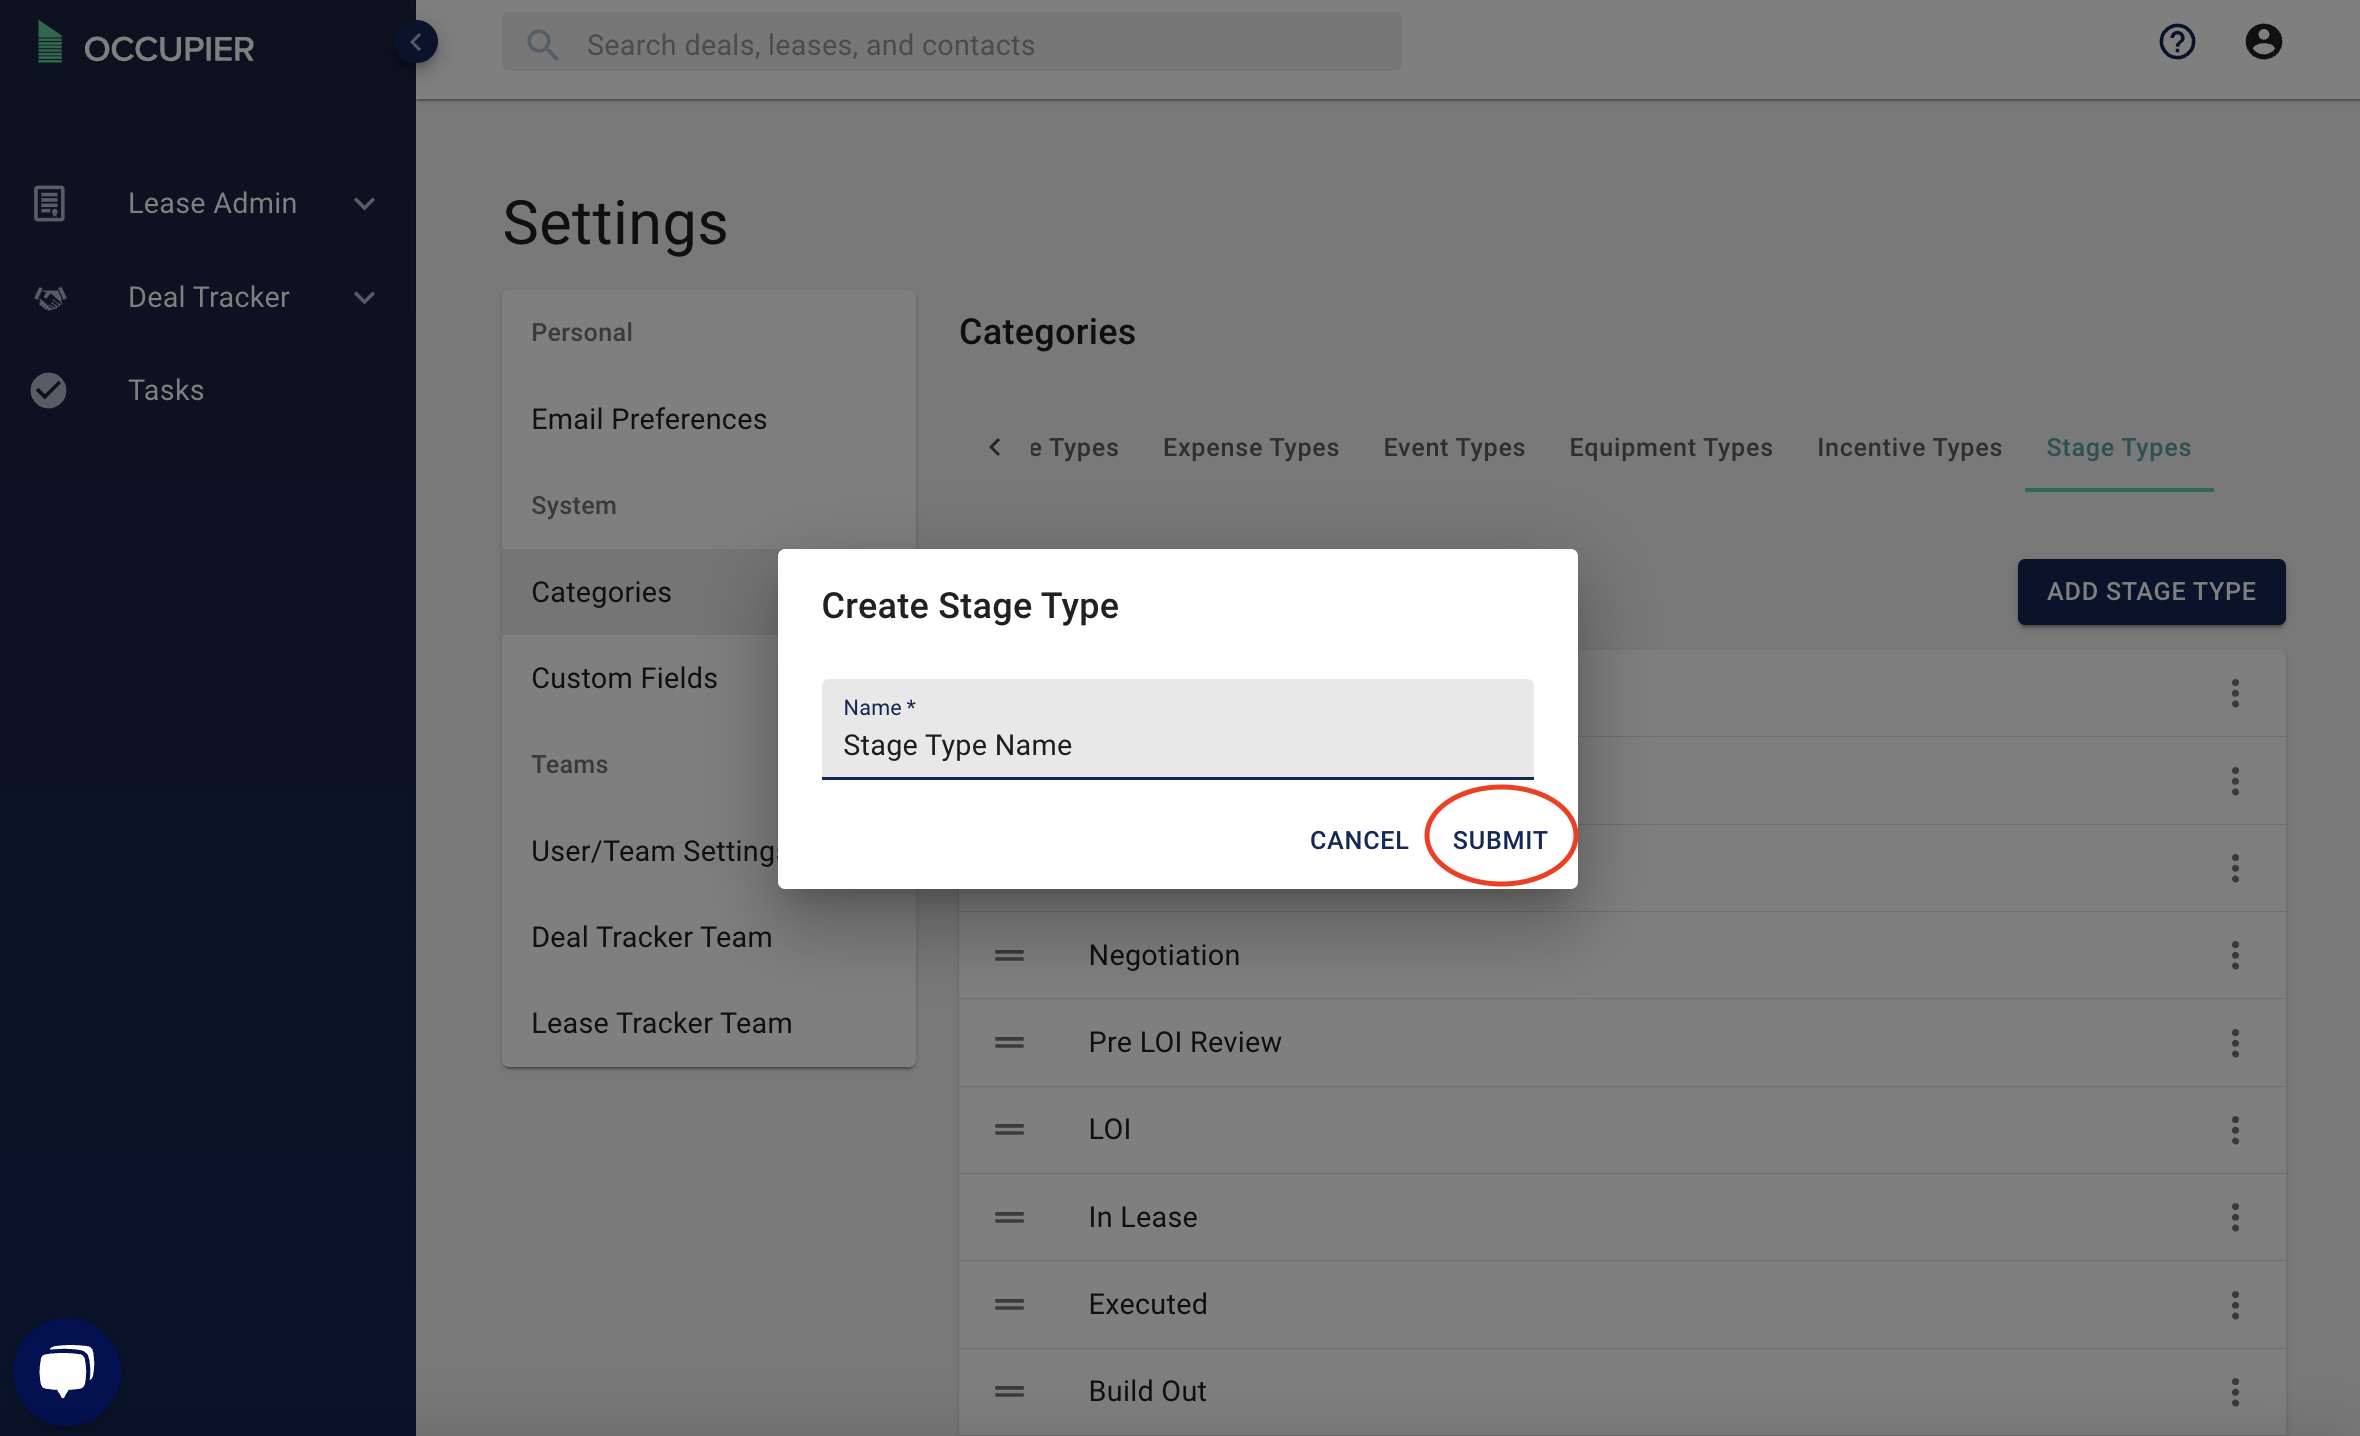
Step 2: Select “Categories”
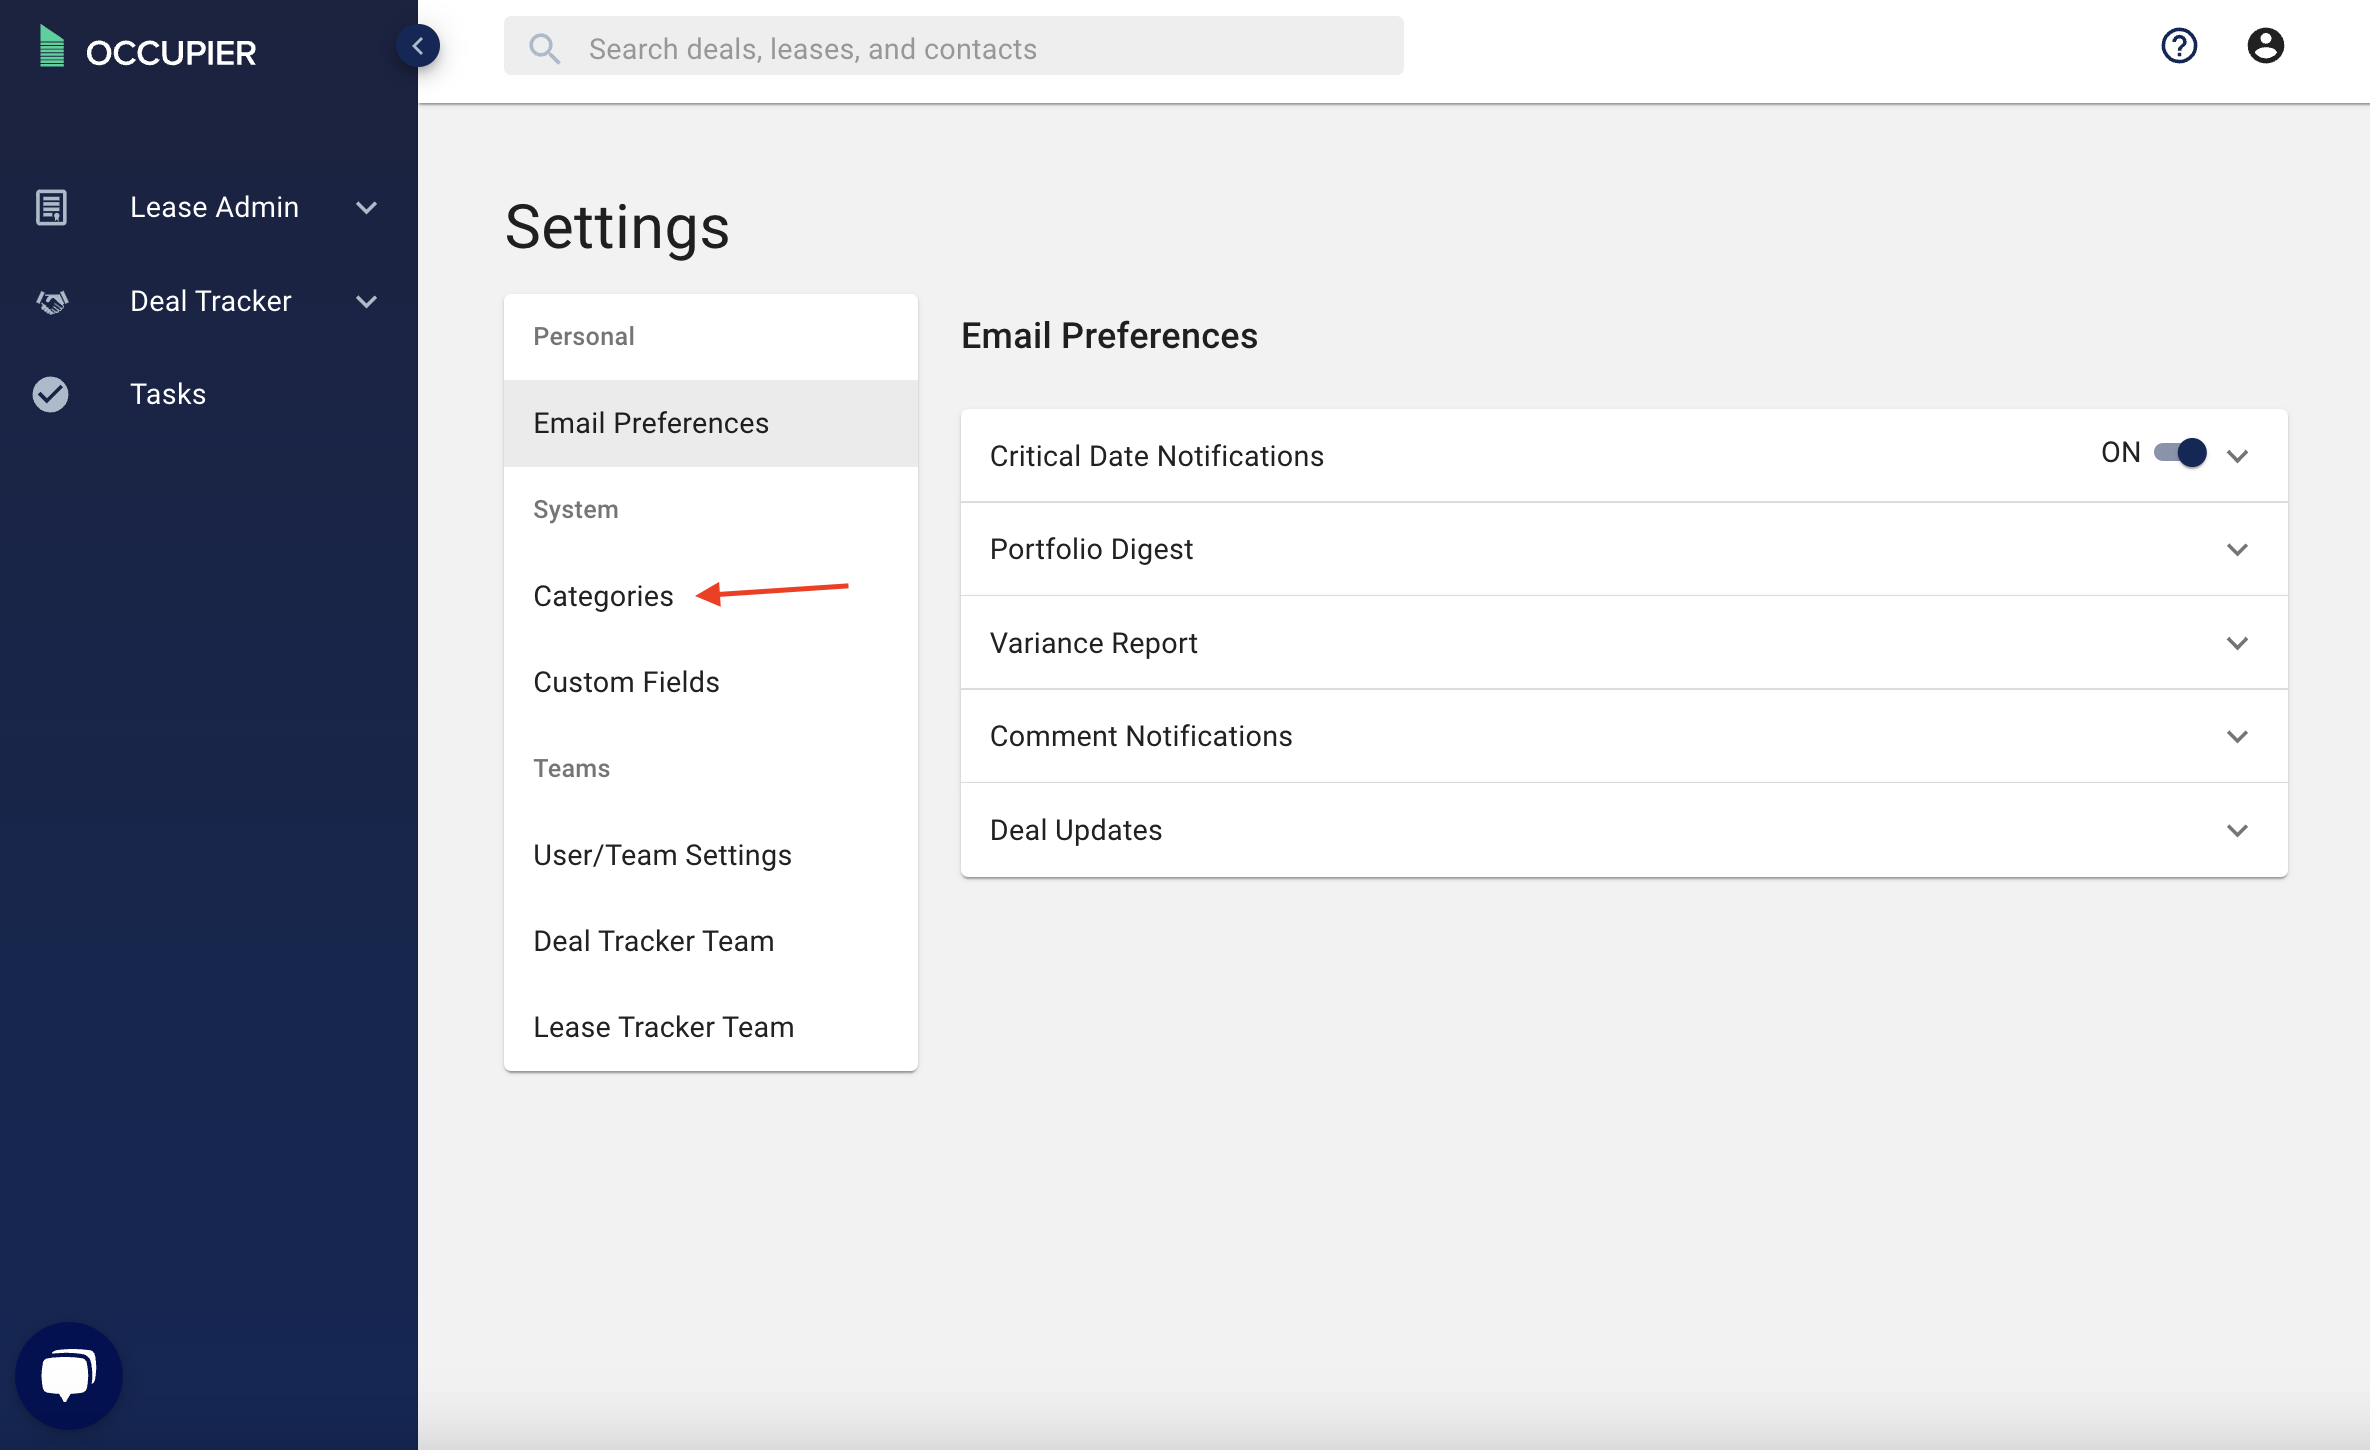
Step 3: Select the category type you’d like to edit (Space Type, Clause Type, Stage Type, etc.)
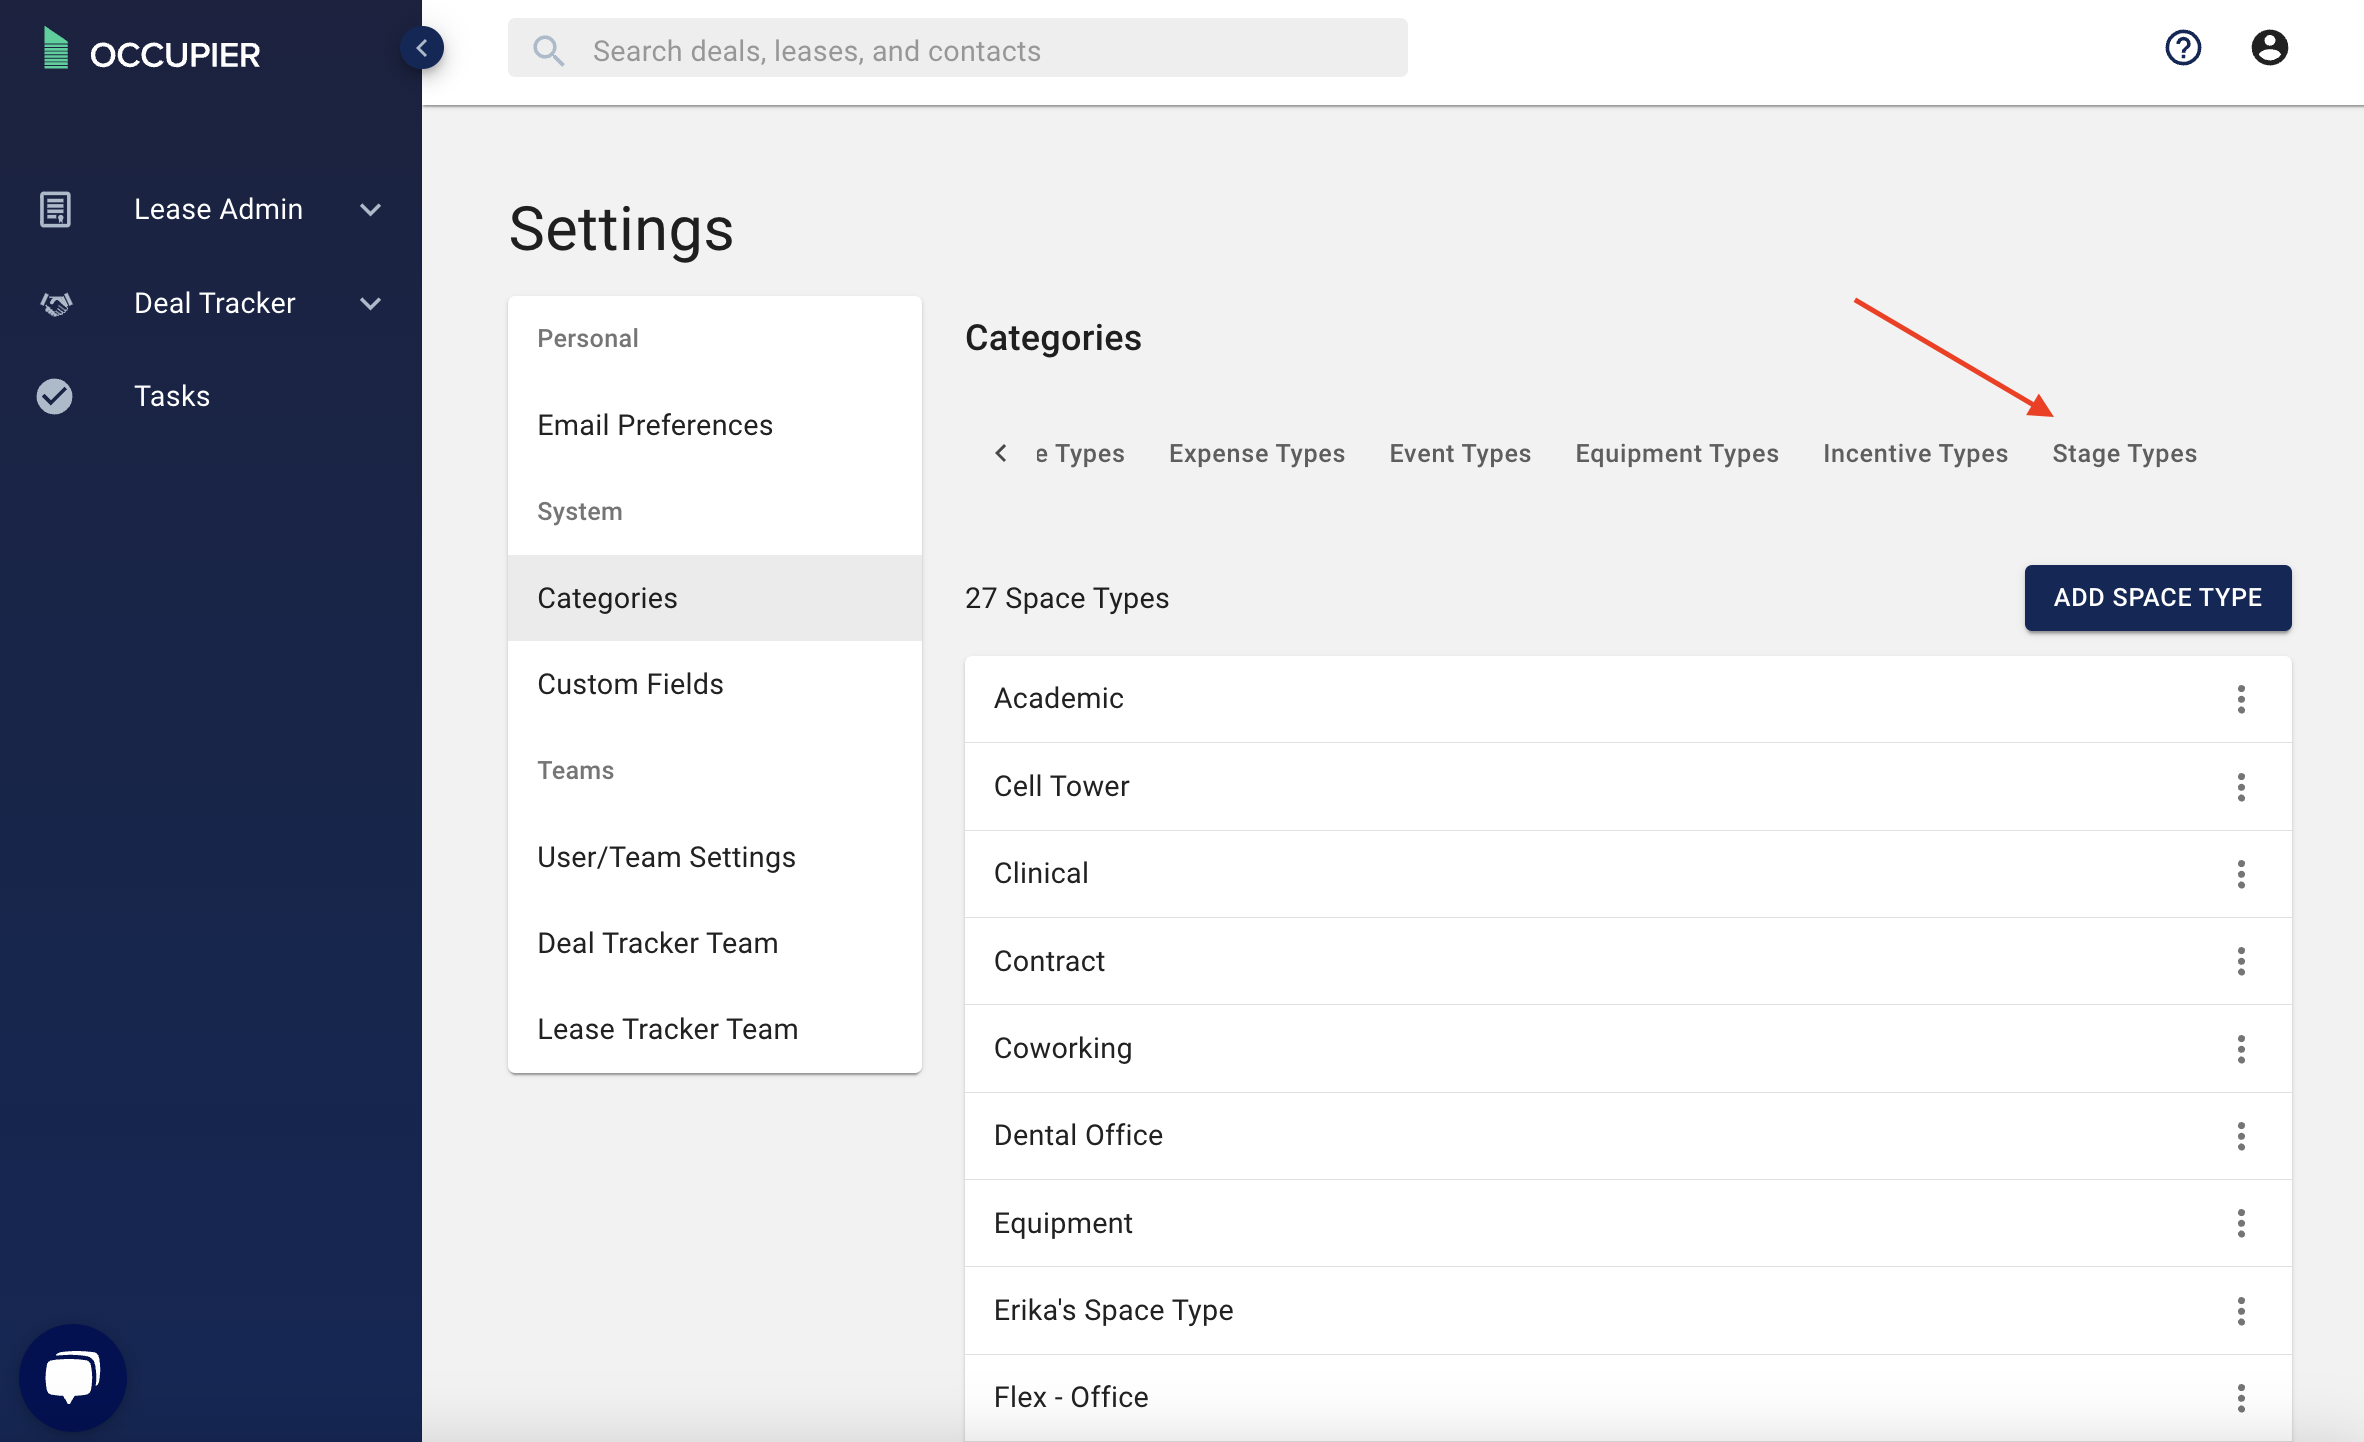
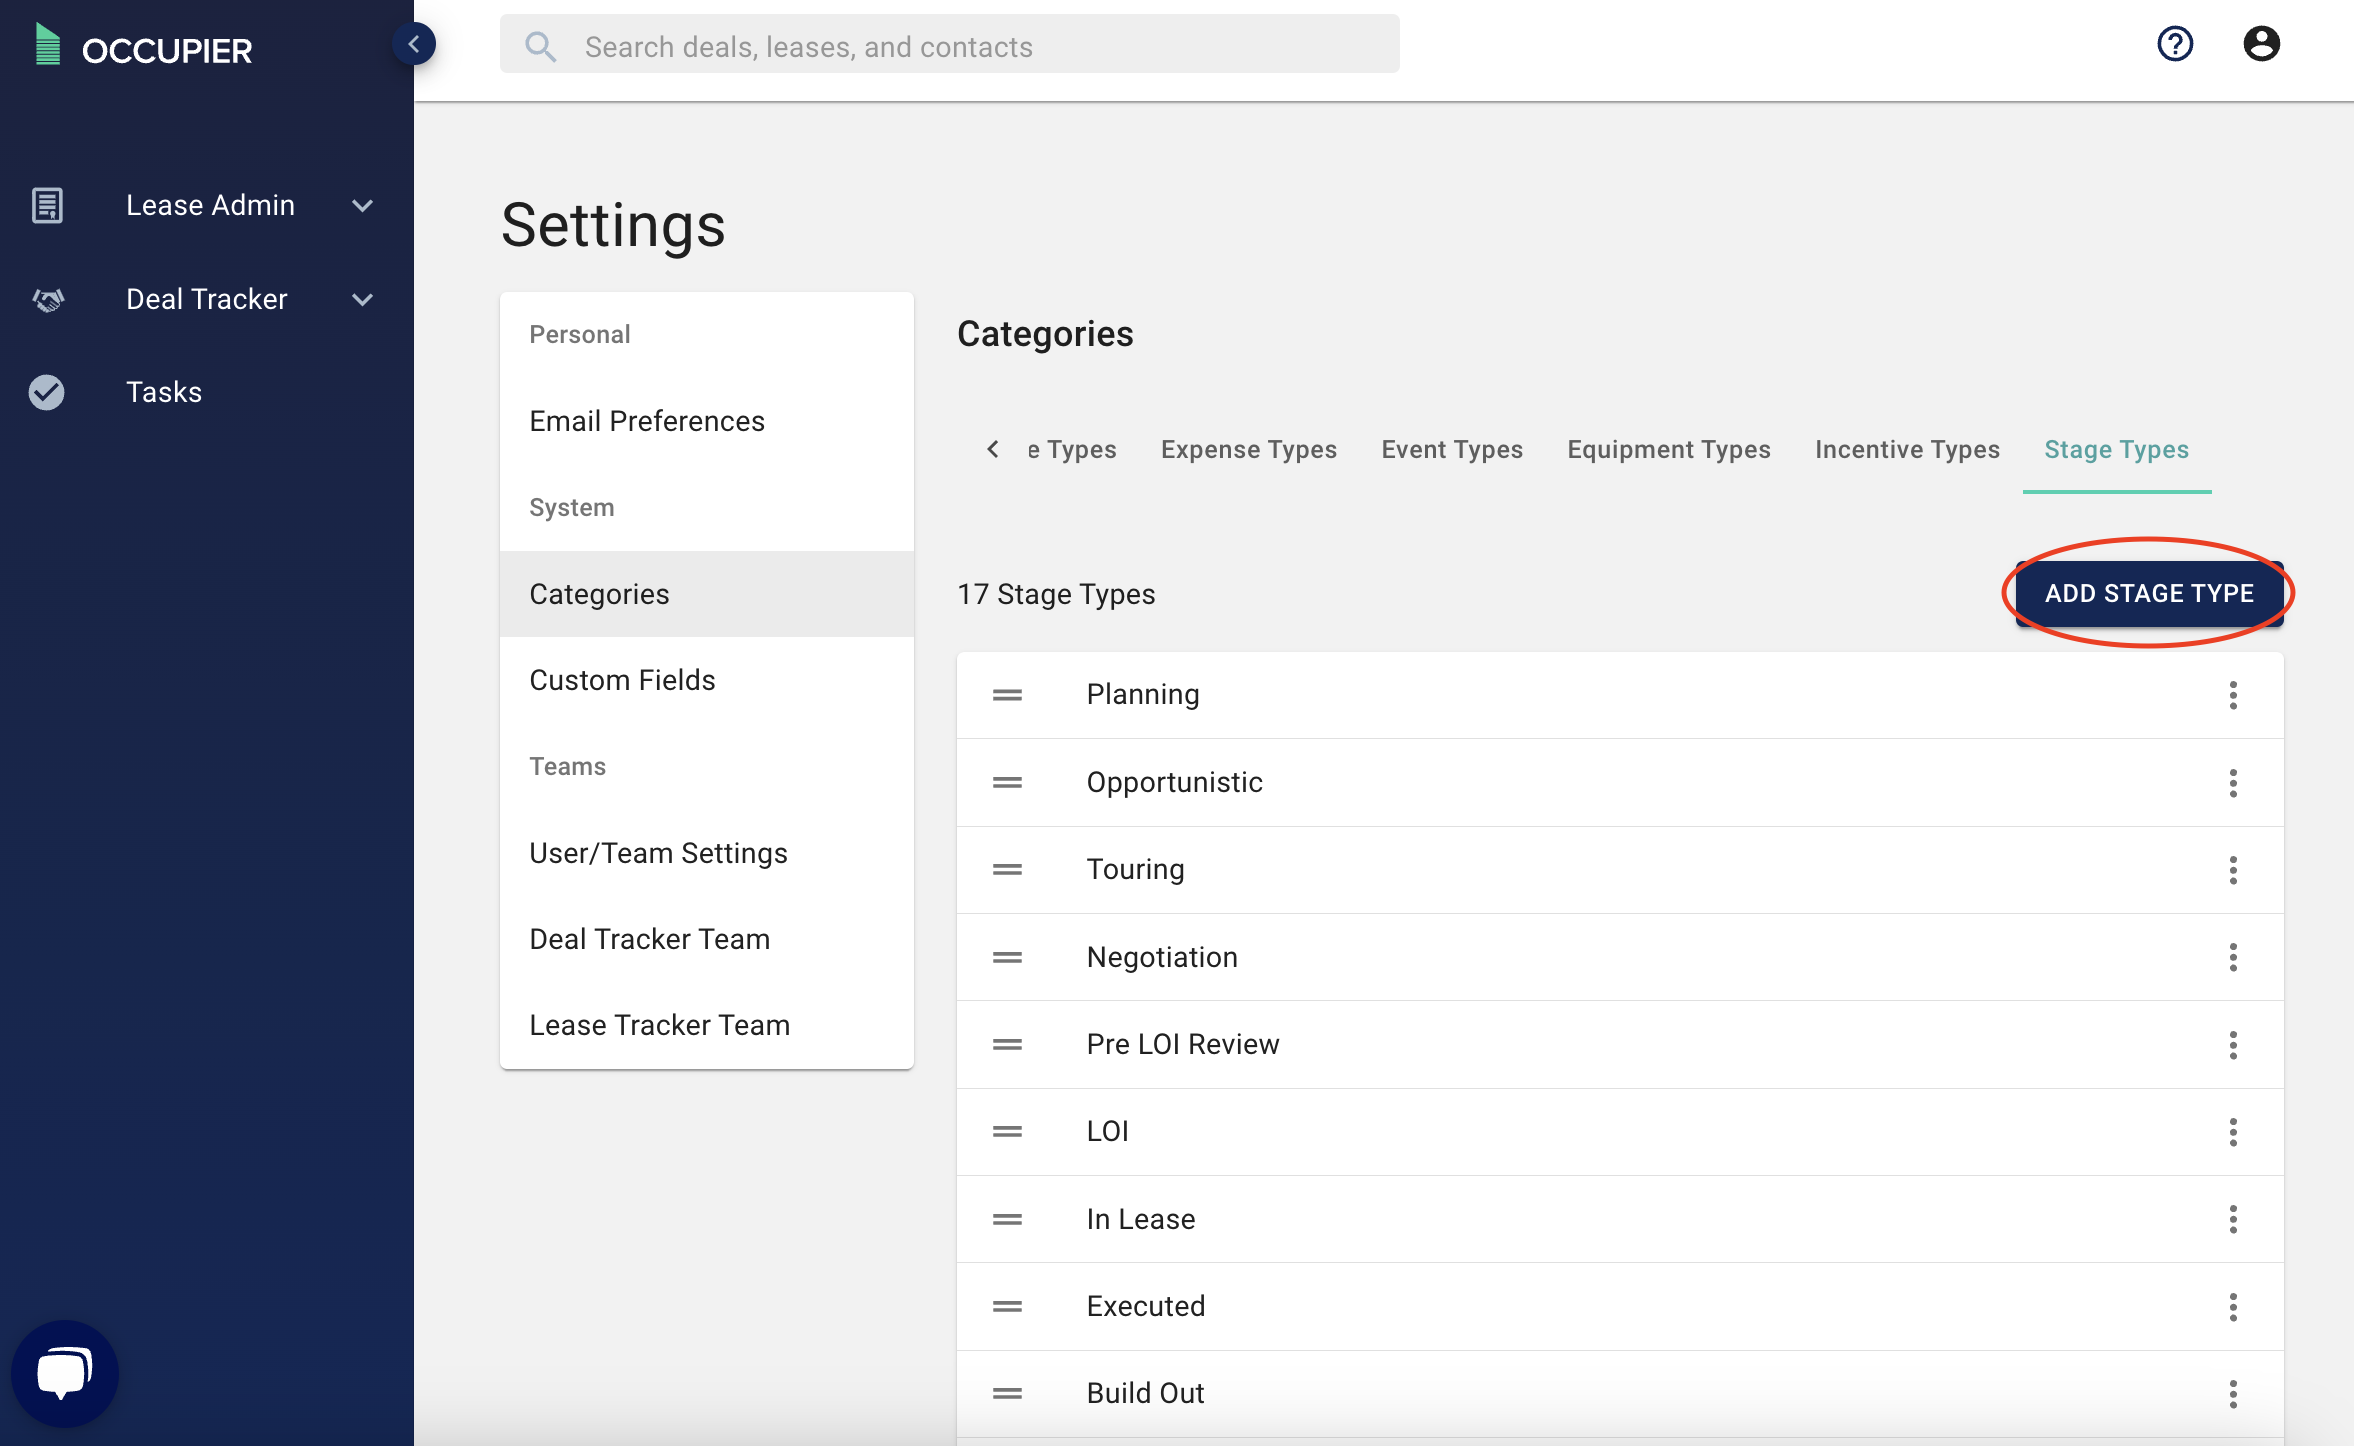
Step 4: Click “Add [Category Type] Type” (ex. Add Stage Type).
Step 5: Name your Category
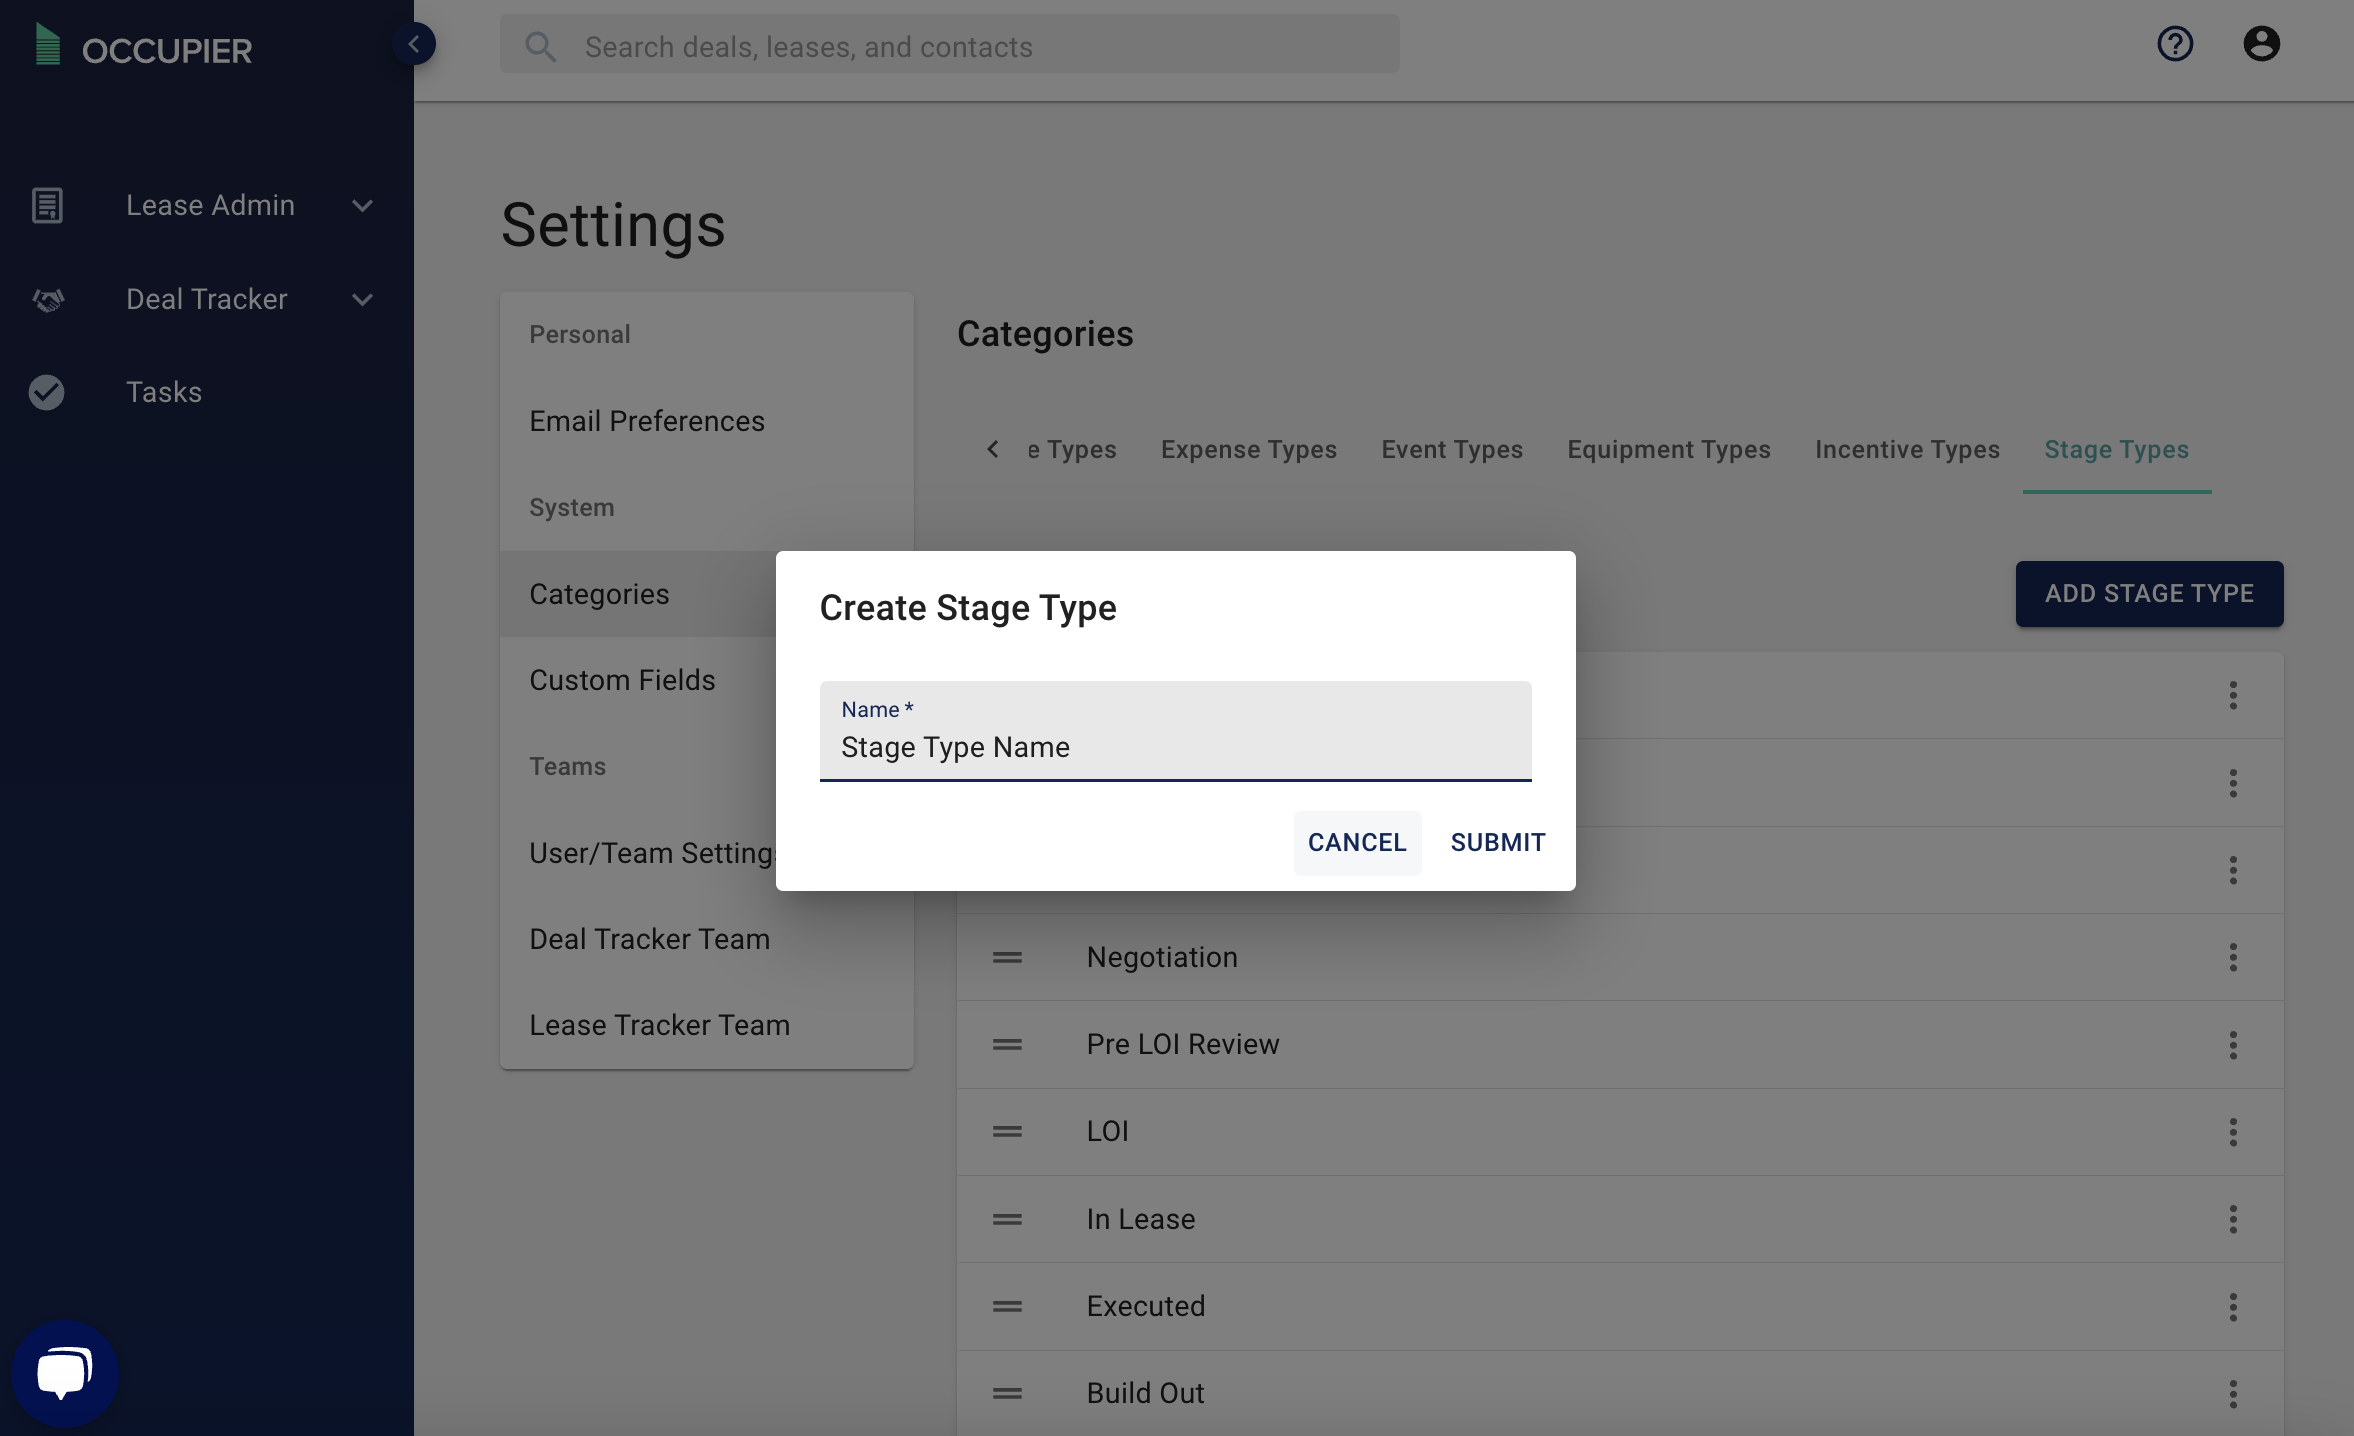
Step 6: Click “Submit”
